Do you love discussing food, nutrition, and healthy eating habits?
Are you interested in starting your own blog to share your thoughts, recipes, and ideas with the world?
If yes, then creating a successful nutrition blog is easier than you might think – and there are plenty of ways to make money from it too.
In this guide, we’ll teach you how to start a nutrition blog & make money online.
So whether you’re looking to become a full-time nutrition blogger or just want to share your knowledge with the world, read on, and let’s make it happen!
How to Start a Nutrition Blog in 7 Steps
- Define Your Nutrition Blogging Goals
- Choose a Nutrition Niche
- Pick & Register a Blog Domain Name
- Setup WordPress
- Write & Publish Blog Posts
- Promote Your Nutrition Blog
- Monetize & Make Money
1. Define Your Nutrition Blogging Goals
Before you start your nutrition blog, it’s important to take some time to define your goals.
Are you looking to become a full-time nutrition blogger?
Do you want to make money by sharing recipes and healthy eating tips on your blog?
Or perhaps you just want to gain exposure for yourself or your business?
Whatever your goals may be, they must be clearly defined before you get started.
What is a Nutrition Blog?
A nutrition blog is a blog that shares information about food, nutrition, and healthy eating habits. The blog educates others about the importance of good nutrition, shares recipes and tips for eating healthy, or simply documents the blogger’s journey to better health.
Why Start a Nutrition Blog?
There are many reasons why someone might want to start a blog.
For some, it’s a way to share their knowledge and passion for healthy eating with the world.
You might be a nutrition professional like a registered dietitian.
For others, it’s an opportunity to build an online business around something they love.
And for some people, it’s simply a way to document their journey to better health.
No matter what your reasons for starting a nutrition blog may be, there are plenty of benefits that come with it.
Some of the most popular benefits include:
- Share your knowledge of nutrition.
- Help others become more healthy.
- Become a health and nutrition influencer.
- Build a community around healthy eating.
- Network with other influencers.
- Get clients and leads if you are a nutritionist.
- Attract customers for your supplements ecommerce store.
- Make money building an online business around nutrition.
How much money can you make from nutrition blogging?
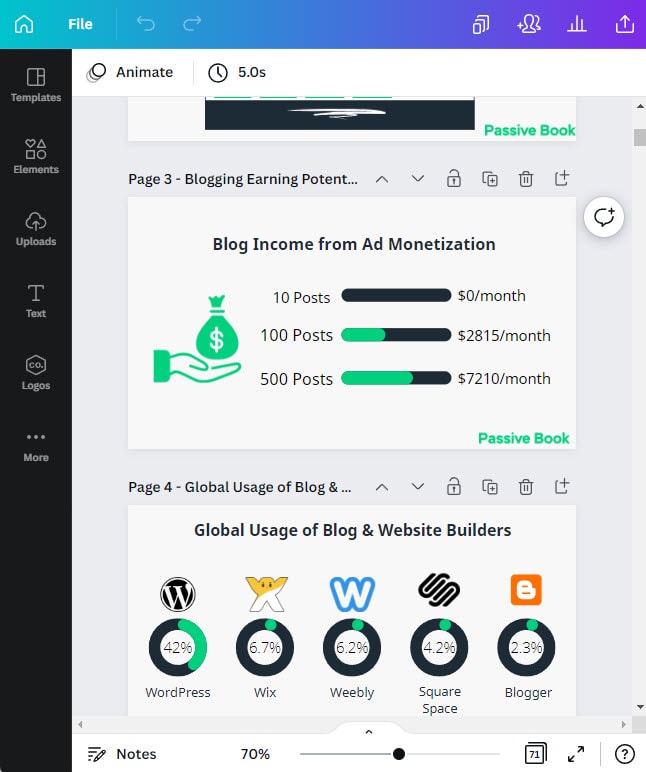
You can make $15-$25 for every 1000 ad views on your nutrition blog. An SEO optimized blog post can get anywhere between 300 to 1000 visits per month. So, a nutrition blog with 100 blog posts can make as high as $2500 every month. You can make even more money if you monetize with affiliate marketing and digital products.
2. Choose a Nutrition Niche
When it comes to starting a successful nutrition blog, choosing the right niche is key. A niche is a specific topic or area of interest that you want to focus your nutrition blog on.
Why choose a niche?
Choosing a niche for your nutrition blog can help you to stand out from the crowd, gain credibility and attract an audience that’s interested in what you’re writing about.
If you write about everything, you’ll be trying to attract readers with interests that are all over the map. For example, a nutrition blog targeting sports athletes can be designed extremely differently from a nutrition blog targeting pregnant mothers.
By trying to appeal to everyone, you will end up appealing to nobody. You will also struggle to be seen as an authority by both search engines and your visitors alike.
Finding Your Ideal Niche
When choosing a niche for your nutrition blog, it’s important to think about a few things:
- What are you interested in?
- What do you have knowledge about?
- Which target group are you interested in serving?
- What can you offer that’s unique?
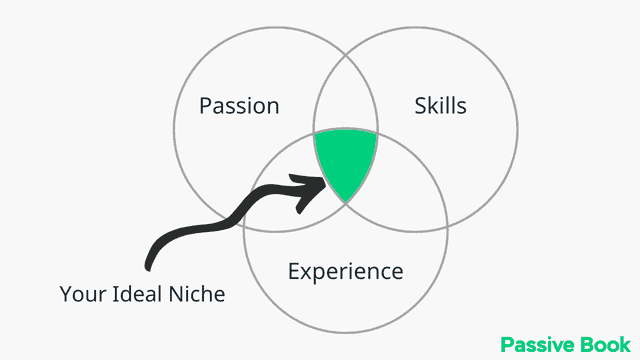
Consider your interests and expertise when choosing a niche for your blog. You must choose a topic that you’re passionate about, as this will make writing content much easier – and more enjoyable!
It’s also important to think about the target group you want to serve with your blog. Who do you want to reach with your content?
- Are you looking to share healthy recipes with busy moms?
- Do you want to help people transition to a plant-based diet?
- Or are you looking to share your own journey with weight loss?
By identifying your target group, you can create content that’s tailored to their specific needs and interests.
It’s also important to consider what unique perspective or expertise you can offer on the topic of nutrition. What do you have to offer that nobody else does?
This can be your own personal story, or a specific skill set you possess – such as cooking skills, experience working with clients, or knowledge of how to optimize diets for athletes.
Some popular nutrition niches include:
- Healthy eating
- Veganism/vegetarianism
- Pregnancy nutrition
- Sports nutrition
- Nutrition for specific health conditions, such as diabetes or high blood pressure
- Different types of diets (Paleo, Keto)
- Smoothies
Come up with a few niche ideas.
Examples of Nutrition Blog
Sometimes looking at other nutrition blogs will help inspire ideas of your own. Here are some of the more popular examples of nutrition blogs:
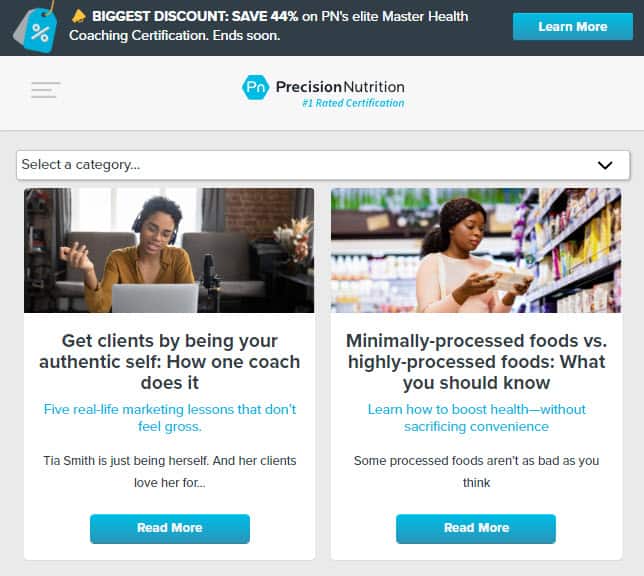
[auto-list-number] Precision Nutrition
This blog not only gives nutrition tips for individuals but also caters to nutritionists, coaches, and fitness professionals providing them with training to find and manage their relationships with clients. They have monetized their website by offering certifications, selling software, and offering personal coaching.
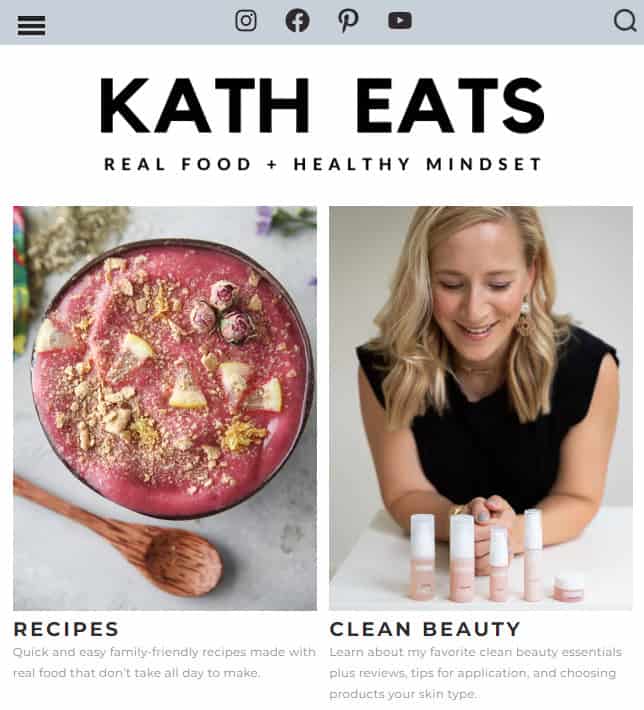
[auto-list-number] Kath Eats
Kath provides relatable content as she talks about how she maintains a healthy lifestyle as a busy working mom. She also provides detailed recipes, guides, and product recommendations to her readers. Kath has monetized her blog through advertisements, selling e-books, and offering personal coaching services.
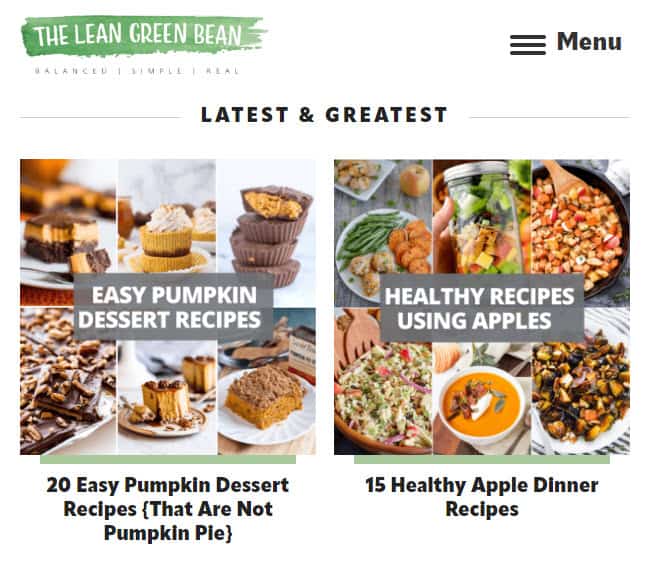
[auto-list-number] The Lean Green Bean
Lindsay is a registered dietician who created her blog as a way to document her personal journey to health and wellness. She offers healthy recipes and exercise tips for her readers, as well as nutritional information about various dietary trends like veganism, vegetarianism, and gluten-free eating.
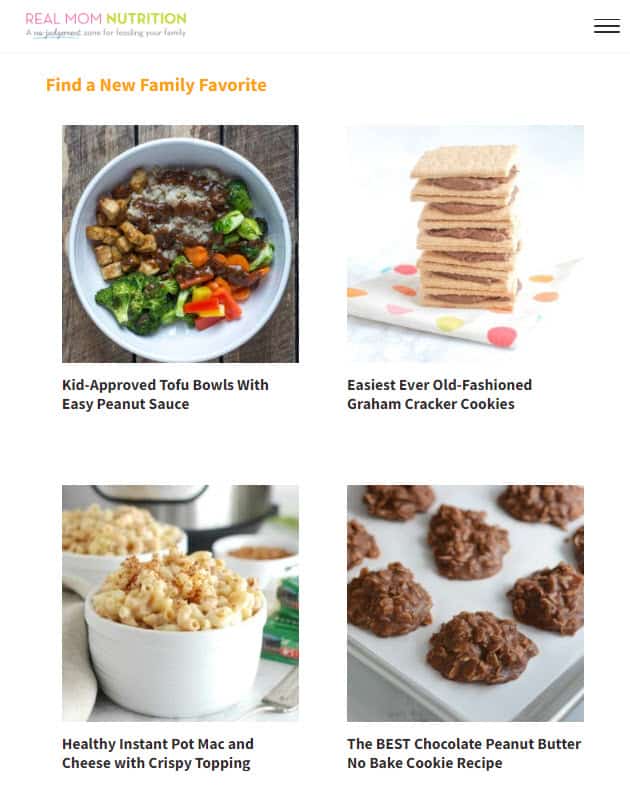
[auto-list-number] Real Mom Nutrition
This blog is run by Megan, a mother of three young children. She shares health and nutrition tips for busy moms, as well as product recommendations and recipes. Megan has monetized her blog through advertisements and affiliate marketing programs.
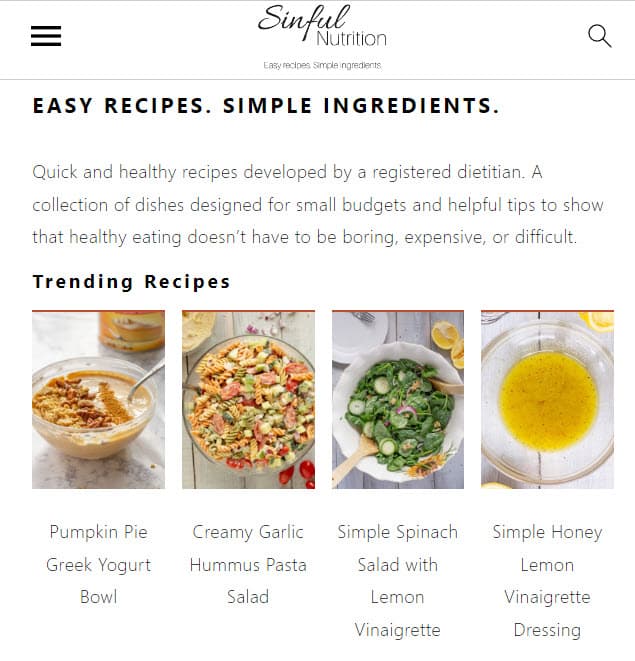
[auto-list-number] Sinful Nutrition
This blog is run by two registered dieticians, Ashley and Jessica. They offer healthy recipes for sweet treats and comfort foods, as well as general nutrition information and tips.
YMYL Niches
It’s also important to consider whether or not your content will fall into the “Your Money or Your Life” category. The YMYL label is given to niches that provide advice or information on topics that can affect a person’s health or finances.
Some of the most common YMYL niches for nutrition blogs include food allergies and intolerances, diabetes management, pregnancy health, etc.
Google has extremely stringent criteria to rank YMYL niches because providing the wrong information can cost a person their life. So they only rank websites where the author has the necessary credentials like a medical or dietician degree. The articles also need to be well-researched and referenced in scientific papers and journals.
You also need a wealth of content before you get any traffic to your blog and often your blog will have to be manually reviewed by a reviewer in Google before they let it rank.
One way to check if a particular topic is YMYL is to google the keyword and see what types of websites rank on top. If you see websites like Health Line, MayoClinic, or WebMD, then it is best if you avoid the topic because it will be almost impossible to compete.
Certain topics within a nutrition niche will be YMYL while other topics are non-YMYL. For example, if you provide medical or nutrition information related to pregnancy it can be YMYL but if you provide breakfast recipes for pregnant mothers it is considered to be non-YMYL.
You can still cover YMYL topics but ensure your article is well-referenced to different papers and scientific journals. Also, display your credentials and certification in your About page and author box.
You can still write and cover YMYL topics in your blog. But bear in mind that the traffic potential of these posts will be extremely low because of the stringent criteria.
3. Pick & Register a Blog Domain Name
Once you have chosen your niche, it is time to brainstorm a few names for your nutrition blog.
We recommend you keep your nutrition blog’s name to two words (Example: Precision Nutrition). One of the two words should be a keyword from your niche. The other word can be something that makes your website brandable. For example, our blog teaches people how to make passive income, so we have named it Passive Book.
Here are some of the words that you can mix and match into your blog name:
- Nutrition
- Eat
- Recipes
- Food
Use a Business Name Generator to brainstorm the name of your blog.
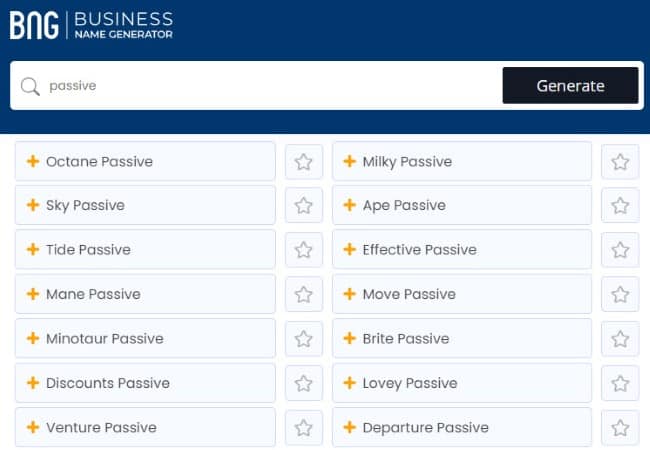
You can also use your own name for your blog. But if you ever plan to sell your website in the future, it is much more difficult to transfer your brand to the buyer when it is your name.
Check Domain Name Availability
After you have brainstormed a few names for your nutrition blog, you should check if the .com domain name is available.
A domain name is the web address that people type into their browsers to visit your nutrition blog. It is usually your nutrition blog’s name followed by .com. For example, the domain name of this website is passivebook.com.
You must check if both the .com domain name and the social media handles are available. You can use Namechk to check the availability of both your domain name and social media handles.
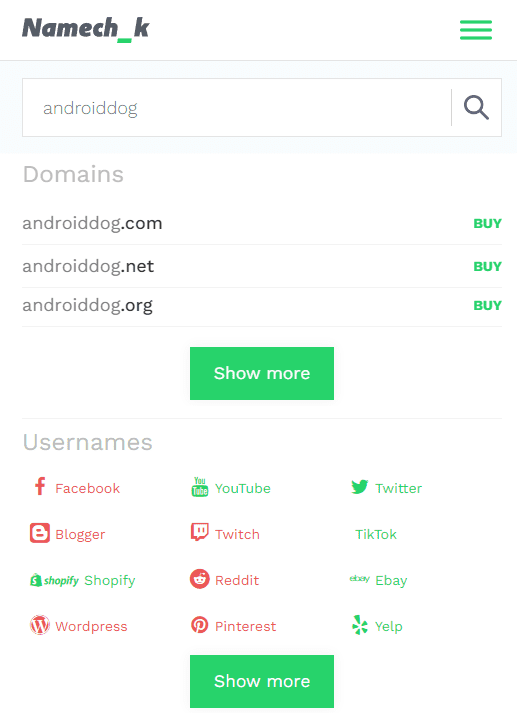
Here are a few things to keep in mind when selecting a domain name:
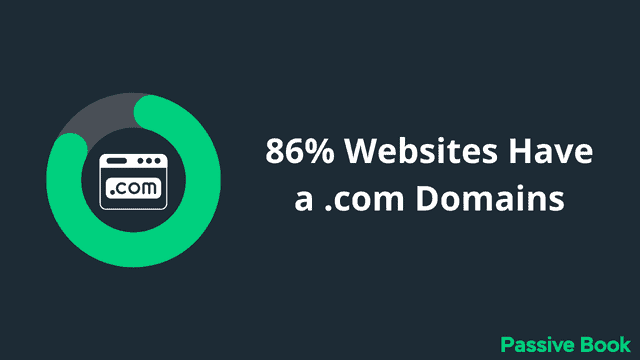
- Choose a .com domain name. 86% of the internet uses .com, so your visitors are likely to try visiting your blog by typing .com. Avoid other extensions like .net or .org.
- Don’t include hyphens and numbers.
- Do not use words with multiple spellings (for example colour vs color).
- Shorter domain names are better. Try to keep it under 12 characters.
- Spelling & Pronunciation should be easy and intuitive.
- It should be easy to remember.
- Avoid words that can be misread together. For example, therapistjohn.com can be read as Therapist John or The Rapist John.
- Make sure it’s not trademarked or copyrighted by someone else. The AI writing software Jarvis.ai had to rebrand to Jasper.ai because Marvel sued them for the Iron Man reference. Lawsuits will happen once your blog is established.
Register a Domain Name
Once you decide your domain name it is time to register it.
You should register your domain with NameCheap because you will get domain privacy for free. Other providers charge $12 per year for domain privacy. Without domain privacy, your name, home & email address will be accessible to the public.
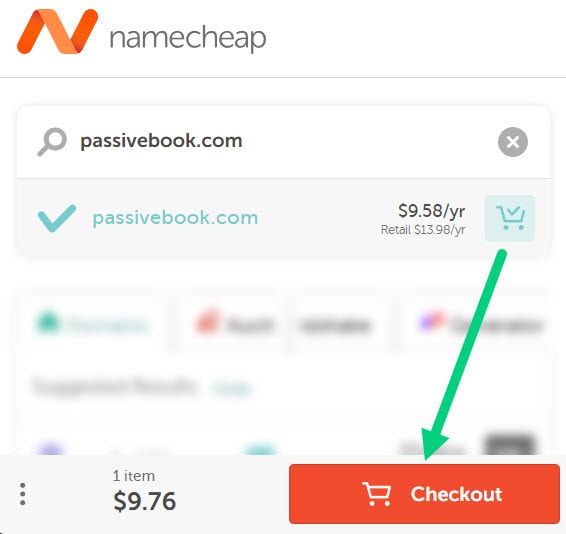
Step 1: Go to NameCheap. Enter your domain name with the .com extension.
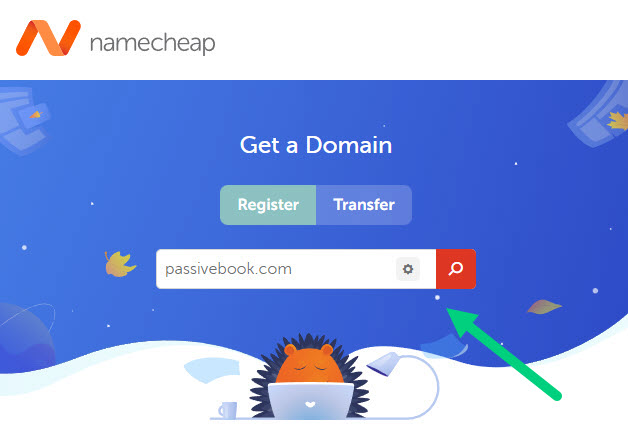
Step 2: Select the .com extension and click the Add to Cart button.
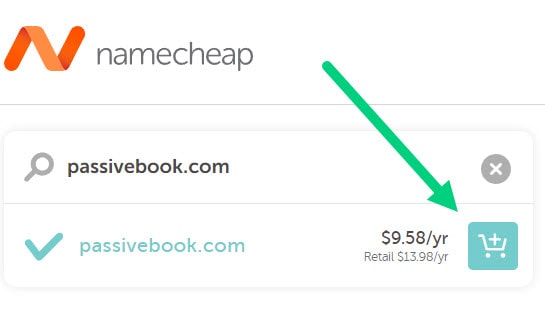
Step 3: After adding the domain to the cart, click on the Checkout button.
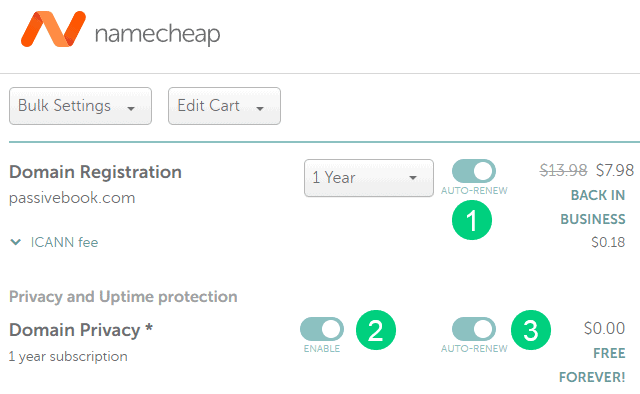
Step 4: Enable Domain Privacy that comes for free along with auto-renew. You don’t need any other paid addon.
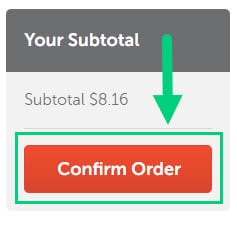
Step 5: Click on Confirm Order. Pay to complete your purchase.
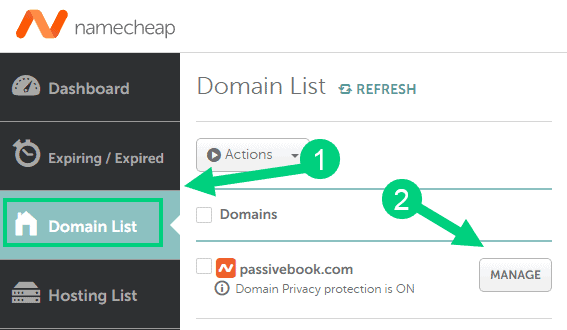
Step 6: Log in to Namecheap and click on Domain List ❶ in the left sidebar and then click Manage ❷ next to the domain you just purchased.
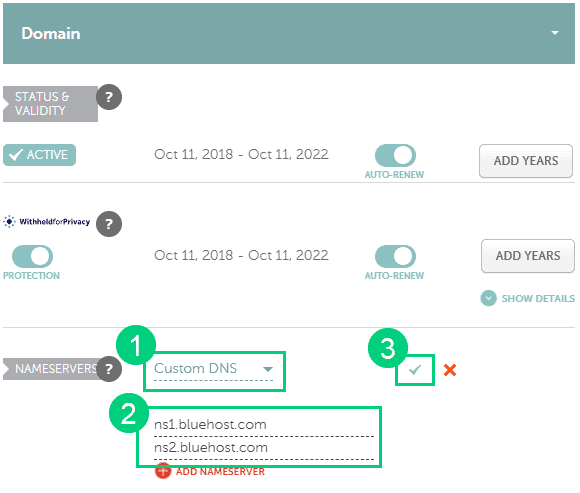
Step 7: Under the Nameservers section, select “Custom DNS” from the dropdown ❶. Then enter the following two nameservers ❷ ns1.bluehost.com and ns2.bluehost.com as shown in the image. Then click the green tick ❸ to save. If you use a hosting provider other than Bluehost, enter their nameserver values in this step instead.
Can I get a free domain name?
Your web hosting provider might give you a free domain name for one year but they charge $12 for domain privacy which is free in Namecheap. From the second year, you will pay for both the domain and privacy which will cost you more than $20+. So it is cheaper to just register your domain with Namecheap from the beginning. Also using different companies for web hosting and domain registration will allow you to easily switch your blog host later without transferring domains.
Can I change the name of my blog later?
You will lose your search engine rankings if you change your blog’s name once it gets links from other websites. It will take as long as a year or more for you to regain the lost traffic. It is possible to mitigate problems by having proper redirects. But you will have to renew both your old and new domains every year. So try to avoid changing your blog’s name once it is established.
4. Setup WordPress
The next step is to get your blog up and running in WordPress.
WordPress is a content management system (CMS) that allows you to create a website or blog from scratch without learning how to code.
Why Choose WordPress.org?
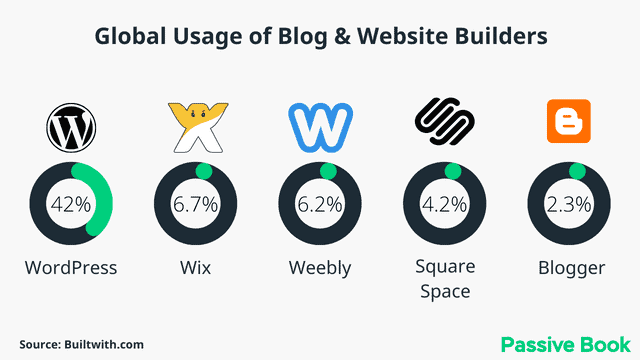
There are many blogging platforms but the self-hosted wordpress.org powers 70% of blogs on the internet. 42% of all websites on the internet use WordPress.
With WordPress, you own your content. No one can take it down or shut down your blog.
There are also thousands of WordPress themes and plugins available for free. Themes help you customize your website to make it look the way you want. Plugins add features that will extend the functionality of your website.
WordPress is also free and open-source software. It has a huge community that makes it extremely easy to get support.
WordPress.org vs WordPress.com
There are two types of WordPress: WordPress.com and WordPress.org
Some people make the mistake of creating their blog in WordPress.com.
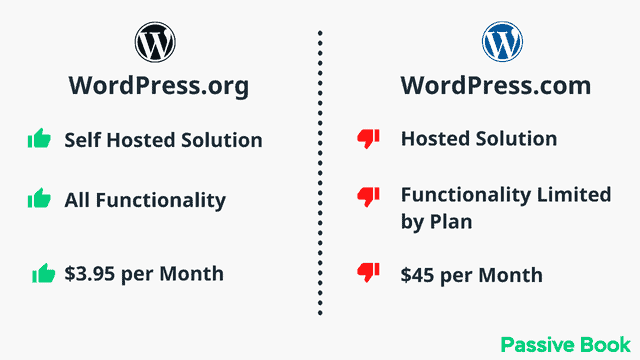
WordPress.com is a hosted platform provided by Automattic, the developers behind WordPress. The biggest limitation of using WordPress.com is that you cannot monetize and make money from your blog. You also cannot install plugins without upgrading to their expensive paid plan.
WordPress.org is the self-hosted version of WordPress that you need to download and install on your own hosting. It has none of the limitations of WordPress.com which is why we will be using it to set up our nutrition blog in this guide.
Why Avoid Free Blogging Platforms
There are many free blogging platforms such as Tumblr, Medium, Blogger, and Wix.
The biggest limitation of building your own nutrition blog on a free platform is that your blog won’t do well in search engines. This will stunt your blog’s growth and traffic potential. These platforms are often used by spammers to build thin content websites and you will just be in a bad neighborhood.
You also don’t own your content. The company can shut down your website or delete your account at any time without notice. This has happened to thousands of blogs on Tumblr and Blogger.

For all these reasons we recommend using self-hosted WordPress.
How much does it cost to start a nutrition blog?
It will cost you $2.95 per month to host your WordPress nutrition blog in BlueHost. A domain will cost you $12/year. So that is a total of $4.2 per month, which is less than the price of Netflix for all the unlimited features that a self-hosted WordPress blog has to offer.
What to do if you already have a free blog?
Migrating your blog from a free platform to WordPress is very easy. All you need is a WordPress import plugin. These plugins are available for free in the WordPress repository.
Install WordPress in Hosting
Before you can install WordPress and set up your nutrition blog, you need to get your hosting set up.
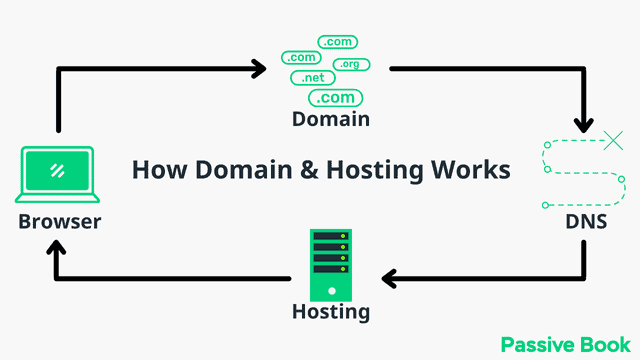
Hosting is a service that provides the server space to store the blog posts, files, and images of your nutrition blog.
When someone visits your nutrition blog in a browser like Chrome or Firefox, your web host will load files from their server into your visitor’s browser, allowing them to access your nutrition blog.
For this guide, we will use BlueHost as our web host. It is a cheap hosting that is extremely easy for beginners to set up. If you use any other web host, the steps will be the same but the user interface may be slightly different.
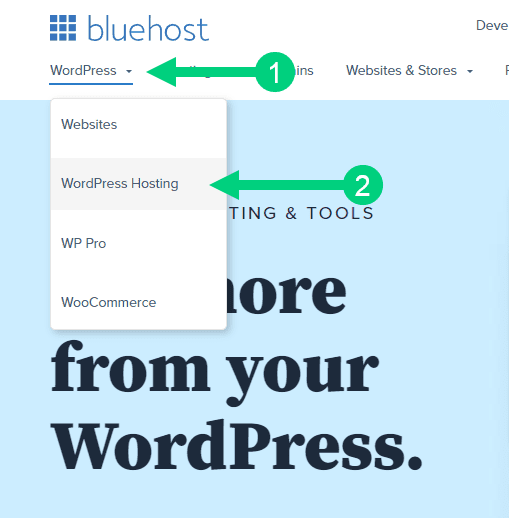
1. Go to BlueHost using this link to get a special discount. Select WordPress > WordPress Hosting from the top menu.
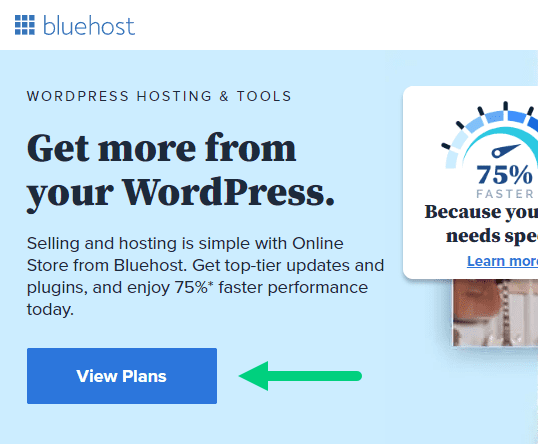
2. Click on the button you see on this page and you will be taken to the pricing section.
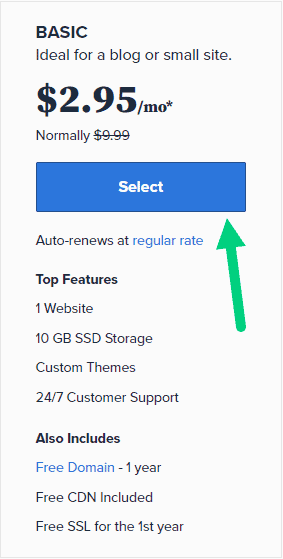
3. Select the Basic Plan. You can upgrade to a different hosting plan as you grow.
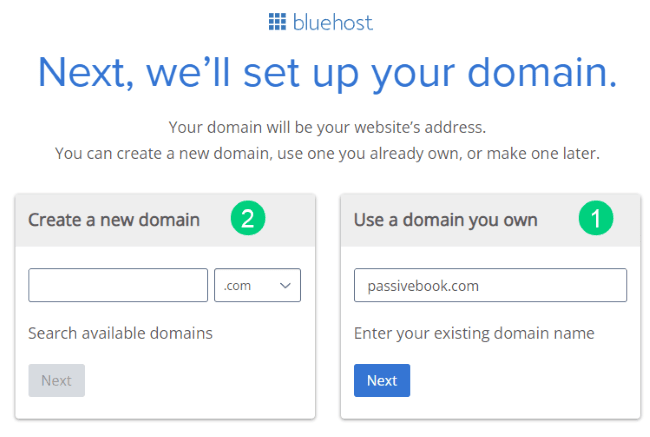
4. If you already have a domain name that you purchased with Namecheap you can put that in the “Use a domain you own” ❶ section. If you don’t have a domain name yet, choose the “Create a New Domain” ❷ to purchase a new domain.
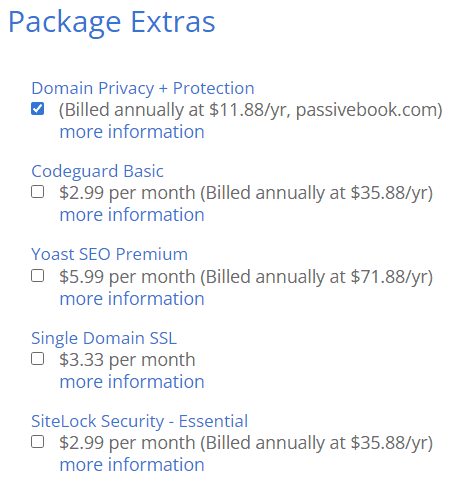
5. In the next screen, enter your information. Uncheck all package extras. If you purchase your domain through Bluehost instead of Namecheap, you may want to enable Domain Privacy. You won’t see the Domain Privacy option if you bought your domain through Namecheap. Namecheap will give you this Domain Privacy for free.
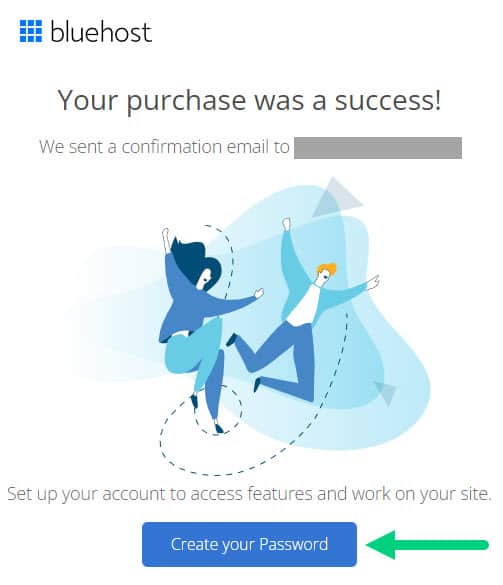
6. Once you have successfully paid, you will be prompted to set a password. Click on the “Create your Password” button.
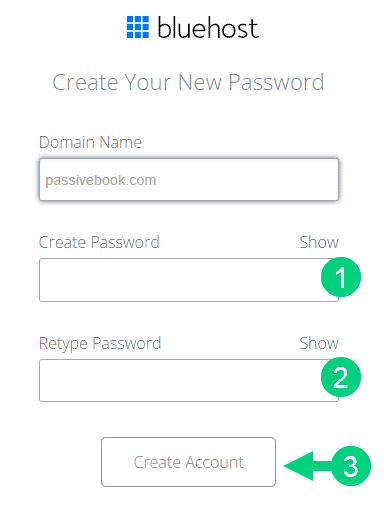
7. Enter your password and create your account. If you lose this password, you can reset it.
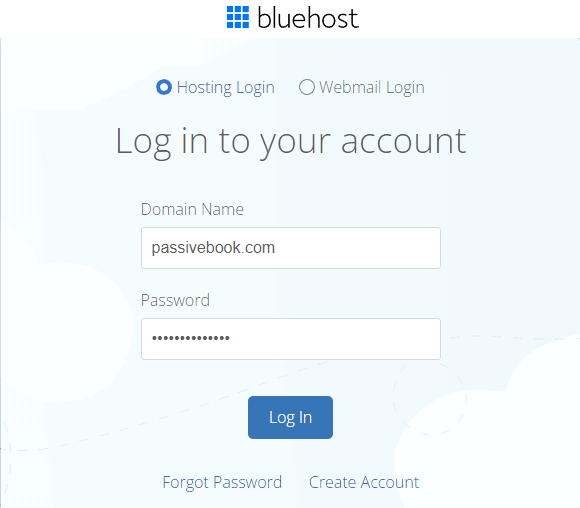
8. After you set your password, log in to Bluehost.
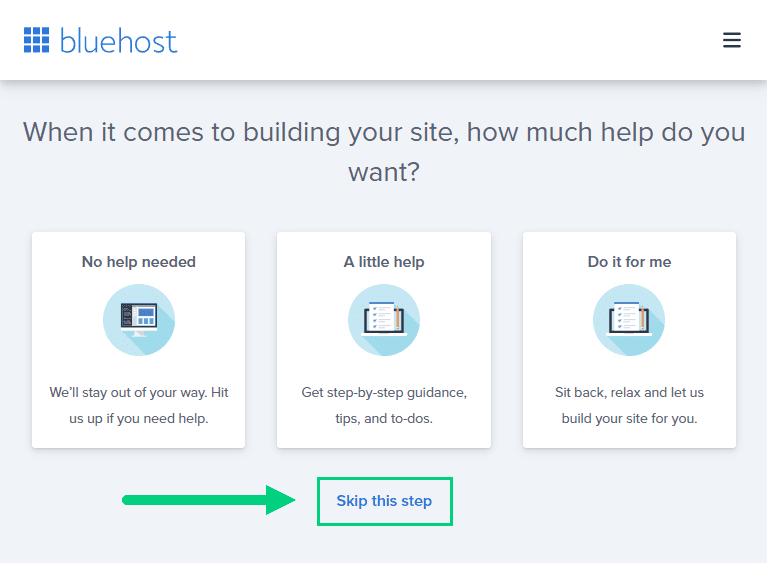
9. Click on the Create your website button on the following screen. This will start a Bluehost Wizard, just click Skip this step wherever possible.

10. On the following page, click “No help needed” or “Skip this step”. We don’t want Bluehost to limit our customization options.
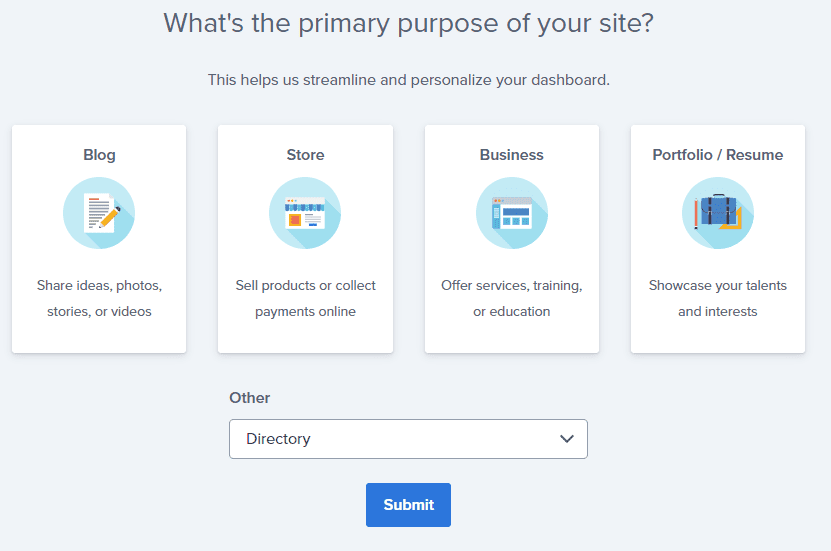
11. On the next page, you will be asked about the purpose of your website. You can choose from any of the available options.
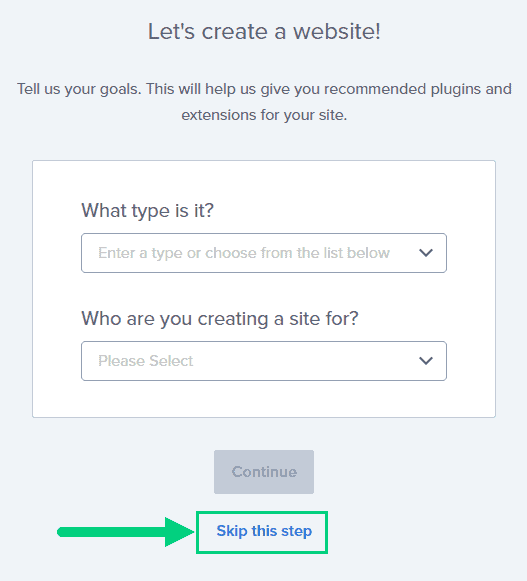
12. On the next page, click Skip this step.
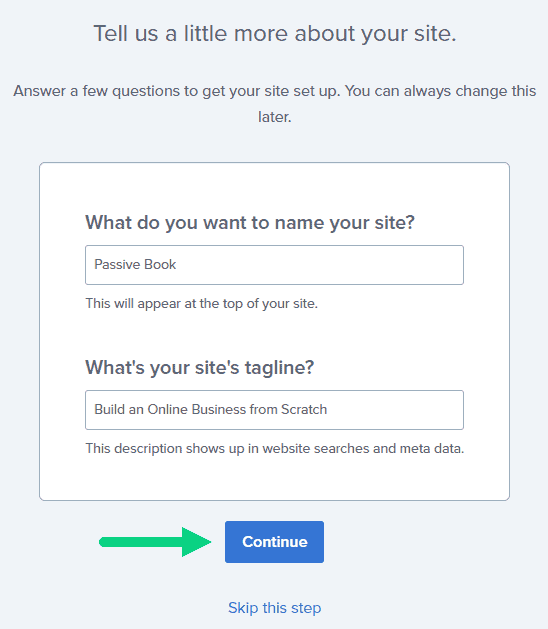
13. On the following page, enter the blog’s name and tagline. You can change this later so feel free to click “Skip this step” or enter something as a placeholder and click Continue.
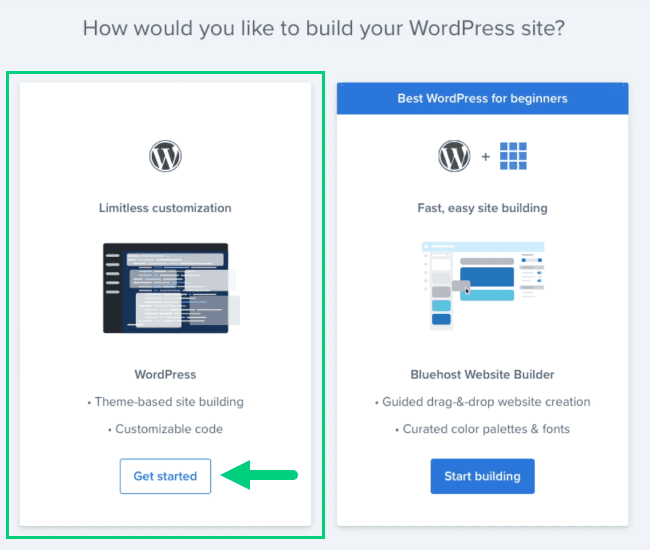
14. Finally you will be asked how you want to build your website. Choose “Limitless customization” to have all the options.
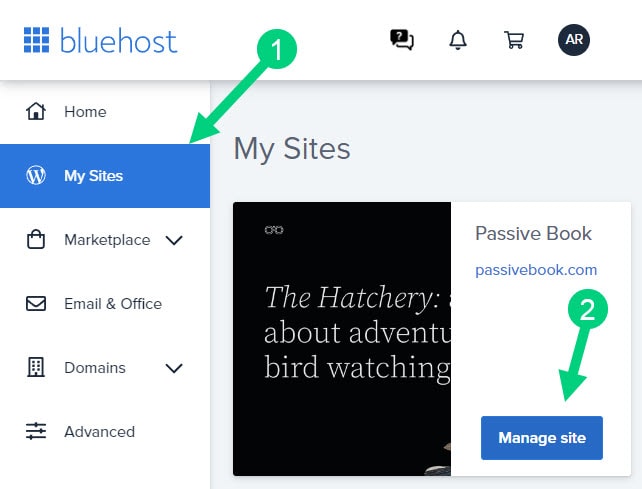
15. You can see your blog by going to yourdomain.com. Go to the Bluehost dashboard and click on the My Sites tab ❶ in the left sidebar and click on the “Manage site” button ❷.
16. Your WordPress site has separate login credentials different from the ones you use to log into Bluehost. You can use this to log in to the WordPress dashboard directly without logging into Bluehost. To get this:
❶ Click on Users on top.
❷ You will be able to see your username and email that you can use to log in to WordPress.
❸ If you click on the three dots you will see the option to Reset your password. ❹
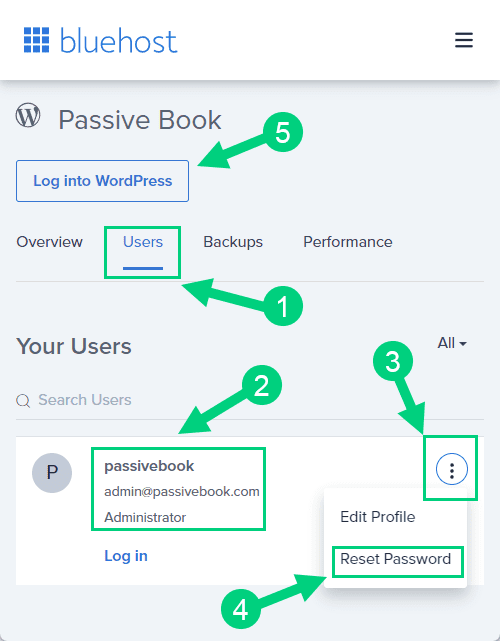
You can log into WordPress from the Bluehost dashboard by clicking the Log in to WordPress button ❺. But it is not recommended you rely on this as your primary login method because you will get locked out of your site if you ever change hosting providers.
17. You will be taken to the WordPress dashboard where you can reset your password ❶. If you don’t like the username Bluehost created for you, you can Add a New User ❷.

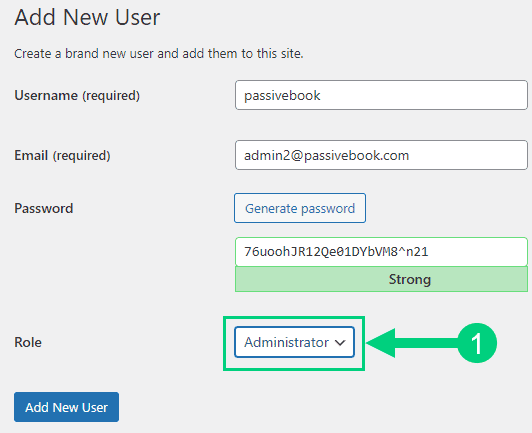
18. If you are adding a new user make sure you specify the user role as Administrator ❶. You can log in as the new user and safely delete the default user created by Bluehost.
Congratulations! You have successfully set up WordPress.
Configure WordPress
Now that you have the basic version of WordPress installed, it is time to customize it to make it look and feel the way you want.
Login to WordPress Dashboard
The WordPress Dashboard is the main area where you will be spending most of your time when running your nutrition blog. It contains all the tools and features you need to manage your blog.
Visit yourdomain.com/wp-admin to access the WordPress dashboard.
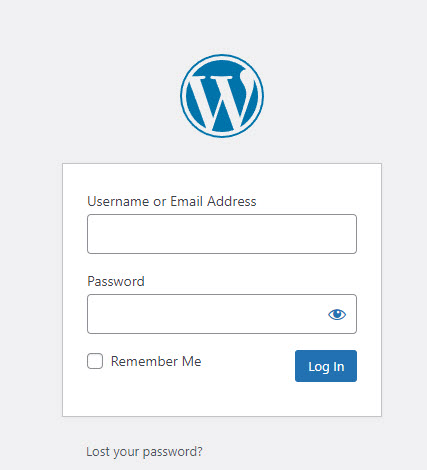
Use the Email and Password you provided during installation to log in to your WordPress dashboard. If you don’t have a password, use the “Lost your password?” to generate a new password.
Install WP Themes
A WordPress Theme is a collection of files that determine the look and feel of your website. When you install a WordPress theme, it will change the entire design of your website including the fonts, colors, and layout.
Your new WordPress blog will be installed with a default blog theme that doesn’t look very great.
To install a new WordPress Theme:
Go to Appearance > Themes > Add New in your WordPress dashboard.
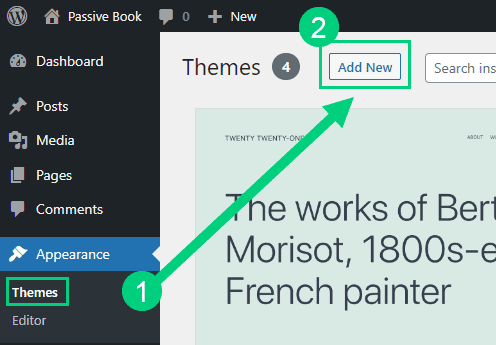
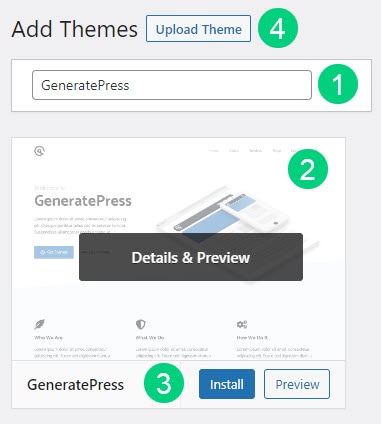
Use the search to find a theme that you like ❶. Before you install the theme, you can see a demo of the theme and learn about its features from the preview screen ❷. If you like the theme, you can install it by clicking the install button ❸. You can also upload a theme from a file on your computer ❹.
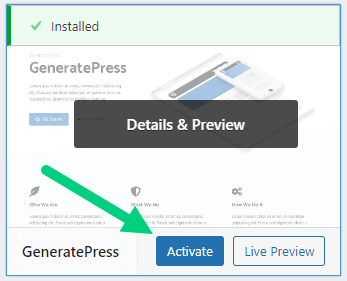
Once installed, click the Activate button to enable the theme.
Although you can use a free theme (there are thousands of free themes available), we recommend using a premium theme.
Premium themes not only reduce your website’s load time but also help you customize your website to your heart’s desire.
Here are the premium themes we recommend:
There are also several custom-made nutrition blog themes. These themes tend to be bloated with poor code which will slow down the performance of your website. We suggest getting one of our recommended themes for a fast website with unlimited customization possibilities.
Install WP Plugins
A WordPress Plugin is a software add-on that extends the functionality of WordPress. There are thousands of free and premium plugins available in the WordPress repository.
There are plugins to do almost anything you can imagine including adding social media buttons, creating contact forms, optimizing your website for speed, and so on.
Too many wordpress plugins can slow down your blog site. So before you install new plugins, it will be worth clearing out any existing plugins that your hosting provider installed by default.
Plugins first need to be deactivated before they can be deleted.
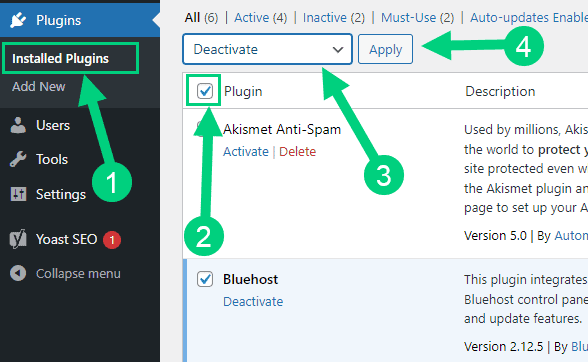
❶ Go to WP Admin > Plugins > Installed Plugins
❷ Click on the checkbox to select all plugins.
❸ Select Deactivate from the drop-down.
❹ Click Apply.
❺ Repeat the above steps but select “Delete” instead of “Deactivate” from the dropdown in ❸ to delete all the deactivated plugins.
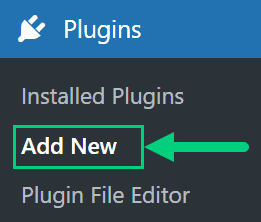
To install new plugins go to the WP Admin > Plugins > Add New.
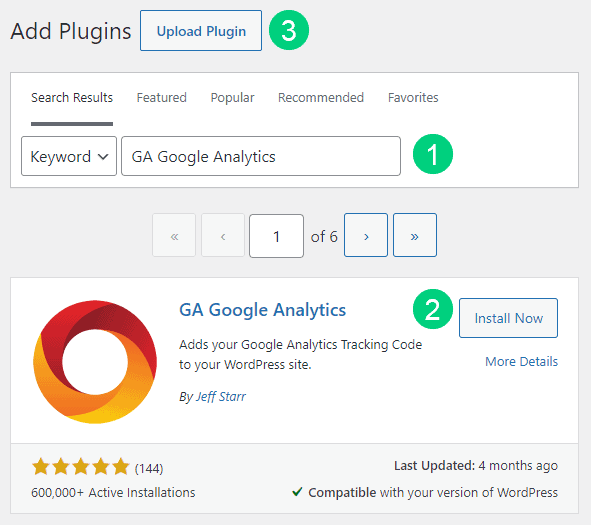
On the plugins page:
❶ Search for the plugin you want in the search bar
❷ Click Install Now. Once you install the plugin, you must also activate the plugin for it to be enabled.
❸ If you are installing a paid plugin you can upload the plugin instead.
There are many different nutrition blog plugins that you can install, but here are the ones which we recommend:
Backup Plugin: A WordPress Backup Plugin helps you create backups of your website. This is important because if something goes wrong with your website, you can restore it to a previous backup.
Recommended Plugin: WPVivid (paid) or UpdraftPlus (free).
SEO Plugin: A WordPress SEO Plugin helps you improve your website’s search engine ranking. By installing a WordPress SEO plugin, you can optimize your website for keywords, add metadata to your posts and pages, and so on.
Recommended Plugin: RankMath (paid).
Google Analytics Plugin: A WordPress Google Analytics Plugin helps you collect the data of your website’s traffic and how people are interacting with your content. This data can then be used to improve your website’s traffic and overall performance.
Recommended Plugin: RankMath (paid) or GA Google Analytics (free).
Cache Plugin: A WordPress Cache Plugin helps speed up your website. When a user visits your website, the cache plugin will serve up a cached version of your website which will load faster than if the plugin wasn’t installed.
Recommended Plugin: WP Rocket (paid).
Page Builder Plugin: A WordPress Page Builder Plugin helps you create custom pages and posts for your website. With a page builder plugin, you can drag and drop elements (e.g. text, images, buttons, etc.) to create custom pages and posts.
Recommended Plugin: Thrive Architect (paid).
Security Plugin: A WordPress Security Plugin helps you protect your website from hackers and malware. By installing a WordPress Security Plugin, you can add security features such as two-factor authentication, firewall protection, and malware scanning.
Recommended Plugin: Wordfence (free).
Social Media Plugin: A WordPress Social Share Plugin helps you share your website’s content on social media. By installing a WordPress Social Share Plugin, you can add social media buttons to your posts and pages which will allow people to share your content on their social media profiles.
Recommended Plugin: Easy Social Share Buttons (paid).
Email List & Lead Generation Plugin: A WordPress Email Opt-in Form Plugin helps you collect the email addresses of people who visit your website. By installing a WordPress Email Opt-in Form Plugin, you can add a form to your website which will allow people to subscribe to your email list.
Recommended Plugin: Thrive Leads (paid).
Nutrition Facts Plugin: A WordPress Nutrition Facts Plugin helps you display nutritional information for your recipes. By installing a WordPress Nutrition Facts Plugin, you can automatically generate nutrition facts for your recipes, import already existing nutrition facts, and more.
Recommended Plugin: WP Recipe Maker (paid).
Customize WordPress
Once you have installed your theme and plugins, it is time to customize the wordpress blog platform:
Change Colors, Fonts & Spacing
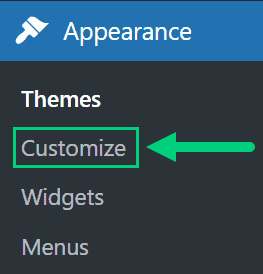
You can set the font, colors, and spacing by going to Appearance > Customize in your WordPress dashboard. Premium themes like GeneratePress allow you to customize every aspect of your blog.
Check out our Blog Fonts & Typography guide to choose the right font and typography settings for your blog.
Add Your Logo
Get a logo designed for your blog from Fiverr. Then set the logo of your blog by going to Appearance > Customize in your WordPress dashboard. A logo is not required for a successful blog but it can definitely help appeal to your target audience.
Change Favicon
Favicon is the image that appears in the browser tab and bookmarks. Set the Favicon from the Appearance > Customize section of the WordPress dashboard.

Create Menus
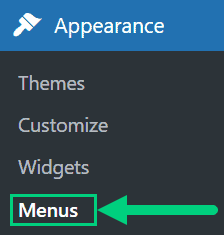
The header and the footer menu can be set from the Appearance > Menus in your WordPress blog dashboard.
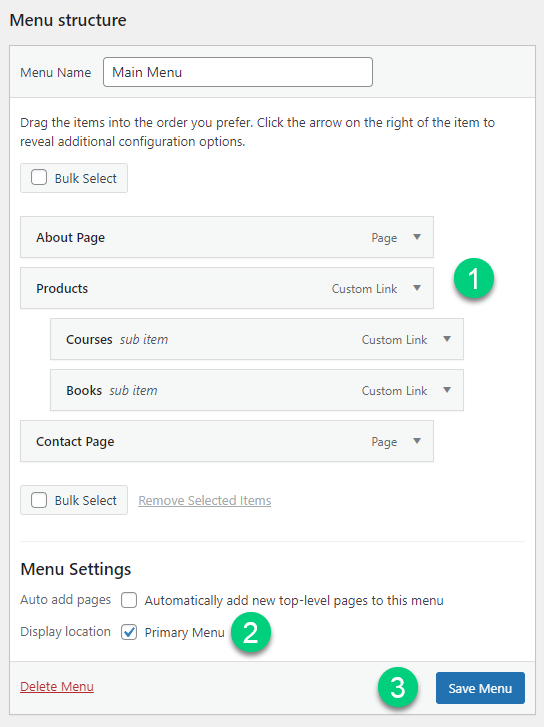
You can nest menu items so that it appears as a dropdown menu ❶. You can use the menu as your primary or secondary navigation menu ❷. Don’t forget to save your menu ❸.
Create Widgets
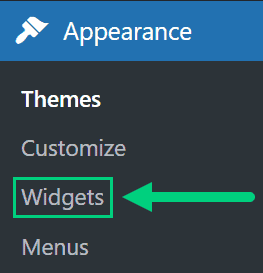
If you have a sidebar, you can add widgets to it. Go to Appearance > Widgets in your WordPress admin dashboard.
Check out the list of the most useful Blog Widgets and how to add them to your blog.
Set Title & Tag Line
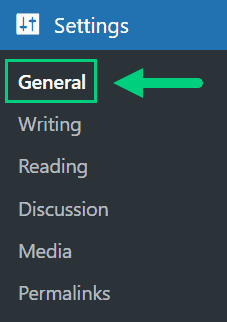
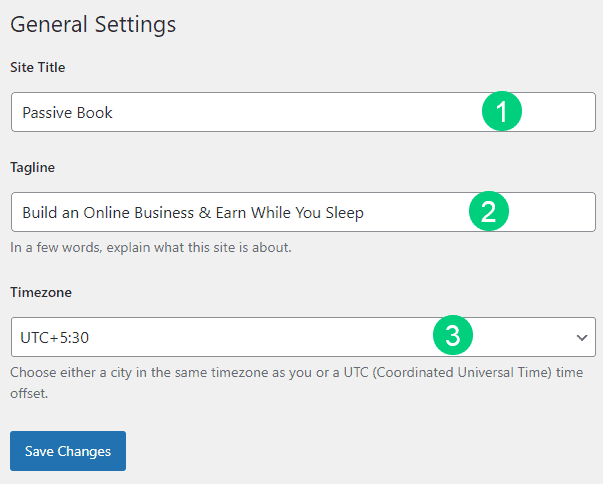
The next step is to change your General Settings. Go to Settings > General in the WordPress Admin area.
You can set your Site Title, Tagline, and Time Zone from this screen.
Set Permalinks
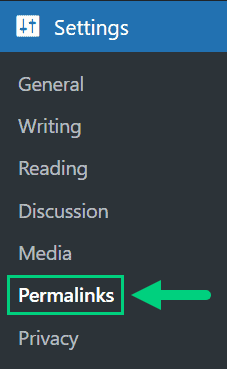
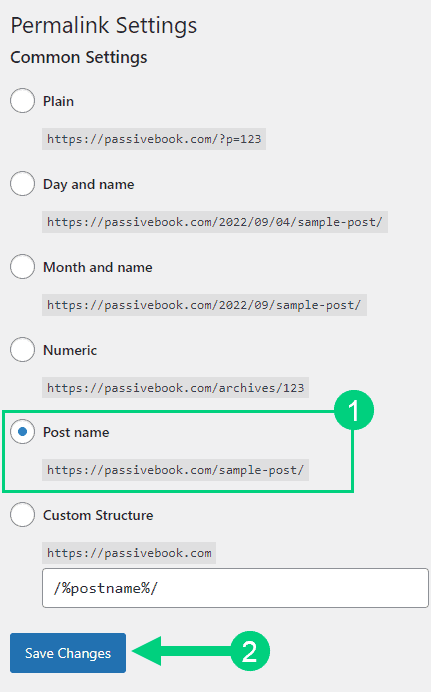
The ideal URL structure for SEO is yourdomain.com/sample-post. Set your permalink structure by going to Settings > Permalinks in your WordPress blog dashboard.
Select the “Post name” radio button and save changes.
Enable Search Visibility
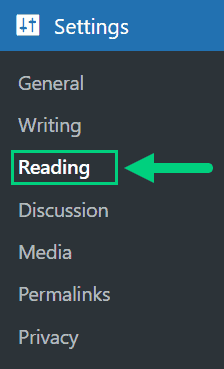
Chances are you want your blog to show up on Google so people can find you. Go to Settings > Reading in your WordPress dashboard.
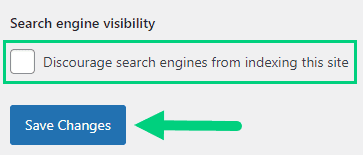
To get search engine traffic, ensure the checkbox “Disable search engines from indexing this site” is Unchecked. You can find this option in Settings > Reading. Most of the time this should be unchecked by default but if it is not, then uncheck it to ensure your site gets traffic from search engines.
Adjust Comment Settings
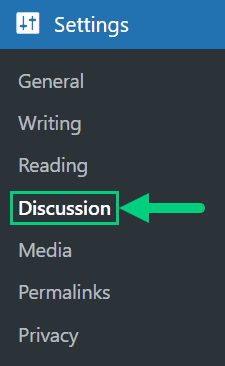
Next, you will want to change the Discussion Setting (aka Comments). Go to Settings > Discussion in your WordPress admin area.
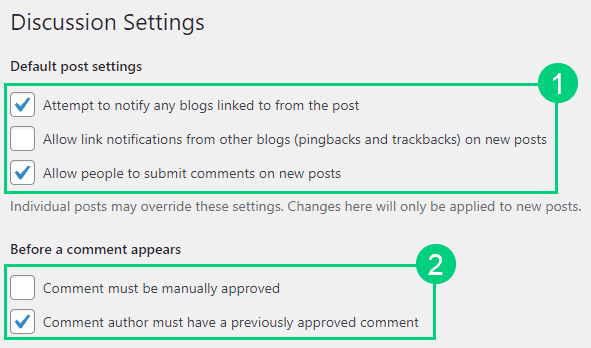
❶ You may want to enable or disable comments on this page. You can also disable pingbacks and enable comment moderation.
❷ You can also set comment approval settings.
If you want to design your blog further, check out our dedicated guide on blog design which has all our best blog design recommendations.
Create Static Pages
There are a few essential pages that you need to create for your nutrition blog before you can start blogging.
Use pages in WordPress to add static content. Go to WP Dashboard > Pages > Add New.
- Write the headline of your content.
- Populate the body content
- Click the publish button.
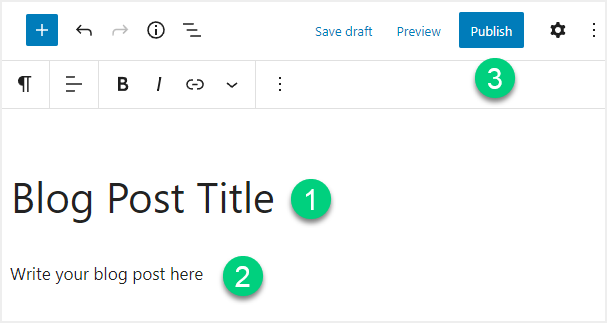
You may want to create the following pages:
Home Page
A home page is the main page of your website. It is the first page that a user sees when they visit your website.
Your home page should include a welcome message, a list of your latest blog posts, and a few other pieces of content. You may also want to include a call-to-action (e.g. subscribe to your email list, download your free eBook, etc.), a contact form, and/or social media icons.
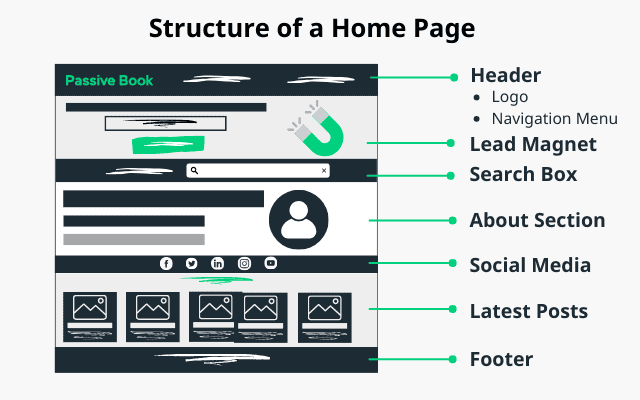
You can create a professional home page for your nutrition blog using a page builder like Thrive Architect.
About Page
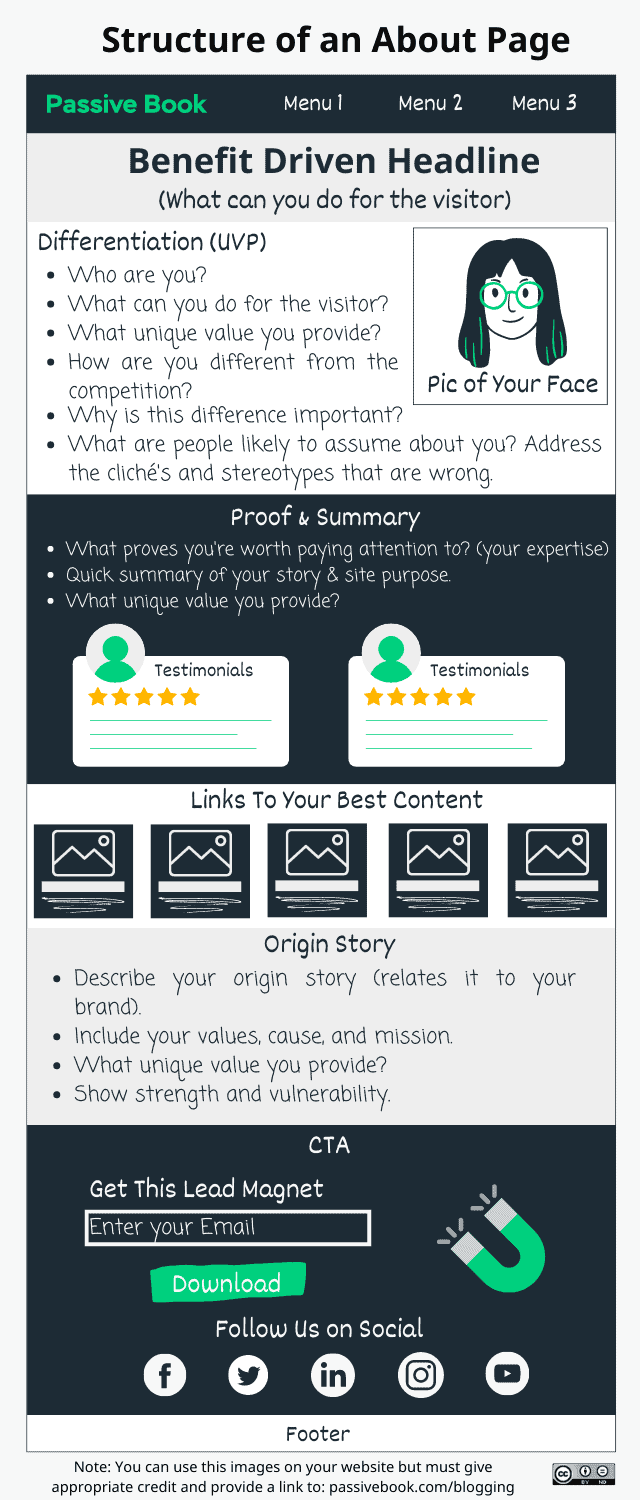
An about page is a page where you tell your story. It is a chance for you to connect with your readers on a personal level.
Your About page should include information about who you are, what you do, and why you do it. You may also want to include a photo of yourself, your contact information, and social media icons.
Contact Page
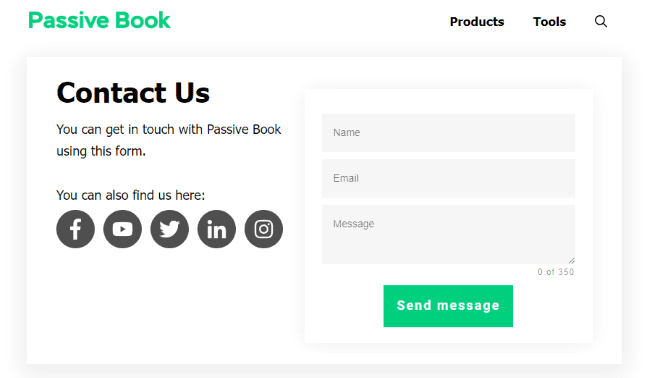
A contact page is a page where people can get in touch with you.
Your contact page should include your contact information (e.g. email address, phone number, mailing address, etc.), a contact form, and social media icons.
Use contact form plugins like Fluent Forms to create the form on your contact page.
Privacy Policy
A privacy policy page is a page where you disclose how you collect, use, and protect the personal information of your website’s visitors.
You are required by law to have a privacy policy page if you collect any personal information from your website’s visitors (e.g. names, email addresses, etc.).
WordPress generates its own privacy policy for you. But you can also use a tool like Termly to generate your own privacy policy.
Terms of Service
A terms of service page is a page where you disclose the terms and conditions that people agree to when they use your website.
Your terms of service page should include information about your website’s content, your website’s ownership, your copyright information, and your user agreement.
Use a terms & conditions generator like Termly to create it.
5. Write & Publish Blog Posts
Now that you have your nutrition blog set up, it’s time to write and publish your first blog post. To craft the perfect blog post, check out our in-depth guide on How to Write A Blog Post. Here we will go over specific tips for a nutrition blog.
1. Brainstorm Topics
You should brainstorm 100 topic ideas for your nutrition blog. This will ensure that you always have content to write about in your nutrition blog.
The goal is to find topics for your nutrition blog that your audience is searching for on Google. The type of content you write on your nutrition blog will depend on your specific niche.
Here are a few nutrition blog post ideas, you can potentially cover in your nutrition blog:
- How-to Posts
- List Posts
- Recipes
There are a few ways to brainstorm specific content:
Look at Competitors
If you want to be a successful nutrition blogger, you need to produce high-quality content that is relevant to your audience.
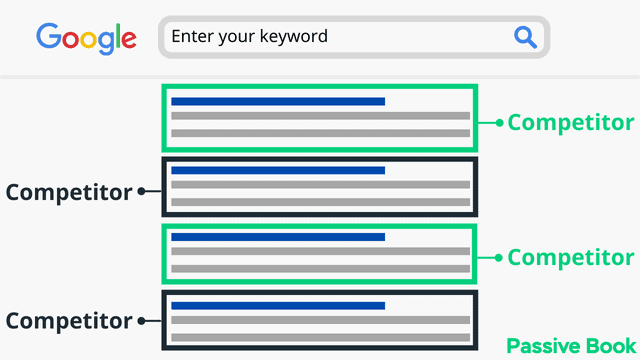
One way to come up with ideas for your blog posts is to look at the articles your competitors are writing about.
By doing this, you can get a sense of what topics are popular in your niche and come up with new content ideas that your audience will love.
Do Keyword Research
Another way to come up with ideas for your blog posts is to use a keyword research tool like KeywordTool.io.
This tool allows you to discover keywords that people are searching for in Google. This can help you come up with new content ideas that your audience will love.

Community & Forums
You can also come up with topic ideas for your nutrition blog by looking at online communities and forums.
This can also be a great way to get feedback on your ideas and find out what content your audience is interested in.
You can find online communities and forums by searching Google.
You can also get topic ideas from Facebook Groups, Reddit, and Quora.
2. Create an Editorial Calendar
Once you have your blog post ideas, you need to create an editorial calendar.
An editorial calendar is a tool that allows you to plan and organize your content topics in advance.
Having an editorial calendar will help you stay organized and make sure that you are regularly publishing new content on your nutrition blog.
An editorial calendar should include the following information:
- Publication date
- Topic
- Author
- Category
- Tags
Download Content Calendar Template
Steal our exclusive content calendar template. Have it delivered directly to your inbox:
You can use tools Google Sheets or Trello to create your editorial calendar.
3. Write a Blog Post
Now that you have your topic ideas and editorial calendar, it’s time to start writing your first post!
Recipes
Recipes are a type of blog post where you share healthy and delicious recipes that align with your blog’s nutrition philosophy. These posts can include step-by-step instructions, ingredient lists, and nutritional information.
Some examples of Recipe post titles include:
- Healthy recipe for [Dish]
- Delicious [Diet/Meal plan] recipe: [Dish]
- 5-ingredient [Dish] recipe
- How to make a healthy vegan chili
- How to make gluten-free banana bread.
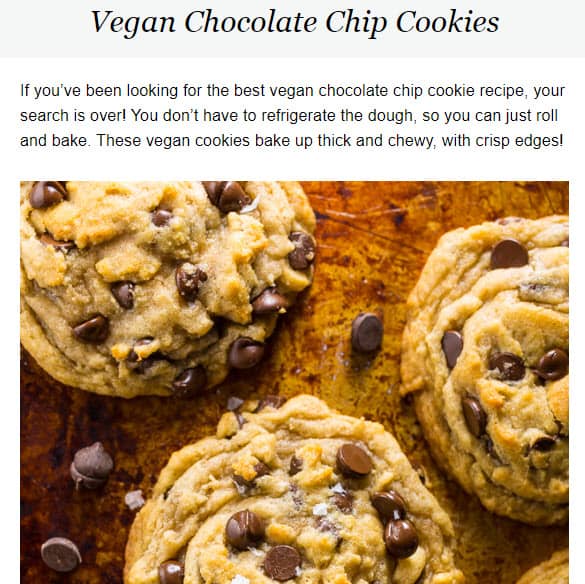
When writing a recipe post, it’s important to be accurate and clear in your instructions and ingredient measurements.
Make sure you follow the standard recipe format of listing the ingredients first and then including step-by-step instructions.
Also, it’s important to provide nutritional information and to make sure that the recipe aligns with your blog’s nutrition philosophy. Additionally, it can be helpful to include images or videos of the finished dish to make the post more visually appealing and to help readers understand the final result.
When writing a recipe post, it’s also important to consider the target audience and dietary restrictions. Also, consider providing alternatives for ingredients, such as vegan or gluten-free options, to make the recipe accessible to a wider range of readers.
You can also include tips or variations to help make your recipe more interesting or unique.
Meal Plans
Meal plans are a type of blog post where you provide meal plans and grocery lists to help readers follow a specific diet or eating plan.
Some examples of Meal Plan post titles include:
- “Weekly meal plan for [Diet/Eating plan]”
- “Grocery list for [Diet/Eating plan] meals”
- “30-day meal plan for [Diet/Eating plan]”
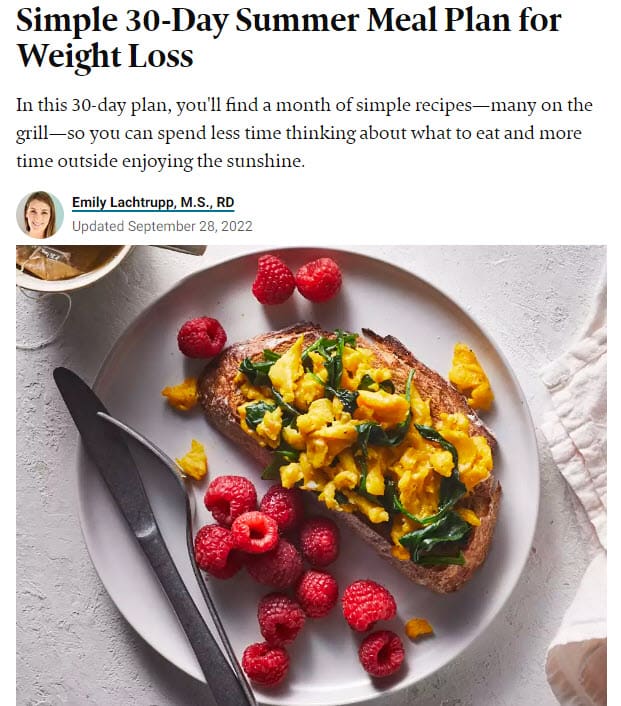
Be mindful of the nutritional needs and goals of the target audience. Consider providing balanced meals that include a variety of food groups. Also, include a grocery list that is easy to understand.
Consider your target audience’s dietary restrictions, such as vegan or gluten-free options. It is also important to consider the cost and availability of ingredients, making sure they are accessible to most readers. Additionally, consider providing a summary of the nutritional information, such as the number of calories or macronutrients, for each meal.
Product Reviews
Product reviews are a type of blog post where you review and rate different food products, supplements, or kitchen tools.
Some examples of Product Review post titles include:
- “Product review: [Brand/Product]”
- “Top [number] [Category] products”
- “Our favorite [Category] products”
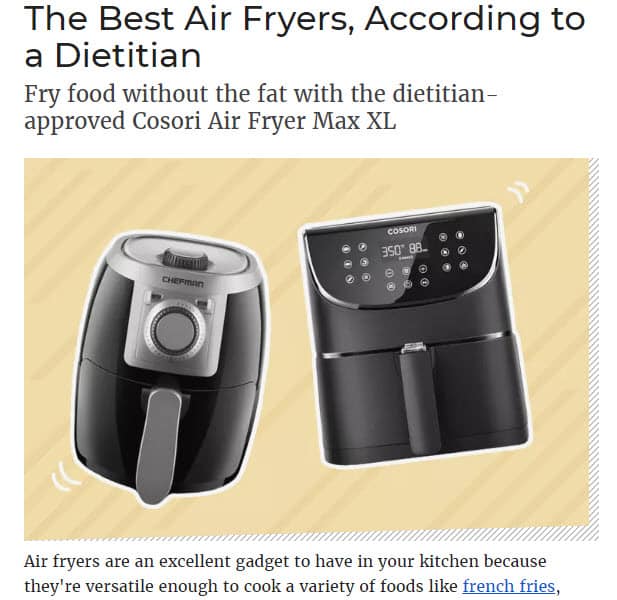
When writing a product review post, it’s important, to be honest and objective in your evaluation of the product. Consider the product’s features, pros and cons, price, and overall effectiveness. Additionally, it can be helpful to include images or videos of the product to make the post more visually appealing.
Also, it’s important to disclose any potential conflicts of interest, such as if you received the product as a sample or if you have any financial ties to the brand.
Nutrition Education
Nutrition education is a type of blog post where you provide information and tips on different aspects of nutrition such as macro and micronutrients, vitamins, minerals, and how to balance your diet.
Some examples of Nutrition Education post titles include:
- “The importance of [Nutrient/Vitamin/Mineral]”
- “Understanding [Dietary concept/Trend]”
- “Balancing your diet for optimal health”
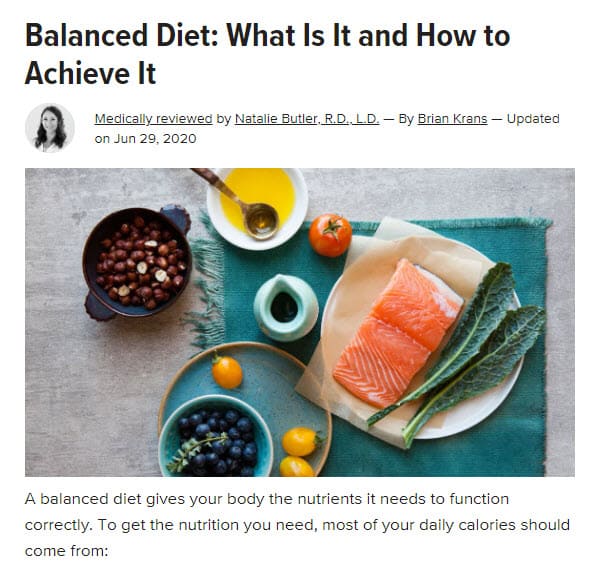
When writing a nutrition education post, it’s important to be well-informed and well-researched. Use credible sources and make sure the information is accurate and up-to-date. Additionally, it’s important to explain the information in a clear and easy-to-understand manner and to consider the level of knowledge of your target audience.
When writing a nutrition education post, it’s also important to be objective and not overly influenced by any particular bias or agenda. Provide a balanced and fair representation of the facts and consider multiple perspectives. Additionally, it can be helpful to include infographics or images to make the post more visually appealing and to help readers understand the information more easily.
Personal Stories
Personal stories are a type of blog post where you share your own personal experiences and struggles with nutrition and how you overcame them. This can include your journey to a healthier lifestyle, your struggles with disordered eating, or your experience with a particular diet or eating plan.
Some examples of Personal Story post titles include:
- “My journey to a healthier lifestyle”
- “Overcoming disordered eating”
- “My experience with [Diet/Eating plan]”
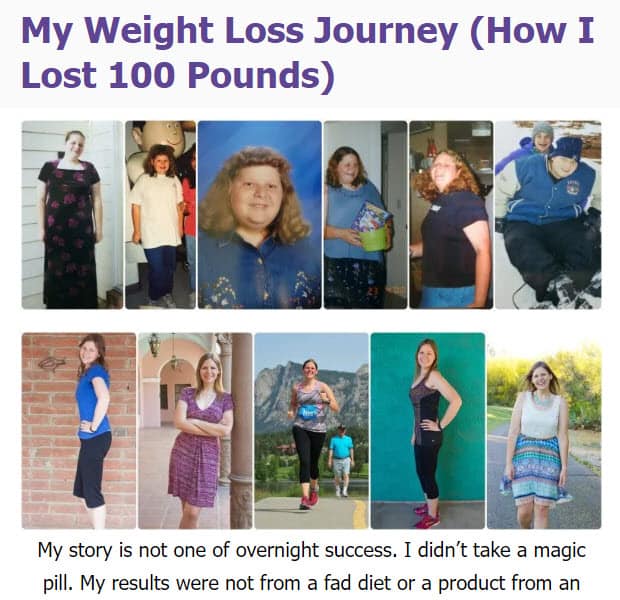
When writing a personal story post, it’s important, to be honest and open about your experiences. Share the ups and downs of your journey and be vulnerable with your readers. Additionally, it’s important to be mindful of the tone and language you use and to be respectful and sensitive to others who may be going through similar struggles.
When writing a personal story post, it’s also important to be aware of the potential impact of your post and to be responsible in your sharing. Be respectful of any personal information that may be shared, and consider the potential consequences of sharing certain details. Additionally, it can be helpful to include tips or advice based on your experiences to help others who may be going through similar struggles.
Q&A
Q&A is a type of blog post where you answer readers’ questions about nutrition and health-related topics.
Some examples of Q&A post titles include:
- “Answering reader questions on [Topic]”
- “Q&A: [Expert’s name] on [Topic]”
- “Addressing common misconceptions about [Topic]”
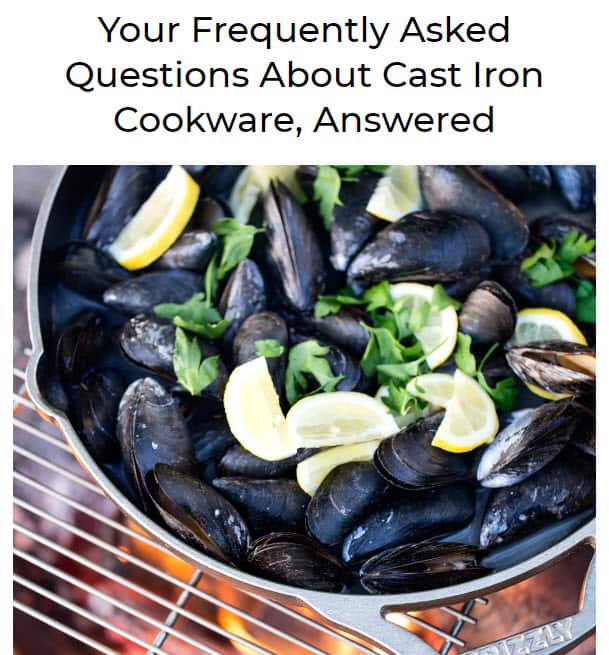
When writing a Q&A post, it’s important to be thorough and detailed in your answers. Use credible sources and provide accurate and up-to-date information.
When writing a Q&A post, it’s also important to be aware of the target audience and their level of knowledge on the topic. Consider providing additional resources or links for further reading and research.
Research Summaries
Research summaries are a type of blog post where you summarize and explain the latest research findings in the field of nutrition.
Some examples of Research Summary post titles include:
- “Breaking down the latest research on [Topic]”
- “What the research says about [Topic]”
- “Exploring the evidence behind [Claim/Dietary trend]”
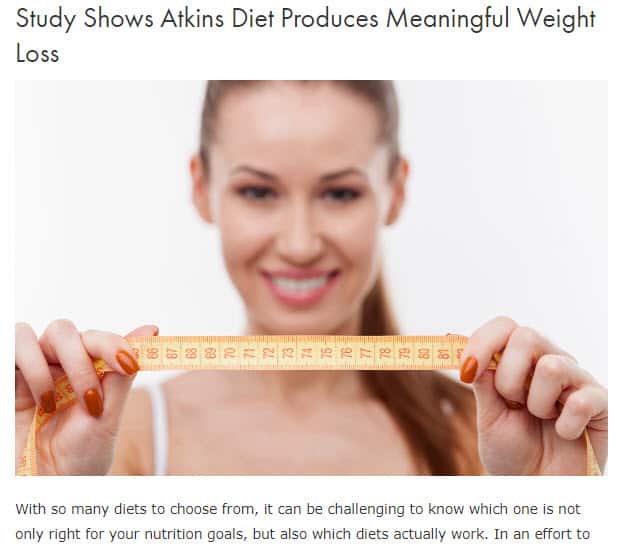
When writing a research summary post, it’s important to be well-informed and well-researched. Use credible sources and provide an accurate and up-to-date summary of the research. Additionally, it’s important to explain the research in a clear and easy-to-understand manner and to consider the level of knowledge of your target audience.
Provide a balanced and fair representation of the research and consider multiple perspectives. Additionally, it can be helpful to include infographics or images to make the post more visually appealing and to help readers understand the research more easily.
How-to Guides
How-to guides are a type of blog post where you provide step-by-step instructions on specific topics such as how to read nutrition labels, how to cook a certain type of food, or how to eat for a specific health condition.
Some examples of How-to Guide post titles include:
- “How to read nutrition labels”
- “Step-by-step guide to [cooking technique]”
- Eating for [health condition]: a guide”
- How to increase vitamin D in your diet
- How to make a healthy smoothie.
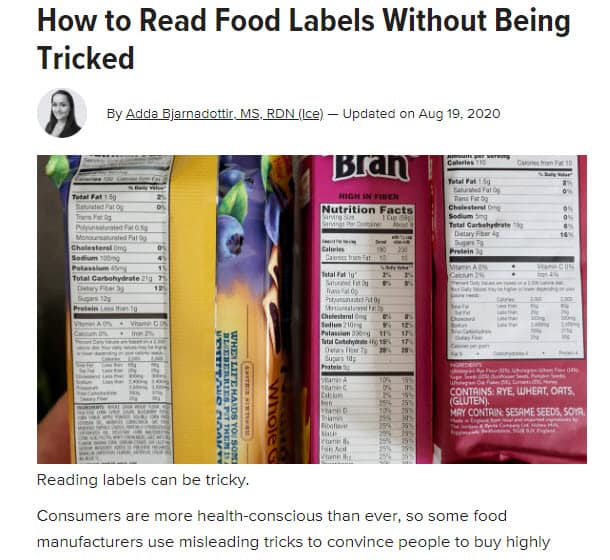
Be clear, concise, and provide detailed instructions and tips. Use images and videos to help readers understand the steps more easily.
Also, it’s important to be sure that the guide is safe and appropriate to follow.
List Posts
List posts are exactly what they sound like—they are posts that include a list of information related to nutrition.
For example, you could write a post about the 17 foods to heal your gut and reduce inflammation or 19 sources of iron for vegans.
To write a list post, follow these steps:
- Choose a topic for your list post.
- Outline the items you want to include in your list.
- Write your post, including all of the items on your list.
- Include images or videos to help illustrate the items on your list.
- Publish your post and share it with your audience!
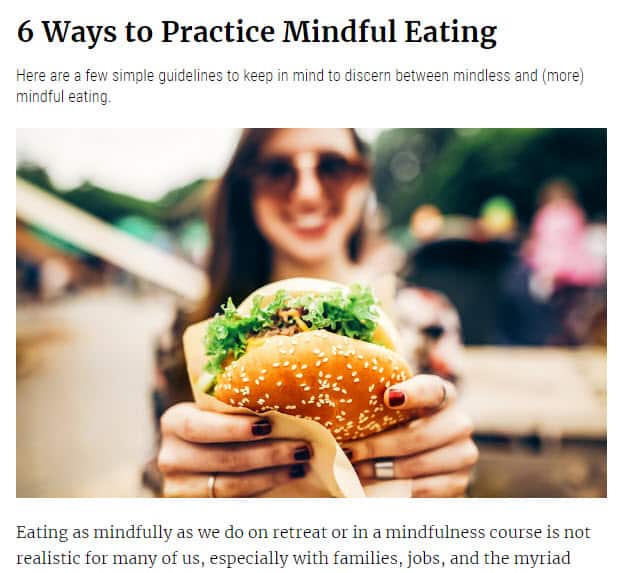
When writing a list post make sure you make the most interesting item as the top one. If you have obvious items on your list, you can put them towards the end.
Write 5x Faster With AI
You can write your new blog post at 5x speed using the AI writing software Jasper. I was able to write over a hundred blog articles in 3 months using Jasper. This blog article you are reading right now was written with the help of Jasper. AI will not only help you write blog posts fast but also with higher quality.
Jasper can write plagiarism-free blog content, articles, social media content, emails, and ad copy. All you have to do is provide a few inputs on what you want and Jasper will do all the hard work of creating the blog content for you. No more writer’s block.
Check out the video below to see Jasper in action:
Try Jasper for free using the links on this page and get 10,000 bonus credits you can use to start writing your first articles.
Once you sign up for Jasper I recommend you spend some time going through the tutorial videos in the Jasper Bootcamp to truly unlock the power of this amazing software.
Check out our guide on How to Write a Blog Post Fast in 15 mins Without Losing Quality for more tips to write fast.
Outsource Writing
If you are struggling to find the time to write your own posts, one option is to outsource writing to a professional writer.
Many freelance websites can connect you with talented writers who can help create content for your nutrition blog.
Some popular options include Upwork and Fiverr.
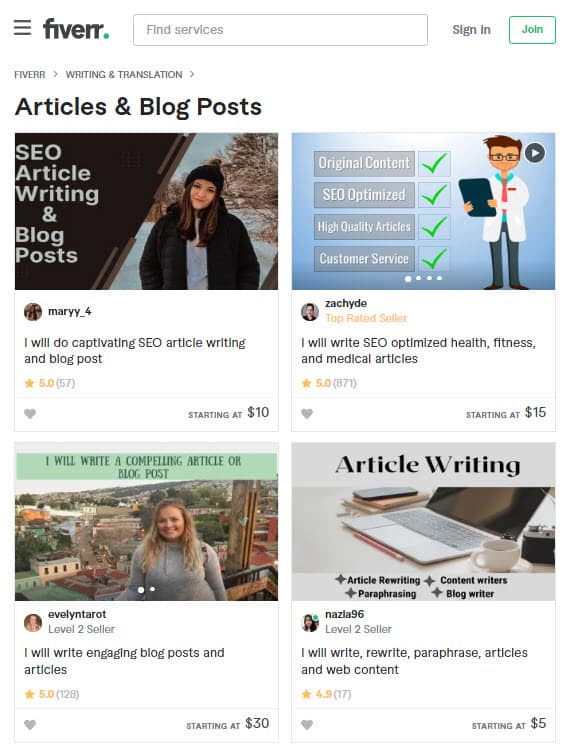
When outsourcing content creation to freelancers, make sure that you carefully review their previous work samples and provide detailed instructions for how you want each piece of content written.
4. Add Images
Make sure you add images to your blog posts as this will make them more visually appealing and help break up the text.
The best photos are the ones you take with your own camera. When you take your own photos, you have complete control over the framing, lighting, and editing. Plus, it can be really fun to take photos of your food and recipes!
Make sure to snap a few shots before you start cooking and then post them on your blog with all of the instructions.
You can also find free stock photos on websites like:
Free Options: Pixabay, Pexels, Upsplash
Paid Options: Deposit Photos, Shutterstock, iStock, Getty Images, 123rf.
Edit With Canva
Another option is to create your own images using a tool like Canva.
Canva is a free online platform that allows you to easily create professional-looking images for your blog posts, social media accounts, and more.
If you are looking for more stock images to use in your blog posts, another option is to upgrade to Canva Pro. With Canva Pro you get a free library of stock images that you can use in your projects. Plus, you also have access to premium fonts, templates, and tools that can help you create even more beautiful designs.
Optimize Images
When adding images to your blog posts, it’s important to optimize them for the web.
This means using the correct file format and compressing them to reduce their size.
It’s also important to include keywords in the file name and alt text of your images.
The best file format for images on the web is JPEG. This format compresses the image while still retaining a high level of quality.
Make sure you avoid using the GIF or PNG formats, as these formats tend to be larger and can slow down your website. The only exception is for graphics. You should use PNG instead of JPEG for graphics for reduced file size.
To compress your images, you can use a tool like TinyPNG or JPEGmini. These tools will reduce the file size of your images
6. Promote Your Nutrition Blog
Now that you have started your nutrition blog, it’s time to start promoting it!
There are several ways you can promote your blog and get more traffic.
Let’s take a closer look at each of these methods:
Search Engine Optimization (SEO)
One of the best ways to drive traffic to your blog is through search engine optimization (SEO).
SEO is the process of optimizing your website for search engines so that you can rank higher in the search results.
When people search for keywords related to your blog, you want your website to appear as close to the top of the search results as possible. The higher you rank, the more traffic you will get.
There are many things you can do to optimize your website for the search engines, including:
- Use keyword-rich titles and descriptions
- Use keyword-rich anchor text
- Optimize your images for the web
Many factors go into SEO, and it can be a bit confusing to figure out where to start. You can master the more advanced SEO tactics by checking out our SEO Resources.
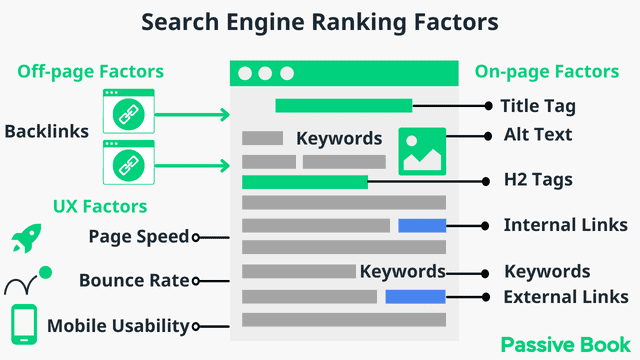
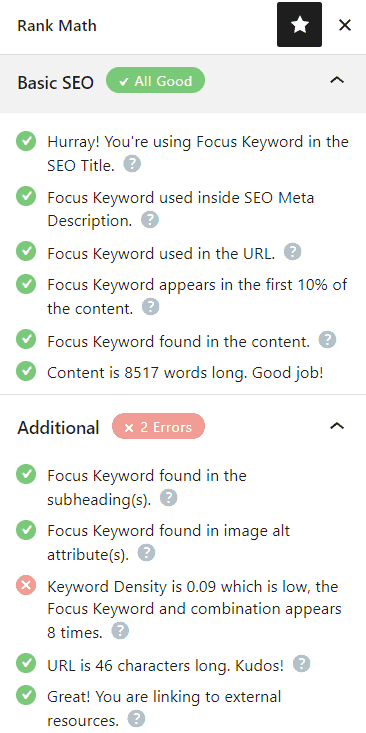
You can ensure you get the basics of SEO right, by completing the recommendations given by the RankMath plugin.
Email Marketing
Another great way to promote your nutrition blog is through email marketing.
Email marketing allows you to send newsletters, updates, and promotional offers directly to your subscribers.
This is a great way to keep people updated on your latest posts, and it can also help increase your sales by promoting your products or services.
There are many different email marketing platforms you can use, such as Active Campaign and Convertkit.
To get started with email marketing, you should create a list of subscribers and start sending them regular newsletters.
You can also offer free downloads like ebooks or checklists to encourage people to sign up for your newsletter.
When creating your emails, be sure to keep them short and sweet so that they do not overwhelm people.
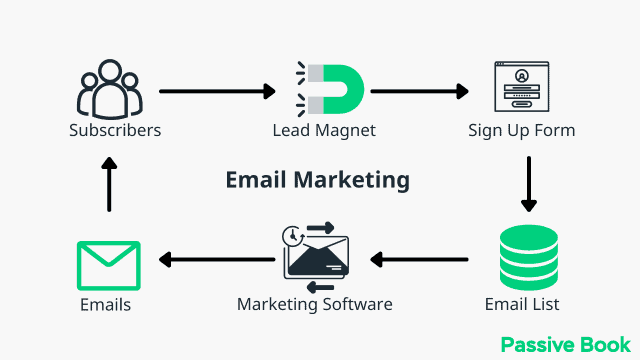
You can use the Thrive Leads plugin to build opt-in forms to collect email addresses. You can then connect the opt-in form to an email marketing service like Active Campaign to send out the emails.
Check out our Email Marketing resources to learn more.
Social Media Marketing
Another great way to promote your nutrition blog is through social media marketing.
Social media platforms, such as Facebook, Twitter, and Instagram are a great way to connect with your audience and engage with potential customers.
There are many different ways you can use social media to promote your blog.
For example, you can share links to your blog posts on your social media profiles or start an engaging conversation around a specific topic related to your niche.
You should also consider creating a Facebook group or community for people interested in nutrition topics so that they can interact with each other and ask questions about the latest trends and developments in the field.
Guest blogging
Guest blogging is another great way to promote your blog.
When you guest blog, you write a blog post for another website in your niche.
This is a great way to get exposure to your blog and reach a new audience.
When you guest blog, be sure to include a link back to your own website so that people can find you easily. You can also promote your blog from your author bio.

7. Monetize & Make Money
Now that you have started your nutrition blog and are getting more traffic, it’s time to start thinking about how you can monetize your blog.
Advertising
One of the most common ways to monetize a blog is by selling advertising space.
When you advertise, you allow other businesses to place ads on your website. The amount you make from advertising will depend on the traffic you are getting to your site and how popular your site is.
You can sign up for an ad network to get started with advertising on your nutrition blog. They will give you an ad code that you can place on your blog and make money.
To start advertising on your blog, you can sign up for an ad network like Ezoic (they pay more than Google Adsense). When your blog starts getting more than 100,000 page views a month you can monetize with Adthrive.
| Ad Network | Earnings Per 1K Impressions (EPM) | Monthly Traffic Requirement |
|---|---|---|
| Ad Thrive | $13 | 100,000 |
| Ezoic | $3 | 10,000 |
| Media.net | $1 | – |
| Google Adsense | $1 | – |
Affiliate Marketing
Another great way to monetize your blog is through affiliate marketing.
Affiliate marketing is when you promote other people’s products or services on your blog and earn a commission when someone buys something from your link.
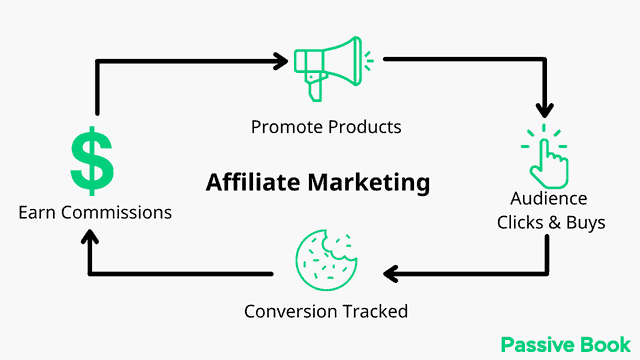
This is a great way to monetize your blog because you can promote products that are relevant to your niche and make money when people buy them.
To get started with affiliate marketing, you should sign up for an affiliate program like Amazon Associates.
You can also find other affiliate programs by searching for “affiliate program” + “your niche”.
For example, you can search for “health and fitness affiliate programs” and find other affiliate offers in your niche.
Digital Products
Another great way to monetize your blog is by selling digital products, such as ebooks, online courses, or audio files.
This is a great option if you have expertise in a specific area of nutrition and want to share your knowledge with others.
It’s also a great way to make passive income because you can sell your digital products over and over again.
To get started, you can create an ebook or course about a specific topic related to nutrition.
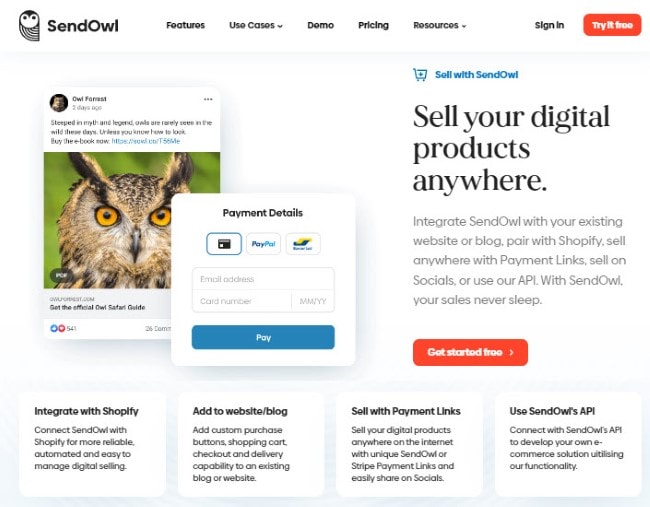
You can use Teachable if you want to sell video courses. Your students will have a dedicated course members area and a community system to ask questions and interact with each other. If you only want to sell eBooks, you can use SendOwl which lets you sell your digital products and eBooks for free.
Sell Services
If you are a nutrition expert or coach, you can also monetize your blog by selling services, such as one-on-one coaching or consulting.
This is another great way to leverage your expertise and make money from your blog.
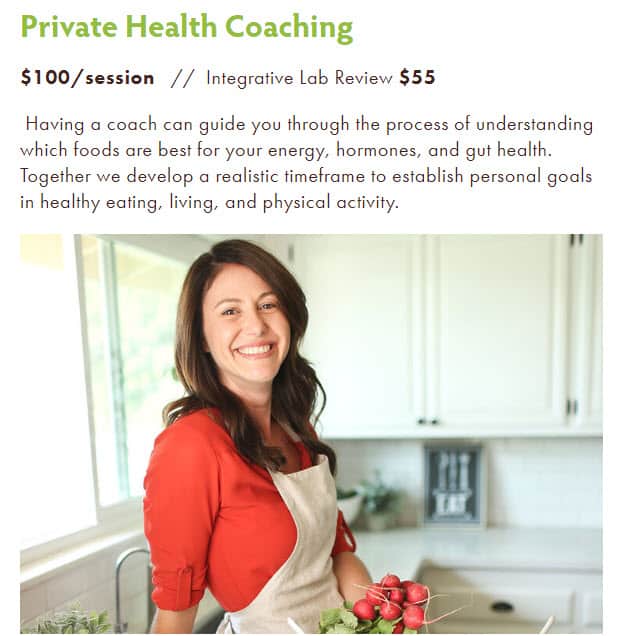
To get started with offering services on your blog, you can create a pricing page on your website where people can learn more about how you can help them achieve their goals, as well as how much it will cost.
Physical Products
Another option for monetizing your blog is by selling physical products, such as supplements or cooking utensils.
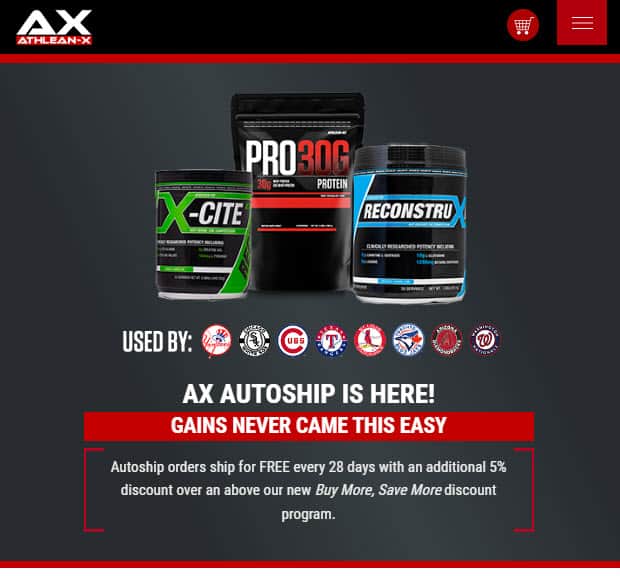
This is a great option if you have a product that would be relevant to your niche audience. To get started with selling physical products on your blog, you can create an online store using the Wordpress plugin WooCommerce.
Sponsored Posts
Another option for monetizing your blog is to get paid to write sponsored posts, which are posts that are written for a specific brand or company.
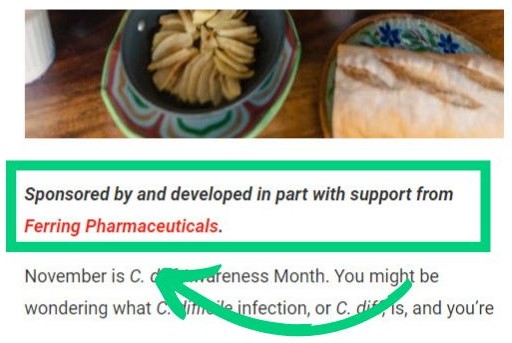
To get started with sponsored posts, you need to contact brands in your niche and pitch how you can help them promote their products or services.
As you get more popular, brands may reach out to you directly and ask if they can pay you to write posts on your blog.
FAQ
Here are a few frequently asked questions:
What do you write in a nutrition blog?
There are a wide variety of topics that you can cover in your nutrition blog, including diet and nutrition tips, healthy recipes, nutrition-related news, and more. You may also want to include personal anecdotes or stories about how your own experiences with nutrition have impacted your life. Ultimately, the content that you choose for your blog should be relevant and engaging to your target audience.
How do I make a nutrition page?
There are a few different ways that you can create a nutrition page on your website. One option is to use a WordPress plugin like WP Recipe Maker paid add-on. This plugin will allow you to easily add nutrition information to your blog posts and pages.
How do I start a nutrition business?
Starting a nutrition business can be a great way to share your passion for healthy living with others and make money at the same time. There are a few different ways that you can start a nutrition business, including starting an online store, becoming a nutrition coach or consultant, or creating digital products about nutrition. Your nutrition blog can be a great way to promote your nutrition business.
How do I monetize my nutrition blog?
There are several different ways that you can monetize your nutrition blog. Some options include affiliate marketing, selling digital products, or getting paid to write sponsored posts. You can also monetize your blog by selling physical products or services related to nutrition.
How do you write a nutrition article?
Writing a nutrition article can be a great way to share your knowledge about healthy living with others. When writing a nutrition article, it’s important to choose a topic that you’re knowledgeable about and that will be relevant to your target audience. Once you’ve chosen a topic, you can start by brainstorming ideas for your article. Once you have a general idea of what you want to write about, you can start writing your article.
What Next?
Starting a nutrition blog can be a great way to help others learn about nutrition, share your own recipes and tips, and make some money on the side.
We hope this guide showed you how to start a nutrition blog.
If you have any questions as you set up your new blog, leave a comment below so we can help you out.
Have you started your nutrition blog yet? What type of nutrition blog are you going to start? Let us know in the comments.
Share this post with your friends & followers:
