You’ve picked a website idea, but the hosting checkout asks you to choose a billing term, register a domain, and buy extras you’re not sure you need. You haven’t built a page yet, and you’re already making expensive decisions.
The worry is understandable: you could pay upfront and still end up with an address that shows the wrong page—or nothing at all. We’ll use Small Tank Notes, an example freshwater-aquarium blog, to connect that purchase to a working WordPress site you can share at your own address, with the costs explained before you commit.
1. Choose a Bluehost Plan You Can Afford to Renew
Learning how to use Bluehost hosting is easier when you separate three parts of your website:
- Your domain is the address people type into their browser.
- Bluehost stores your website and serves it to visitors.
- WordPress manages your pages, articles, images, and design.
This walkthrough uses self-hosted WordPress. You don’t need a separate WordPress.com subscription.
Decide Whether Bluehost Fits Your Website
I primarily use DigitalOcean for my own websites, but I recommend Bluehost as a starter-friendly alternative when you want guided WordPress setup. Running a server is a separate job, and you don’t need to take it on to publish your first article.
For a modest blog like Small Tank Notes, I would begin by comparing the entry-level plan with the next tier. Pay more for a requirement you can name, such as phone support or additional storage.
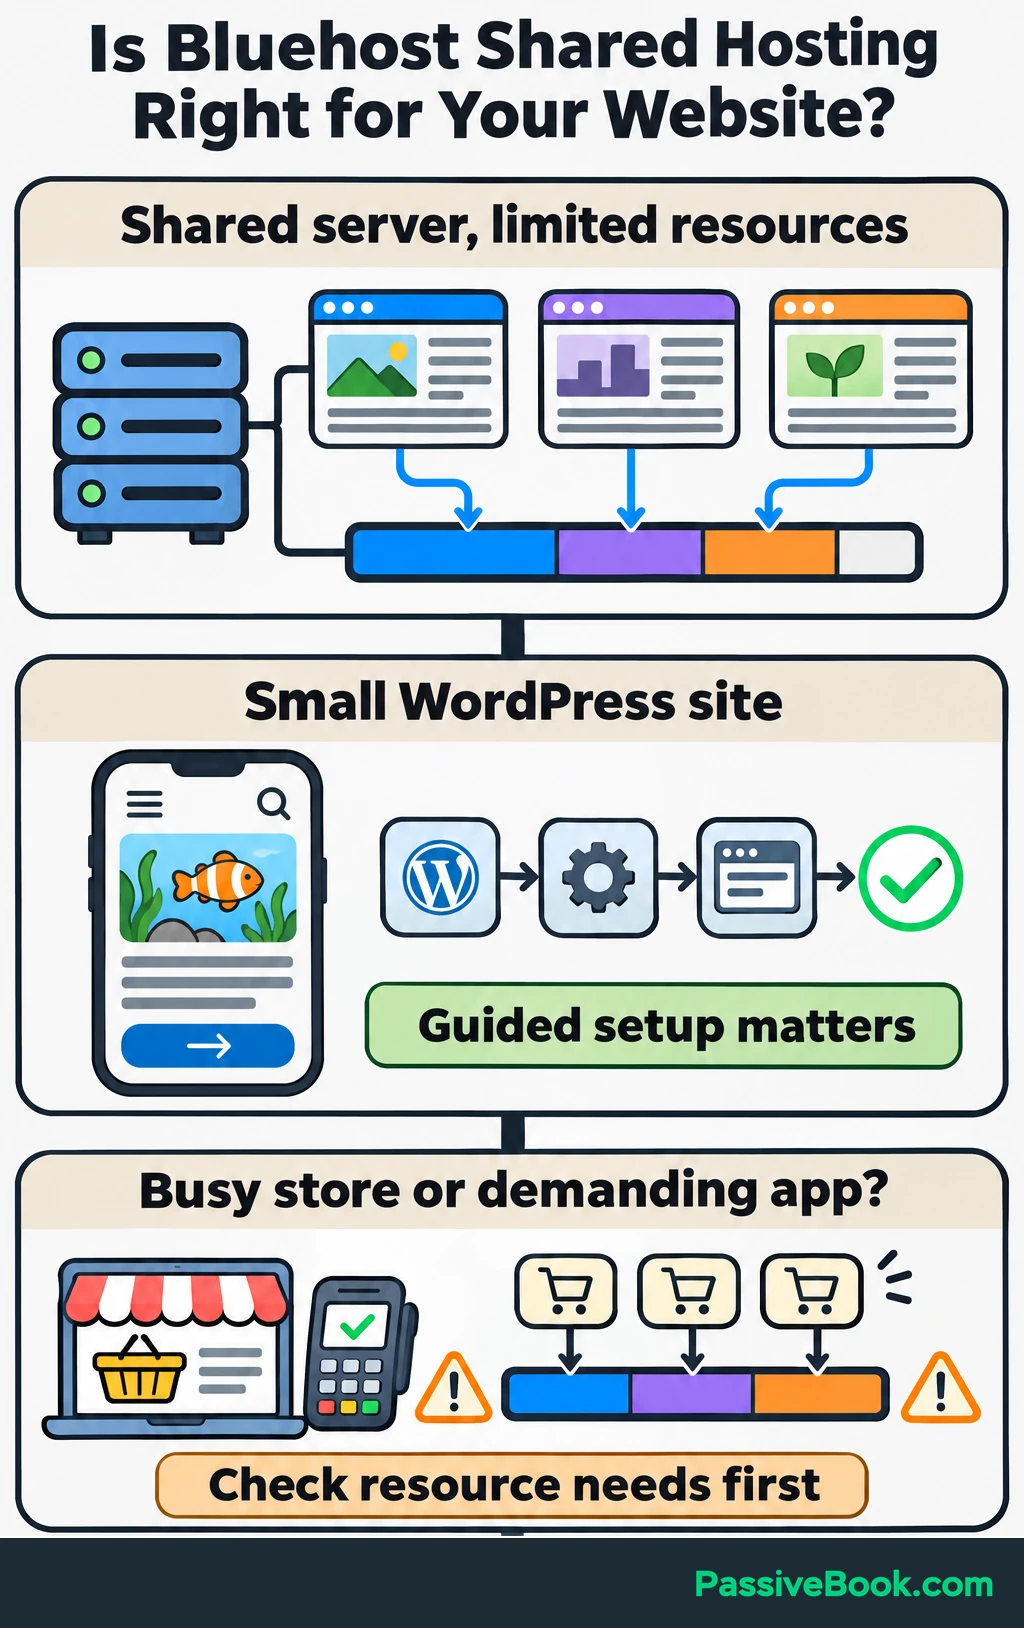
Bluehost’s Starter plan includes chat support and free SSL, which enables an encrypted connection. Business adds phone support and more storage. Check those differences in the plan comparison before choosing.
There are tradeoffs. Shared hosting means websites share server resources, so capacity is limited. Storage also has a ceiling, renewal prices are higher than introductory offers, and optional services can add recurring charges. You still need to manage your content, plugins, and recovery arrangements.
My recommendation is narrow: Bluehost is worth considering for a small WordPress site when guided setup matters more to you than getting the lowest ongoing price. I wouldn’t choose an entry-level shared plan for a demanding application or a busy store without checking its needs first.
Bluehost’s standard hosting is paid. Free WordPress software and a first-year domain offer do not give you ongoing free hosting.
Calculate the Initial Payment and Renewal Costs
Work out what leaves your account, rather than comparing the large monthly figures on sales pages.
Count the hosting rate multiplied by the months billed upfront, then add domain charges, selected extras, and taxes.
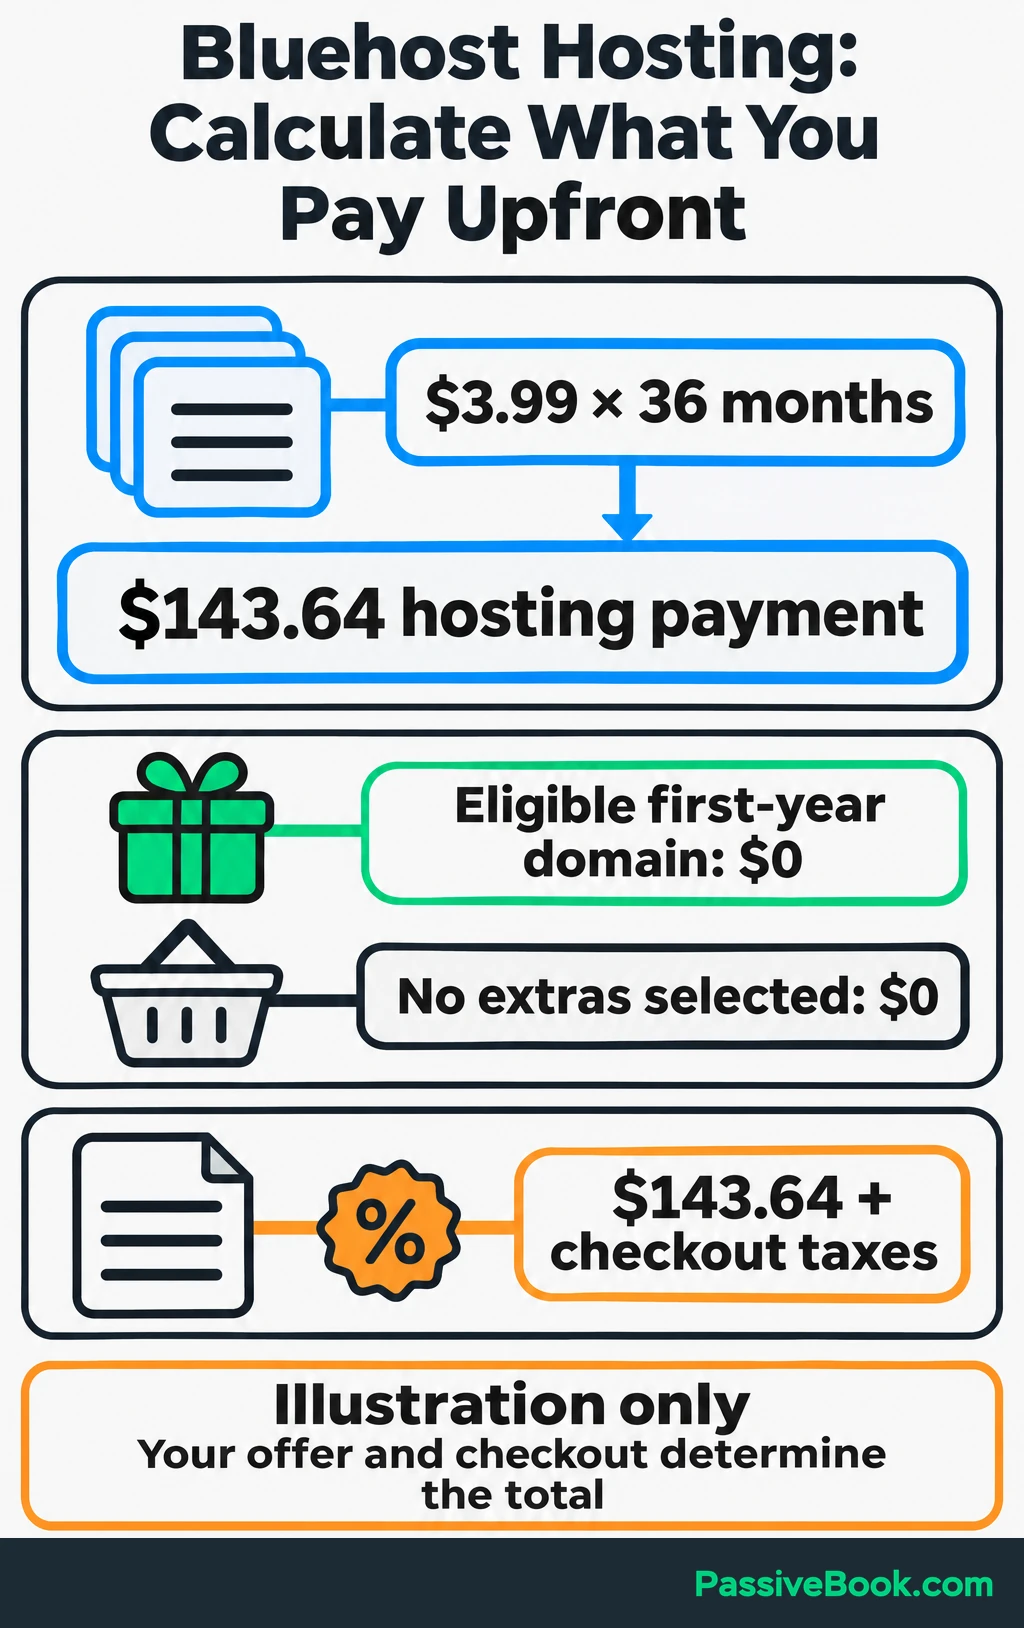
The table below uses Bluehost’s advertised USD Starter offer and its published rates. It assumes an eligible first-year domain offer and no optional extras. Your country, currency, promotion, and checkout terms determine your actual payment.
| Purchase Item | Billed Period | Payment Today | Renewal Amount | Next Charge Date |
|---|---|---|---|---|
| Starter hosting | 36 months | $3.99 × 36 = $143.64 | $9.99 × 36 = $359.64 for another 36-month term | Not available in this illustration; copy the scheduled charge date from your account |
Eligible standard .com domain | First year | $0 with the qualifying offer | Listed at $23.99 per year; privacy is separate | Copy the scheduled renewal charge date; it may precede expiry |
| Optional extras | None selected | $0 | $0 unless you add a subscription | No extra charge scheduled in this example |
| Taxes | Applied to relevant purchases | Calculated at checkout | Calculated on future taxable charges | Charged with the relevant purchase or renewal |
The hosting renewal example uses the 36-month rate. Other terms have different rates, as shown in Bluehost’s renewal price list.
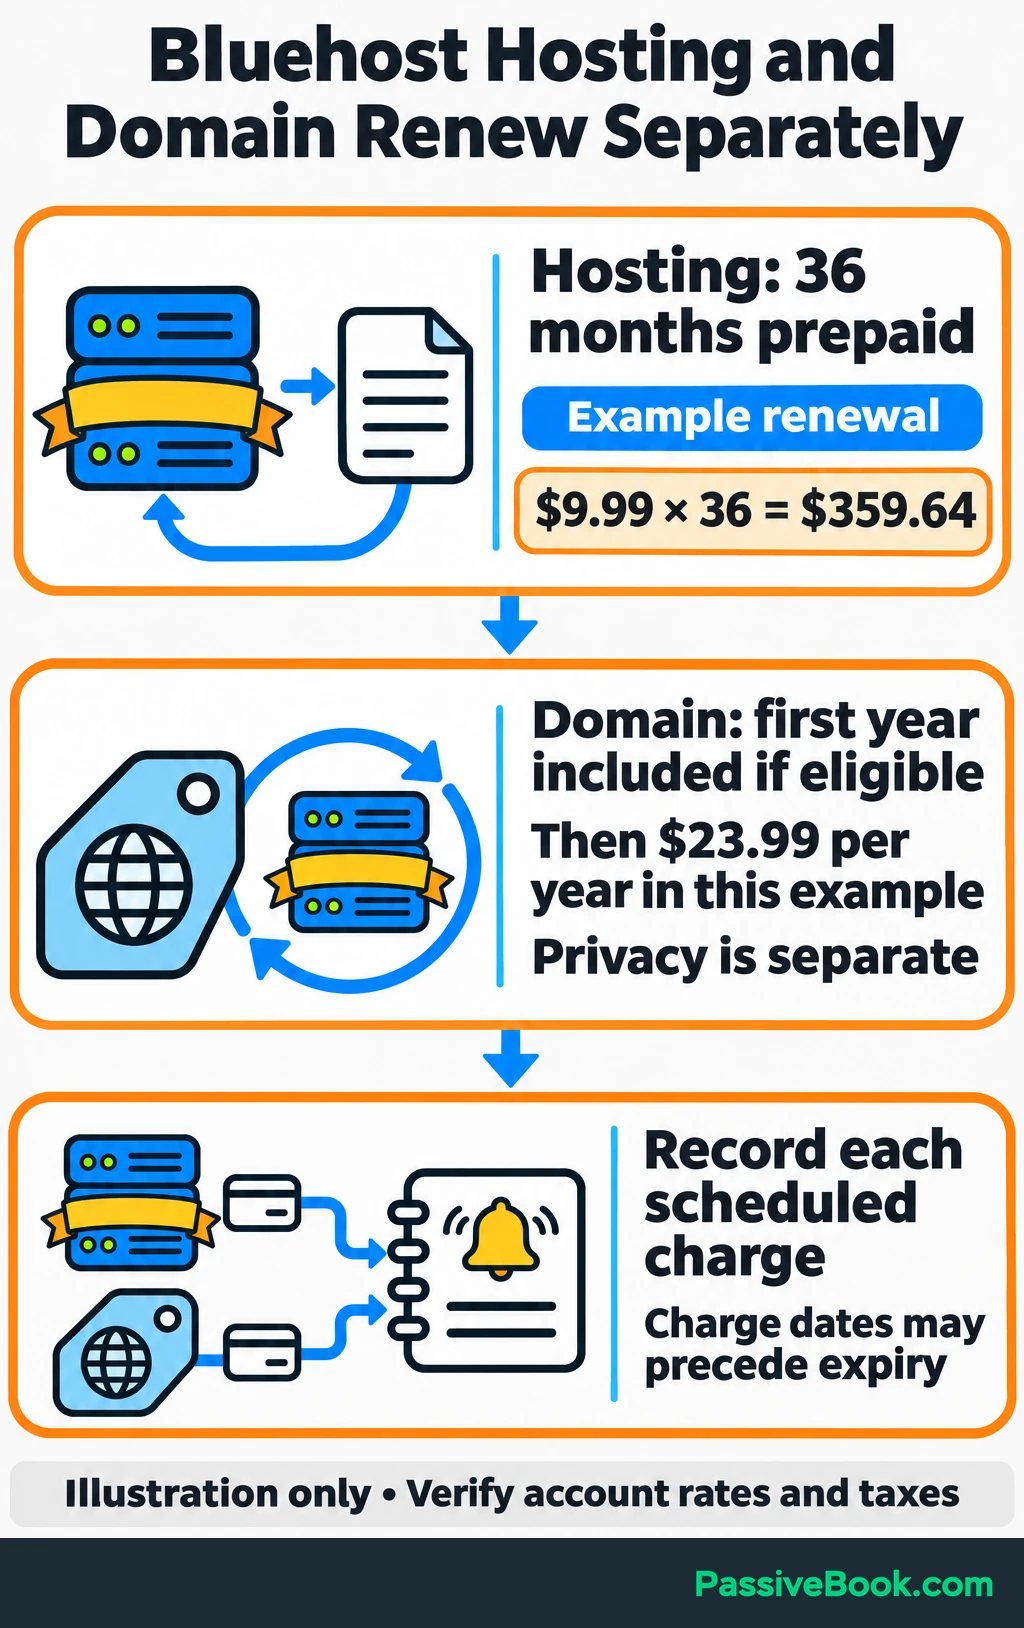
The domain renews separately, including during prepaid hosting. Bluehost’s first-year offer applies to eligible non-premium domains with qualifying 12- or 36-month hosting purchases, and it must be redeemed within 90 days. See its domain prices and offer conditions.
I would choose a shorter available term if a longer commitment strained my budget. A lower monthly equivalent isn’t much comfort when the full payment leaves you short.
If you’re deciding between billing terms, the budget worksheet can show how each one affects your available cash. It also accounts for domain and extra-service charges that can arrive before your prepaid hosting runs out.

Free Business Cash Planner


2. Register Your Domain and Purchase Hosting
Choose a name you can say aloud without explaining the spelling. Avoid adding numbers or hyphens just to rescue an unavailable name.
For Small Tank Notes, you might check a matching .com address. That is a naming example, not a claim that the domain is available. Confirm availability and read the spelling carefully before paying.
You can register a new domain during signup or use one you already own. An existing domain does not need to move to Bluehost just because your website will live there.
At checkout, review each item separately:
- Confirm the hosting plan, term, full payment, and renewal rate.
- Check that any eligible domain offer has been applied.
- Use the included SSL for this basic website.
- Decide separately whether you want domain privacy or a business-email subscription.
- Remove extras you cannot explain a need for.
I would decline the optional Professional Email trial unless I intended to use it. Bluehost’s offer says the one-month trial becomes a paid subscription unless canceled before renewal.
Read the refund terms before paying, too. Eligible new hosting purchases have a 30-day money-back window, but domains and many additional services are excluded. A promotional domain fee can also be deducted from your refund. Monthly hosting terms are excluded from the guarantee. These distinctions appear in Bluehost’s refund policy.
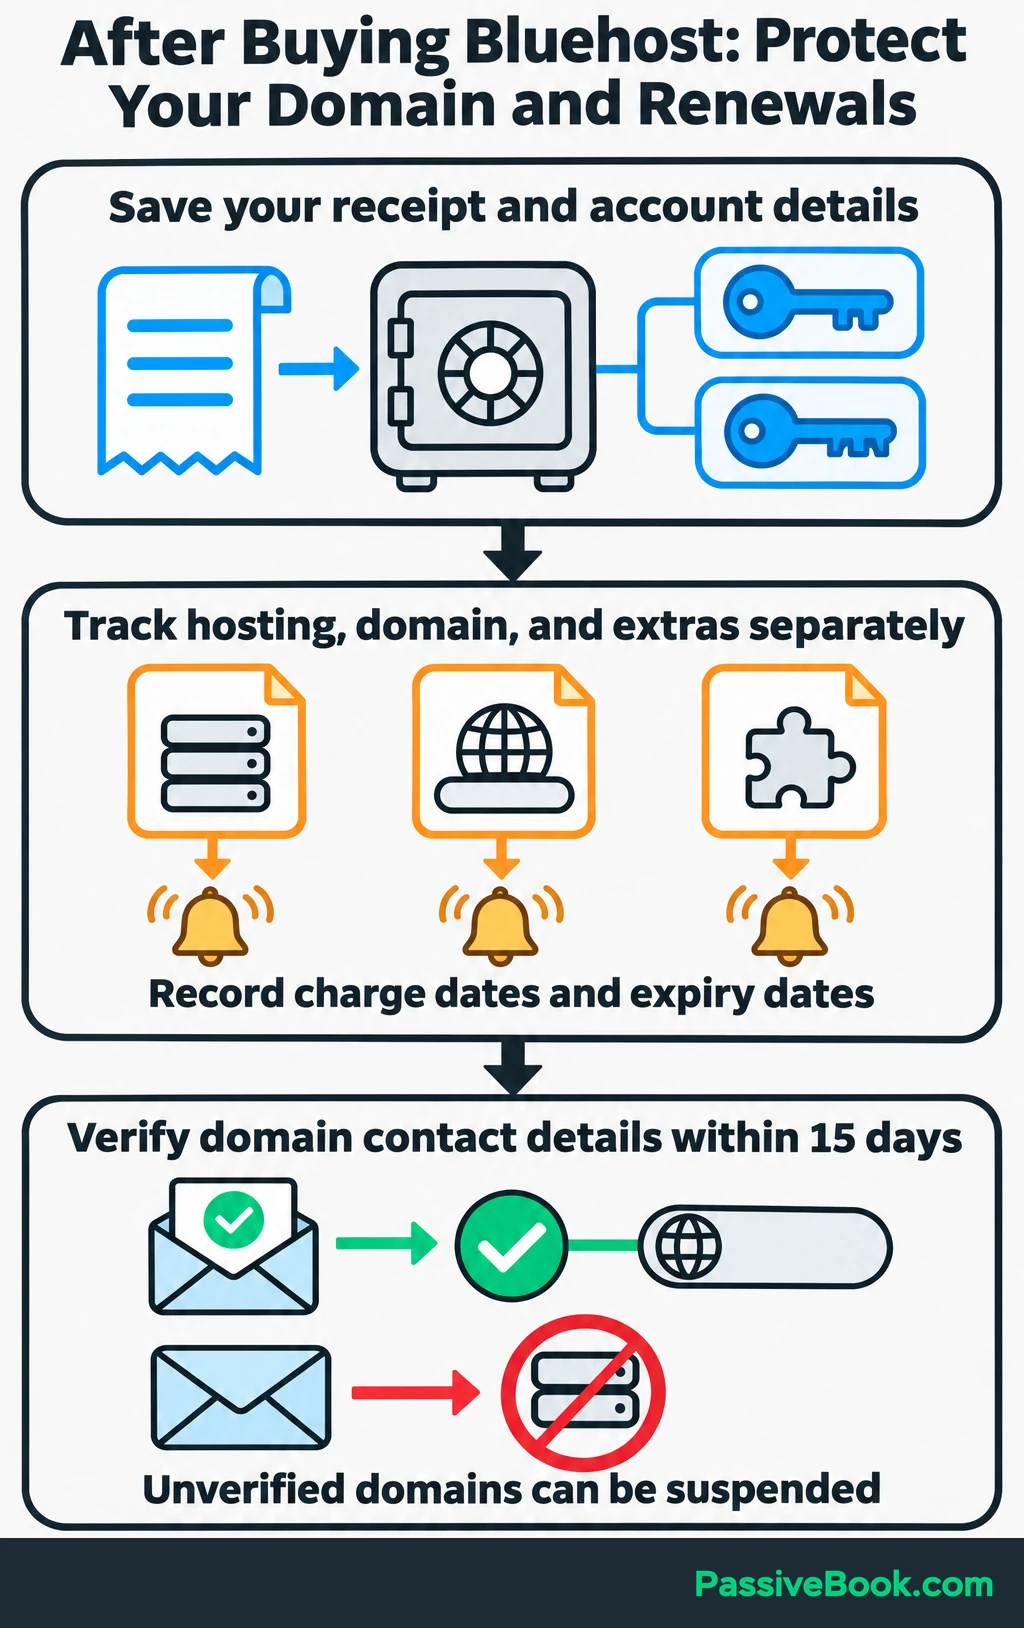
Create your account with an email address you already control and a unique password. Save the receipt, then review the Renewal Center for hosting, domain, and optional-service renewals. Record charge dates as well as expiry dates.
Finally, complete the domain-contact verification email promptly. Bluehost warns that failing to verify within 15 days can suspend the domain until verification is complete. That requirement is explained in its domain-contact guidance.
3. Create Your WordPress Website
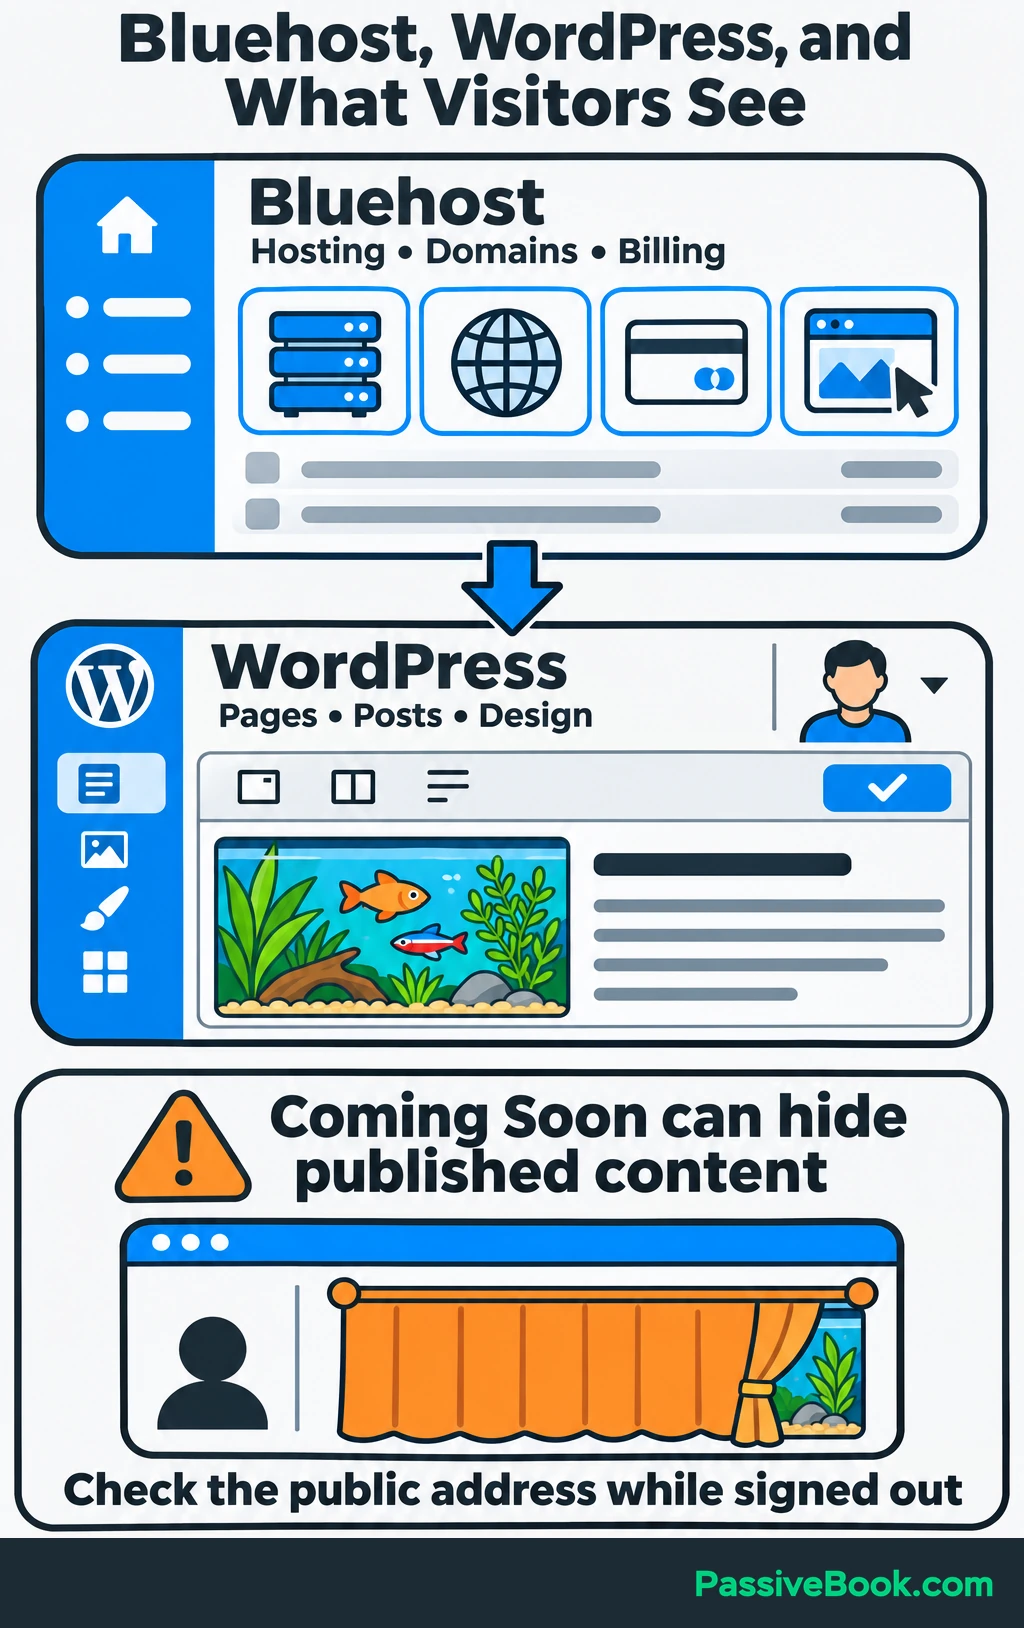
You’ll use two main dashboards. Bluehost handles hosting, domain connections, and billing. WordPress handles the website itself.
Start by checking whether onboarding has already created a WordPress site. Open that installation if it exists.
If you still need to create one:
- Open Websites in your Bluehost account.
- Choose Add Website, then select WordPress.
- Wait for installation to finish.
- Choose AI Site Creator to generate a starter design for your new website.
- Enter your site title, description, and website type.
- Preview a simple design and select it to continue.
For the description, you could enter:
Small Tank Notes publishes practical freshwater-aquarium care articles. Include Home, About, Articles, and Contact pages.
Treat the generated layout as a starting point. Replace its text and images before launch, and check that the requested pages actually exist.
Open WordPress administration from Bluehost’s site controls. In your WordPress user profile, confirm your administrator username, set a separate WordPress password, and check the recovery email. Save these details in a password manager.
Once your domain works, adding /wp-admin to the end of its address gives you another route to the WordPress login.
While building, enable Bluehost’s built-in Coming Soon page. In the website’s management area, find Advanced and turn on the Coming Soon setting. Open the public address while signed out to confirm visitors see the placeholder.
That signed-out check matters because your administrator view can show the working site while visitors see something else.
4. Connect Your Domain and Secure the Connection
Point the Domain to the Correct Website
Two things need to agree: Bluehost must connect the domain to your intended WordPress installation, and the domain’s DNS records must send visitors there.
DNS is the system that directs a domain name to the services behind it.
If you purchased the domain and hosting together, Bluehost normally assigns the domain to the default site. Confirm that this is the installation you just created.
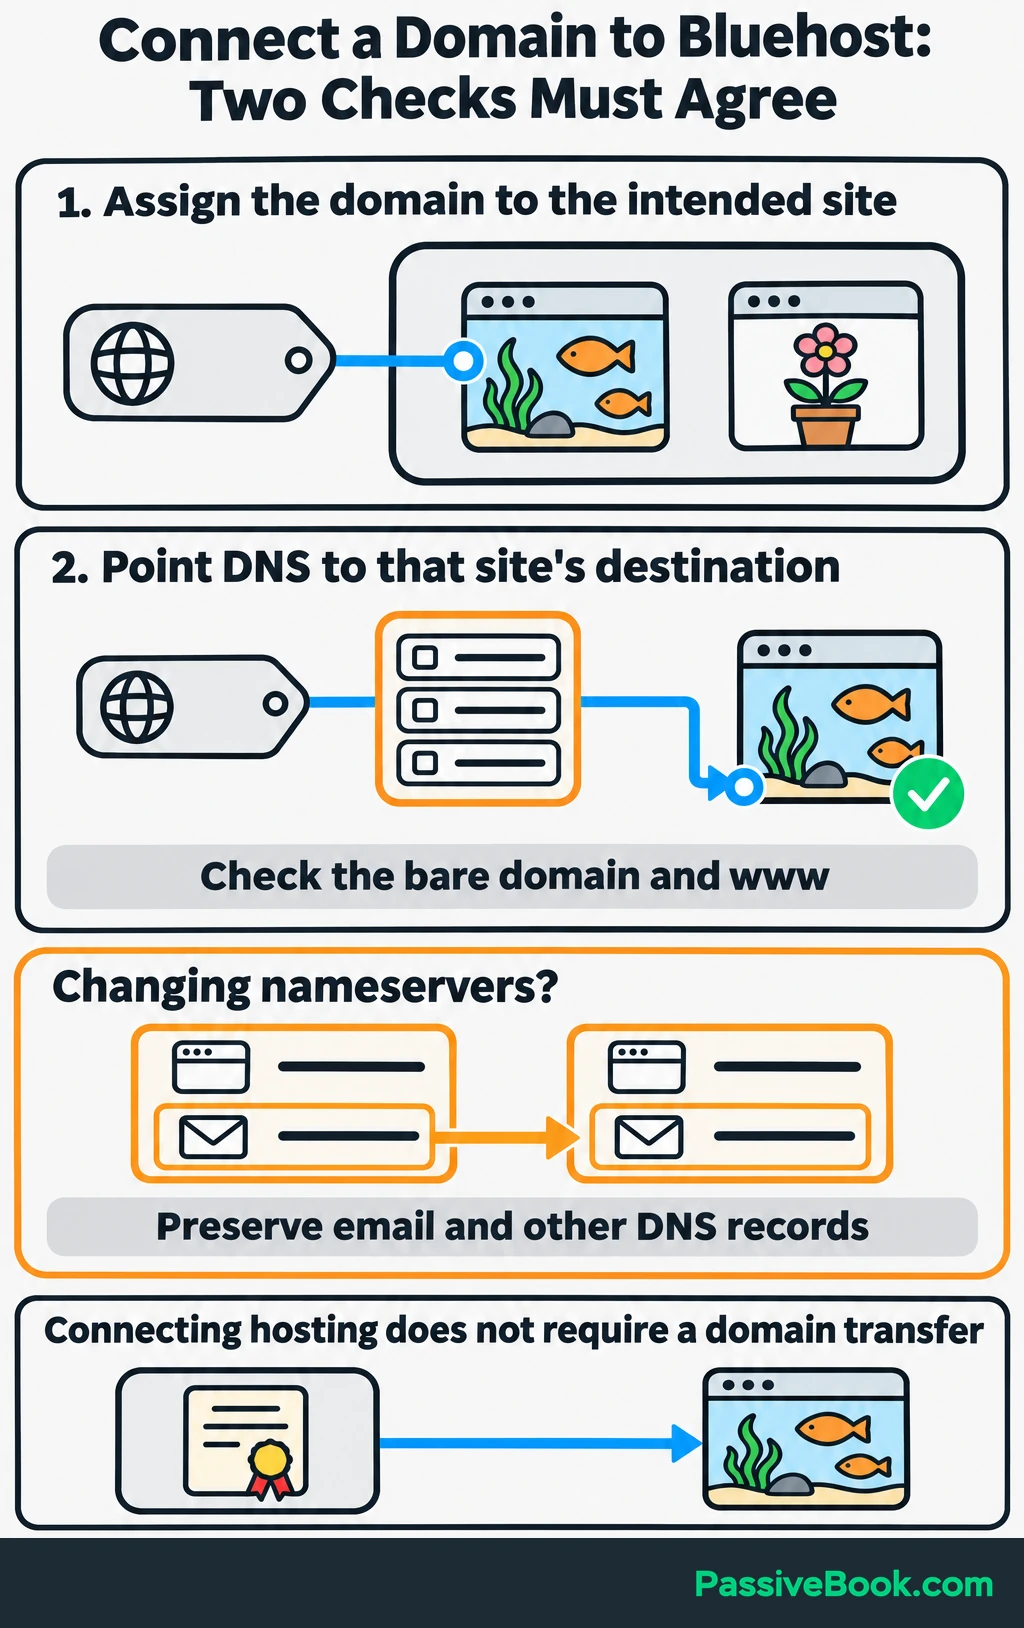
For an unconnected domain, open the intended website under Websites and choose Manage Site. Use Connect Domain in its overview, enter the address, and complete the connection prompts. Add the domain to this existing installation rather than creating another website.
For a domain registered elsewhere, choose the approach that fits your situation:
- For a new domain without other services, change its nameservers at the registrar to the values Bluehost supplies. Nameservers determine which provider manages the domain’s DNS.
- If you already use another DNS provider, you can keep it and update the website records to Bluehost’s assigned destination. Use Bluehost’s instructions for both the bare domain and
www.
Before changing nameservers on an established domain, copy its existing DNS records and make sure the new provider has the records needed for email and other services. Otherwise, getting the website online could interrupt your inbox.
Transferring domain registration is a separate choice. You don’t need to do it just to connect the website.
Allow time for DNS changes to appear across networks, and test both versions of the address. Record when you changed the records before making another change; repeated edits make troubleshooting harder.
Activate SSL and Check HTTPS
SSL enables an encrypted connection between a visitor’s browser and your website. Bluehost includes free Let’s Encrypt SSL, and the domain needs to point to the hosting account for activation.
Check the certificate for your custom domain in the website’s Security area. If it is inactive, use the certificate controls to activate it. Bluehost’s SSL requirements also cover domains whose DNS is managed elsewhere.
Then open the address beginning with https://. The browser should report a secure connection without certificate warnings. Check that images and other page content load securely, too.
Also test the http:// address. It should redirect to HTTPS. A certificate alone does not enforce that redirect, so ask Bluehost support to configure it if needed.
For Small Tank Notes, the check is simple: the custom address opens the aquarium website securely, and an HTTP visit ends at its HTTPS address.
5. Build Your Website in WordPress
Establish a Backup Before Substantial Changes
Check what you can recover before importing designs or making substantial changes.
In Bluehost’s backup area, look for a completed backup with a usable date. Its Basic Weekly Backup keeps one restore point, and a newer backup overwrites the previous one. That makes it useful, but it gives you little history to choose from. See Bluehost’s backup coverage.
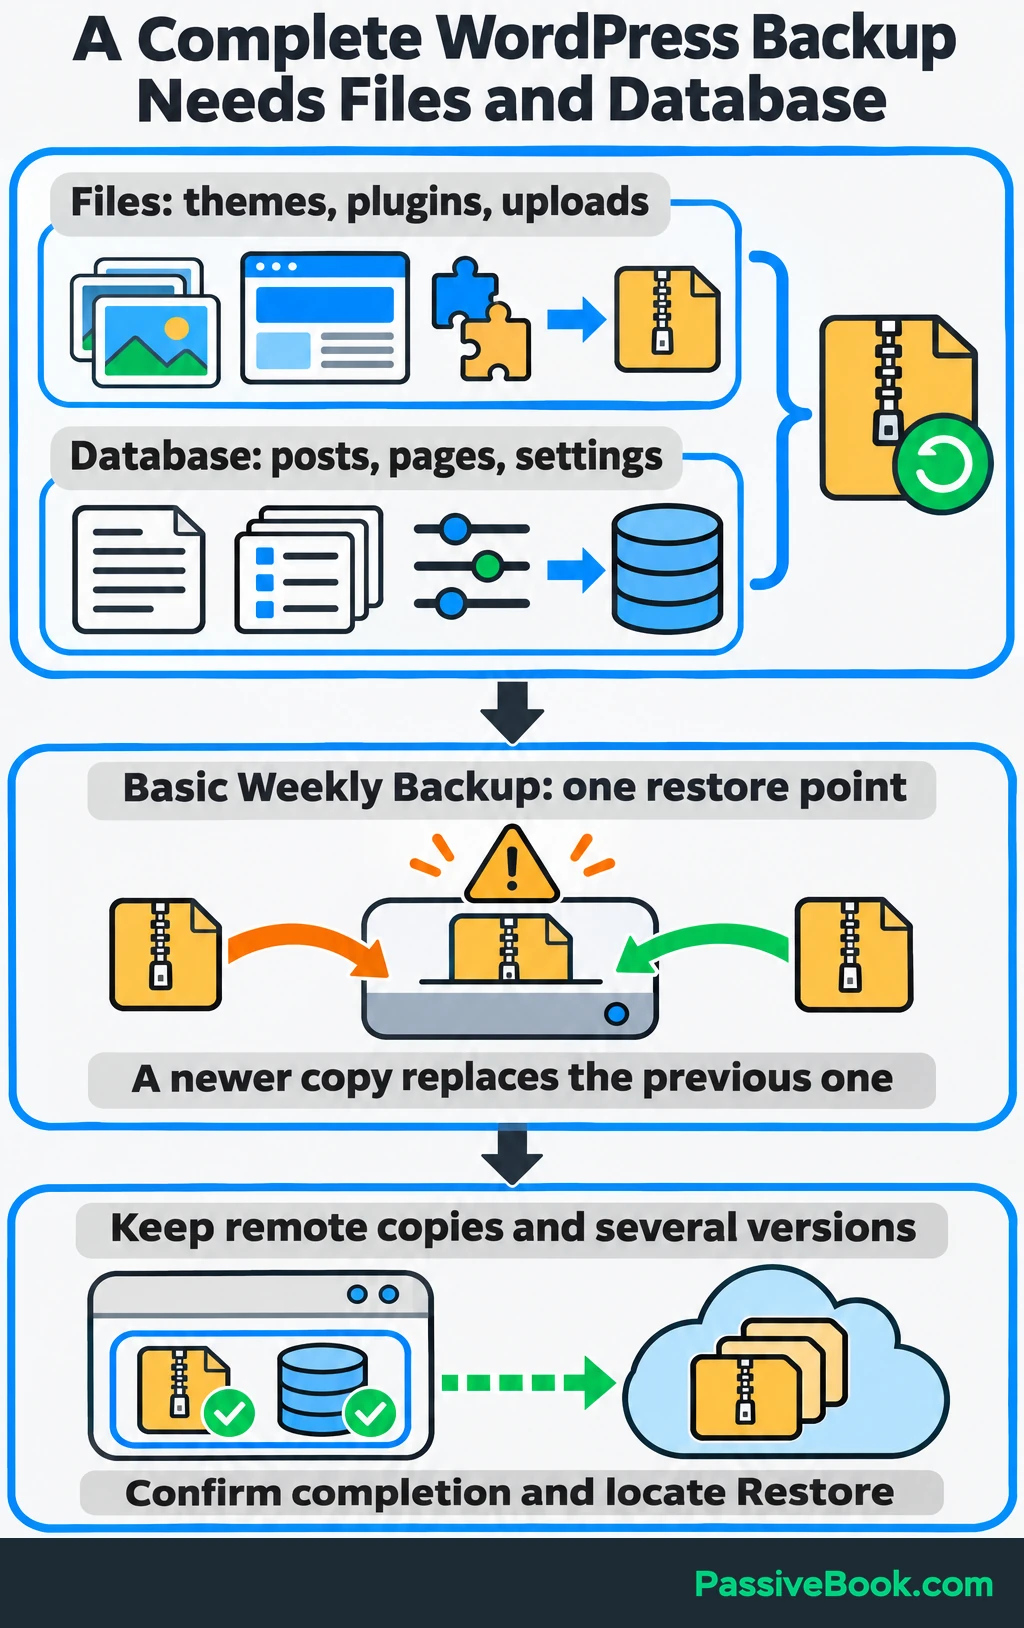
I would also keep backups outside the hosting account.
One option is UpdraftPlus, a WordPress backup plugin that can send backups to Google Drive. Install and activate it from WordPress’s plugin screen, then:
- Open its settings and choose Google Drive as remote storage.
- Save the settings and complete the Google authorization.
- Run Backup Now with both files and the database included.
- Confirm that the backup finishes and the saved files appear in Drive.
- Locate the dated backup and its Restore control so you know where recovery starts.
The files contain items such as themes, plugins, and uploaded images. The database contains your posts, pages, and settings. You need both to recover the site’s content and appearance.
Schedule backups around how much recent work you can afford to lose. While actively building, I would back up daily and keep several versions. Take an extra backup before a major design change, and check that scheduled copies continue arriving.
Set the Basics and Customize One Theme
Before publishing links, confirm these WordPress settings:
- The site title uses your intended name.
- The administrator email reaches an inbox you monitor.
- The time zone matches your publishing schedule.
- The permalink format uses Post name for readable article addresses.
Permalinks are the permanent addresses of your pages and posts. Choose the structure early so you don’t create unnecessary link changes later.
Keep the generated design if it suits the site. Otherwise, open the theme screen under Appearance and install a free theme such as GeneratePress, my preferred starting point. Use WordPress’s block editor for the initial content.
On one of my WordPress sites, I spent an evening adjusting header spacing before noticing that the Contact page still contained demo text. That was an unhelpful order of work. Now I get the useful pages working before polishing the edges.
Choose readable text, a plain background, and a small set of colors. A text version of “Small Tank Notes” is enough for the header. A logo can wait.
Preview the layout at phone width. Check the menu, headings, images, and buttons without assuming the desktop version tells the whole story.
Save a backup before importing a design that could replace pages or settings.
Create Your Essential Pages and First Article
Use pages for lasting information and posts for articles in your blog feed.
Open Pages and check which pages the setup created. Edit an existing page, or choose Add New if it is missing. Enter or update its title, then use the plus button to add paragraph, heading, image, or button blocks. Save your changes and preview the page before publishing.
Build the site around a few useful destinations:
| Page | What It Should Do | Small Tank Notes Example |
|---|---|---|
| Home | Explain the site and give visitors somewhere useful to go | “Practical freshwater-aquarium care,” with a link to “How to Organize Aquarium Maintenance Supplies” |
| About | Explain the purpose and who creates the content | An author introduction beginning, “I started Small Tank Notes to keep practical aquarium-care notes in one place.” |
| Contact | Provide a working way to reach you | “Send me a question or correction using the form below,” above a tested contact form |
| Articles | Display published posts | The published “How to Organize Aquarium Maintenance Supplies” post |
On Home, write a clear introduction and link to your most useful starting content. A button might say:
Read the aquarium care guides
Give that button a real destination. A decorative button that goes nowhere is just a rectangle with ambitions.
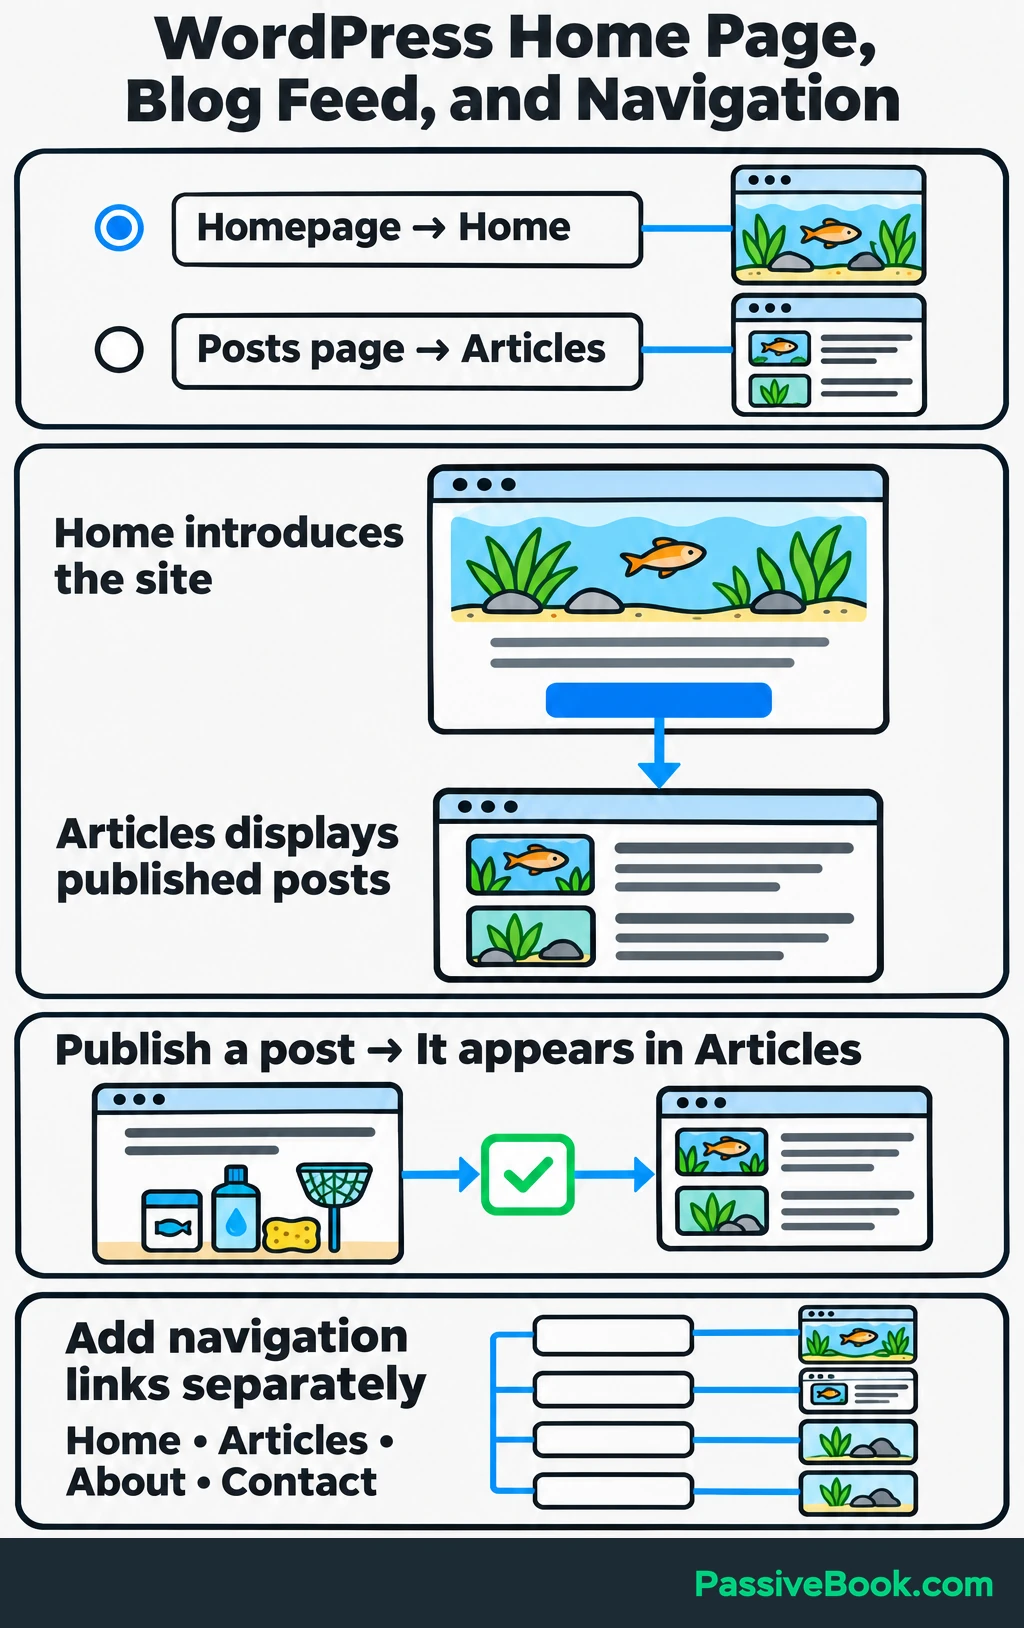
Use an empty Articles page for the blog feed, and publish both Home and Articles while Coming Soon remains enabled. To make Home the front page and Articles the blog feed, open WordPress’s Reading settings. Choose a static homepage, assign Home as the homepage, and assign Articles as the posts page. Save the settings.
Next, add Home, Articles, About, and Contact to your navigation. With GeneratePress, use the menu controls under Appearance and assign the menu to the main navigation location. If your chosen theme uses the Site Editor, edit its Navigation block instead.
Now create your first article through Posts and Add New. For Small Tank Notes, that could be “How to Organize Aquarium Maintenance Supplies.”
Give it a descriptive title, useful section headings, and images sized for the page. Preview the post, check its links, and publish it when ready. Confirm that it appears on Articles.
Before moving on:
- Replace generated claims, placeholder text, and images you won’t use.
- Remove unused demo pages and sample posts.
- Check that the navigation leads to the finished pages.
- Add a privacy notice that reflects the information your forms and services collect.
WordPress provides privacy-policy starter text in its Privacy settings. Edit it to match your actual tools and practices, then link the finished notice in the footer. Publishing untouched starter text does not make it accurate.
Add Only the Functions Your Site Needs
Plugins add functions to WordPress. Start by reviewing the preinstalled ones and identifying what each does.
Keep the functions you need and remove unused plugins. Avoid installing several tools for the same job.
For Small Tank Notes, the initial needs are modest: backups and a working contact method. You can add other functions when there is a reason to use them.
If you want a form, Fluent Forms is one option. Install it, create a simple contact form, and place it on Contact using its block. Set notifications to an inbox you monitor, submit a test message, and confirm arrival.
A success message on the website proves that the form accepted the submission. It does not prove the email reached you. If the test email does not arrive, check spam and the form’s notification address. Until delivery works, give visitors a monitored email address on Contact.
Use Bluehost’s built-in caching initially. Caching keeps reusable copies of content so the server does less repeated work. Bluehost advises against adding separate caching plugins because they can conflict with its managed caching, as explained in its caching guidance.
I would skip a separate caching purchase during setup and spend that time checking the public pages.
6. Test and Launch Your Website
Start with the route a visitor will take. Open Home, follow a link to an article, return through the menu, and use Contact.
Preview Home, About, Contact, Articles, and your first post on both a phone and a computer. Check that:
- Text is readable and images fit the screen.
- Menus, links, and buttons reach the intended destinations.
- The article feed displays your published post.
- Your contact method works and messages reach you.
Check basic accessibility, too. Use the keyboard’s Tab key to move through links and form controls, and make sure you can see which item has focus. Check text contrast, clear form labels, and useful alternative text for meaningful images. The W3C’s basic accessibility checks explain what to look for.
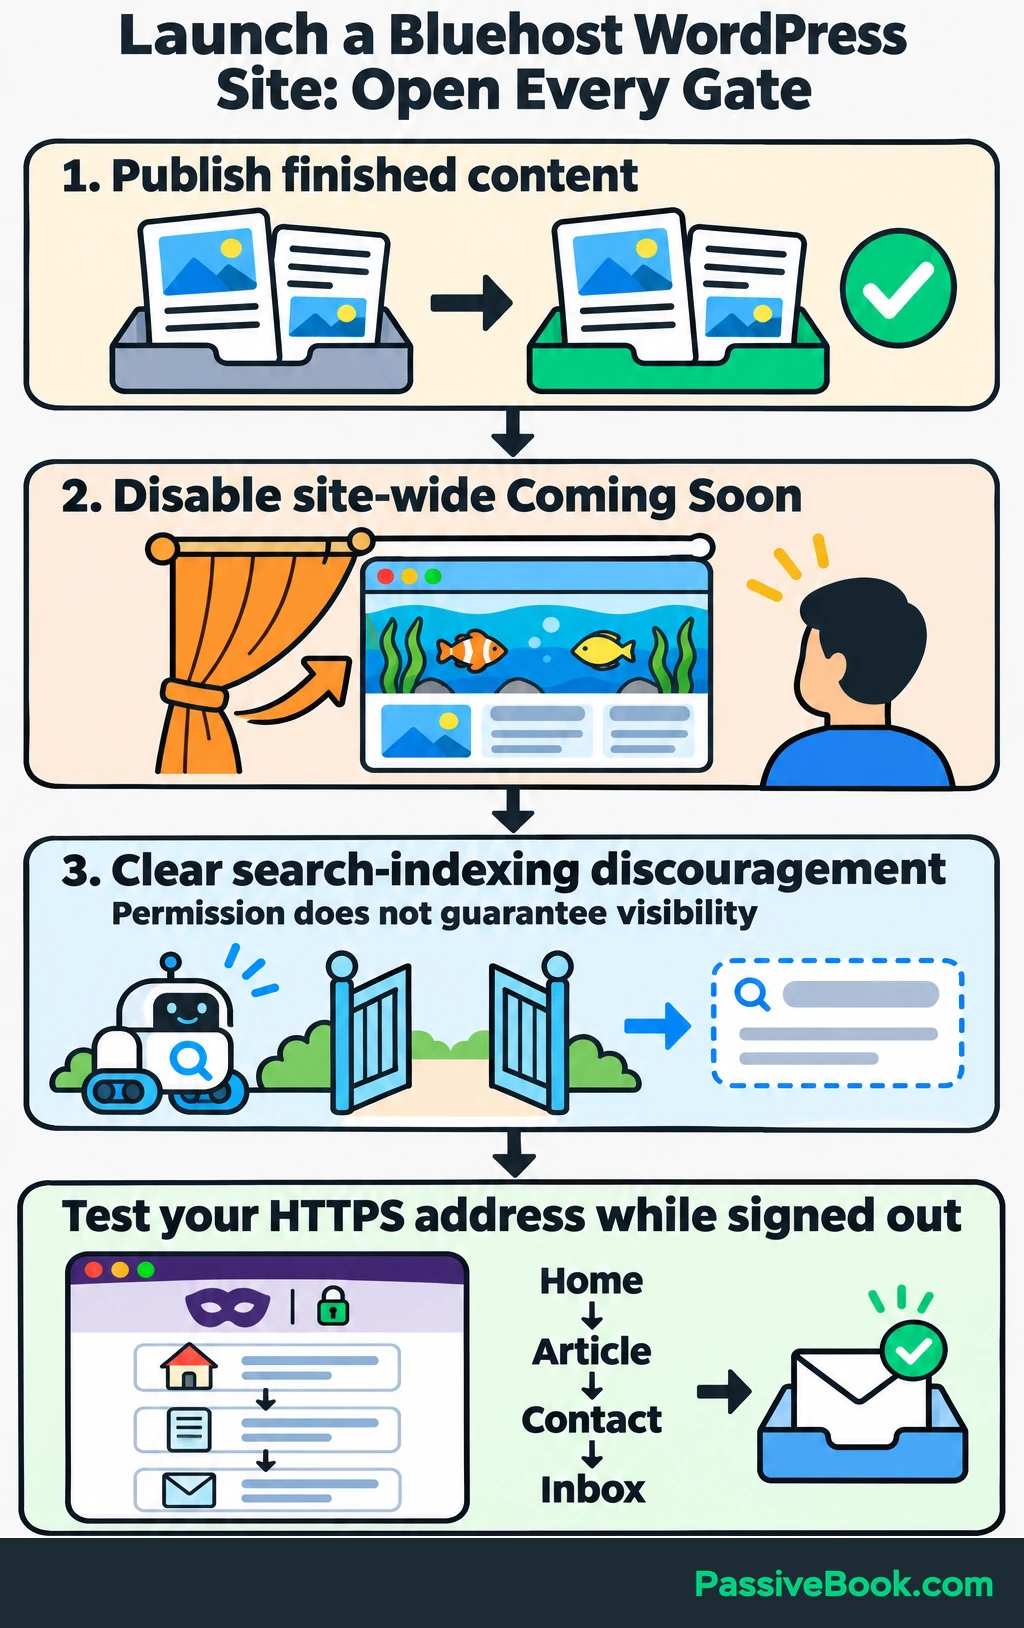
When the content is ready, publish the finished pages and posts, then disable Bluehost’s site-wide Coming Soon setting. Publishing an individual page does not remove that placeholder.
In WordPress’s Reading settings, clear “Discourage search engines from indexing this site” and save. This permits search discovery; it does not guarantee immediate visibility in search results.
Now open your custom HTTPS address in a private browser window while signed out. Repeat the visitor’s route from Home to an article and Contact.
Launch is complete when the public domain displays the intended website with working HTTPS, readable content, usable navigation, and a functioning contact method.
Save a complete launch backup. Set a recurring reminder to check updates and backup completion, plus separate reminders before hosting, domain, and optional-service charges.
Troubleshoot Common Bluehost Setup Problems
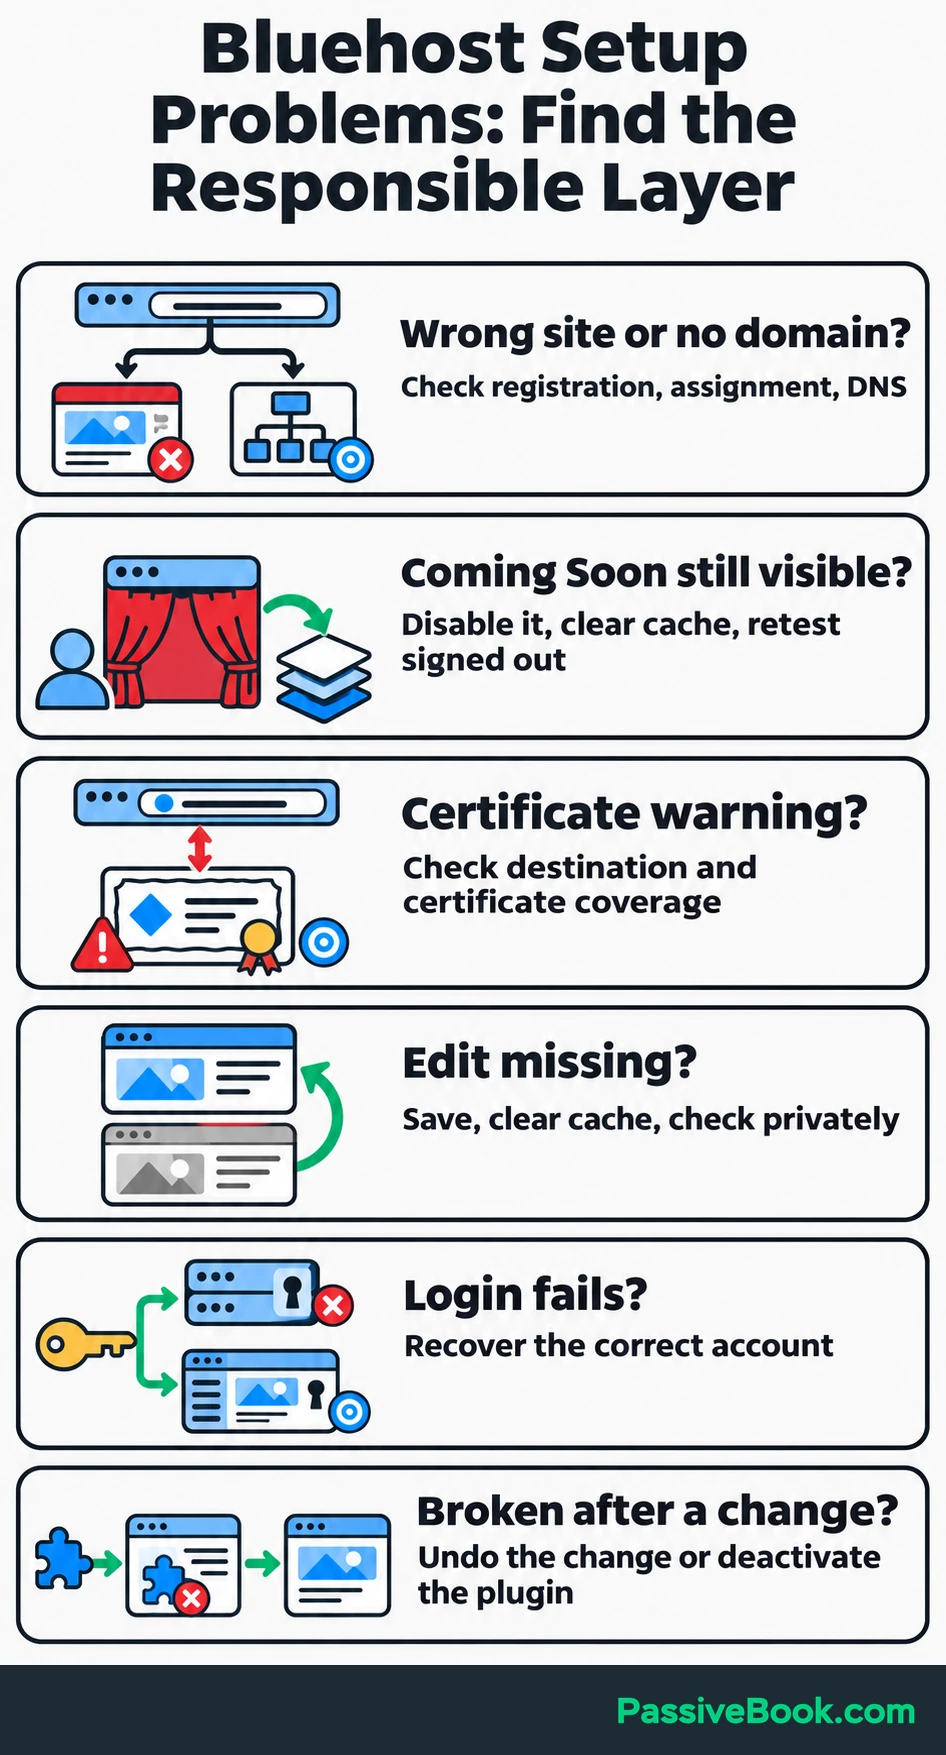
When something fails, check the part responsible before changing unrelated settings.
| Symptom | First Check | Next Action |
|---|---|---|
| The domain fails or shows the wrong website | Check spelling, registration status, contact verification, website assignment, and DNS destination | Correct the mismatch. Record the last DNS change time before editing records again |
| Visitors still see Coming Soon | Check the site-wide Coming Soon setting | Disable it, clear Bluehost’s cache, and retest while signed out |
| The browser shows a certificate warning | Check that the domain points to the intended site and its certificate is active | Give support the exact domain and warning; ask them to check certificate coverage |
| An edit does not appear | Confirm that you saved or published the change | Clear the hosting cache and reload in a private browser window |
| WordPress login fails | Identify whether you are using the Bluehost account login or WordPress administrator login | Use the password-recovery process for that account |
| The site breaks after a theme or plugin change | Identify the most recent change | Undo it or deactivate the affected plugin. Ask support for help if administration is inaccessible |
Before restoring a backup, inspect its date and preserve newer work where possible. A restoration replaces the selected current files or database content with the saved version.
When contacting support, provide the affected URL, exact error, recent changes, and a screenshot. Keep passwords and recovery codes private.
What Next?
Write down your full checkout payment, renewal amounts, and expected charge dates before buying. If you have already purchased hosting, open your public HTTPS address while signed out and complete the launch checks.
Use the social buttons to share this walkthrough when a website discussion gets stuck at domains, billing, or the launch button.
Which setup check would give you the most confidence in sharing your new website? Leave your answer in the comments, and bring any other questions there too.
Share this post with your friends & followers: