Your product is ready, but paying to put it in front of strangers feels different from posting about it. A few clicks would be encouraging. A card charge with no orders would be less charming.
The hard part is choosing settings that reach likely buyers and knowing whether their response justifies another card charge. This guide follows a shop selling personalized dog ID tags from account access through launch and purchase reporting, so you can limit the first test’s spending and judge whether its orders justify another test.
Choose the Result You Want From X Ads
Choose one result before opening the campaign builder. Do you want purchases, qualified inquiries, website visits, or exposure?
Then check whether relevant conversations exist on X. Search for your product category and the problems it solves. Read the replies, too. For the tag shop, discussions about pet identification and choosing collar accessories offer more useful context than a popular dog meme.
This check won’t prove that ads will sell your product, but it can help you avoid funding a test with no clear audience.
Match your result to the campaign objective:
| Your goal | Objective | What to measure |
|---|---|---|
| Completed purchases or website lead forms | Sales | Purchases or valid submitted leads, plus their cost |
| Visits to an article or offer page | Website traffic | Site visits or link clicks, depending on the selected goal |
| Interactions with a post | Engagements | Relevant interactions and cost per engagement |
| Exposure to more people | Reach | People reached, impressions, and spending |
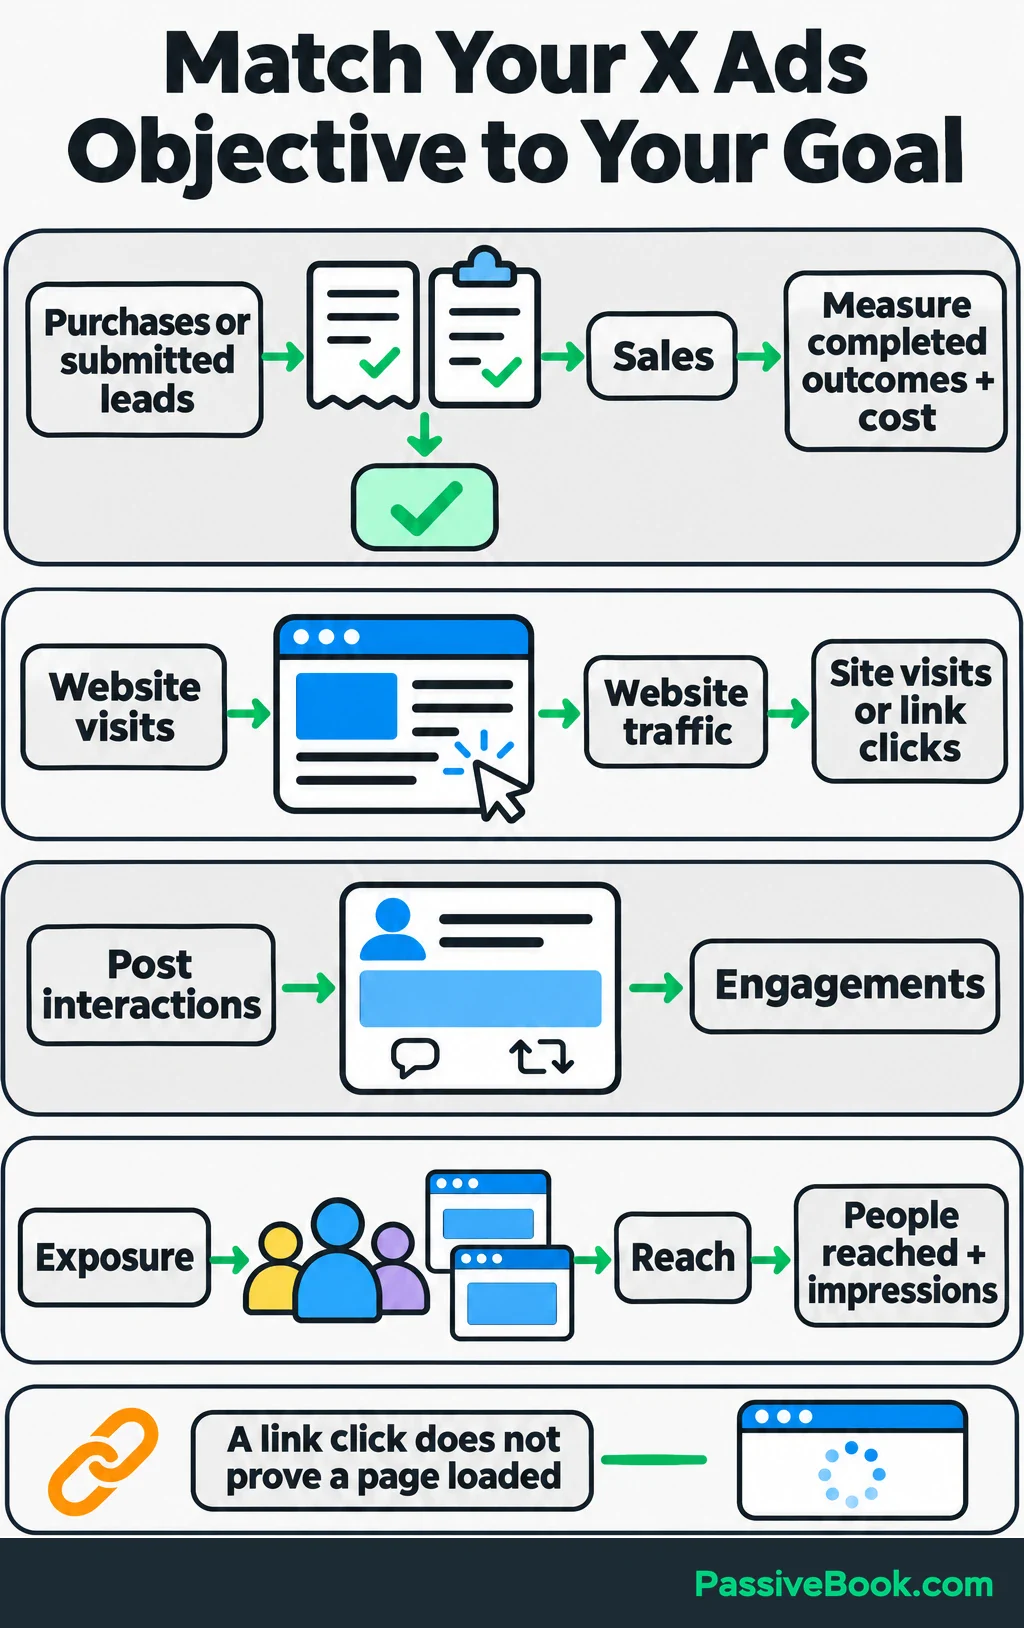
Sales requires a configured conversion event through the X Pixel, Conversion API, or both. The Pixel sends website activity to X through a website tag; the Conversion API sends it directly from your server. X’s Sales requirements.
Within Website traffic, Site Visits requires the X Pixel. Link clicks optimizes for clicks on your ad’s link, which doesn’t establish that the destination loaded. X’s website traffic goals.
For the tag shop, I would choose Sales and measure completed purchases. Cheap clicks aren’t the goal when you need orders.
Around 2022, I spent six months chasing Instagram and Twitter/X followers for a side niche. The audience numbers gave me things to check, but the bank account stayed around $47. That was organic social activity, separate from paid advertising and Passive Book. It taught me to connect attention to a business outcome before spending more time—or money—getting it.
The shop, ad copy, prices, budgets, and results below are illustrations.
Create or Access an Eligible X Ads Account
Start with the account whose handle should appear on your ads. It should be active and public, with recognizable branding, static profile and header images, and a working website link in its bio. That link must represent the business and open without a login gate.
Check that your country supports self-service advertising and complete the required verification. X directs businesses and government entities to organization verification and individuals to eligible subscription verification programs. Check the applicable program and its current cost before committing to a test. Verification is an expense separate from ad delivery. X’s advertiser eligibility requirements.
To create or access the advertising account:
- Sign in to the correct X handle.
- Open X Ads Manager.
- Complete account setup if prompted, or open your existing advertising account.
- Confirm the country, billing currency, and reporting time zone carefully.
- Add an accepted credit or debit card under Billing and confirm that its status becomes Active.
Country, currency, and time zone cannot be changed on the existing advertising account, so check those choices before finishing setup. X’s account-setting restrictions.
Also check that your account, offer, and destination meet X’s advertising policies. If your category requires authorization, complete it before submitting ads.
Prepare Your Destination and Tracking
Make the Landing Page Complete the Advertised Action
Send people straight to the advertised product or form. Don’t pay for a visit that makes them search again.
For the tag shop, use the personalized tag’s product page. It should show:
- Readable engraving examples.
- The price and available sizes.
- What buyers can personalize.
- Delivery information and shipping charges.
- A clear route through customization and checkout.
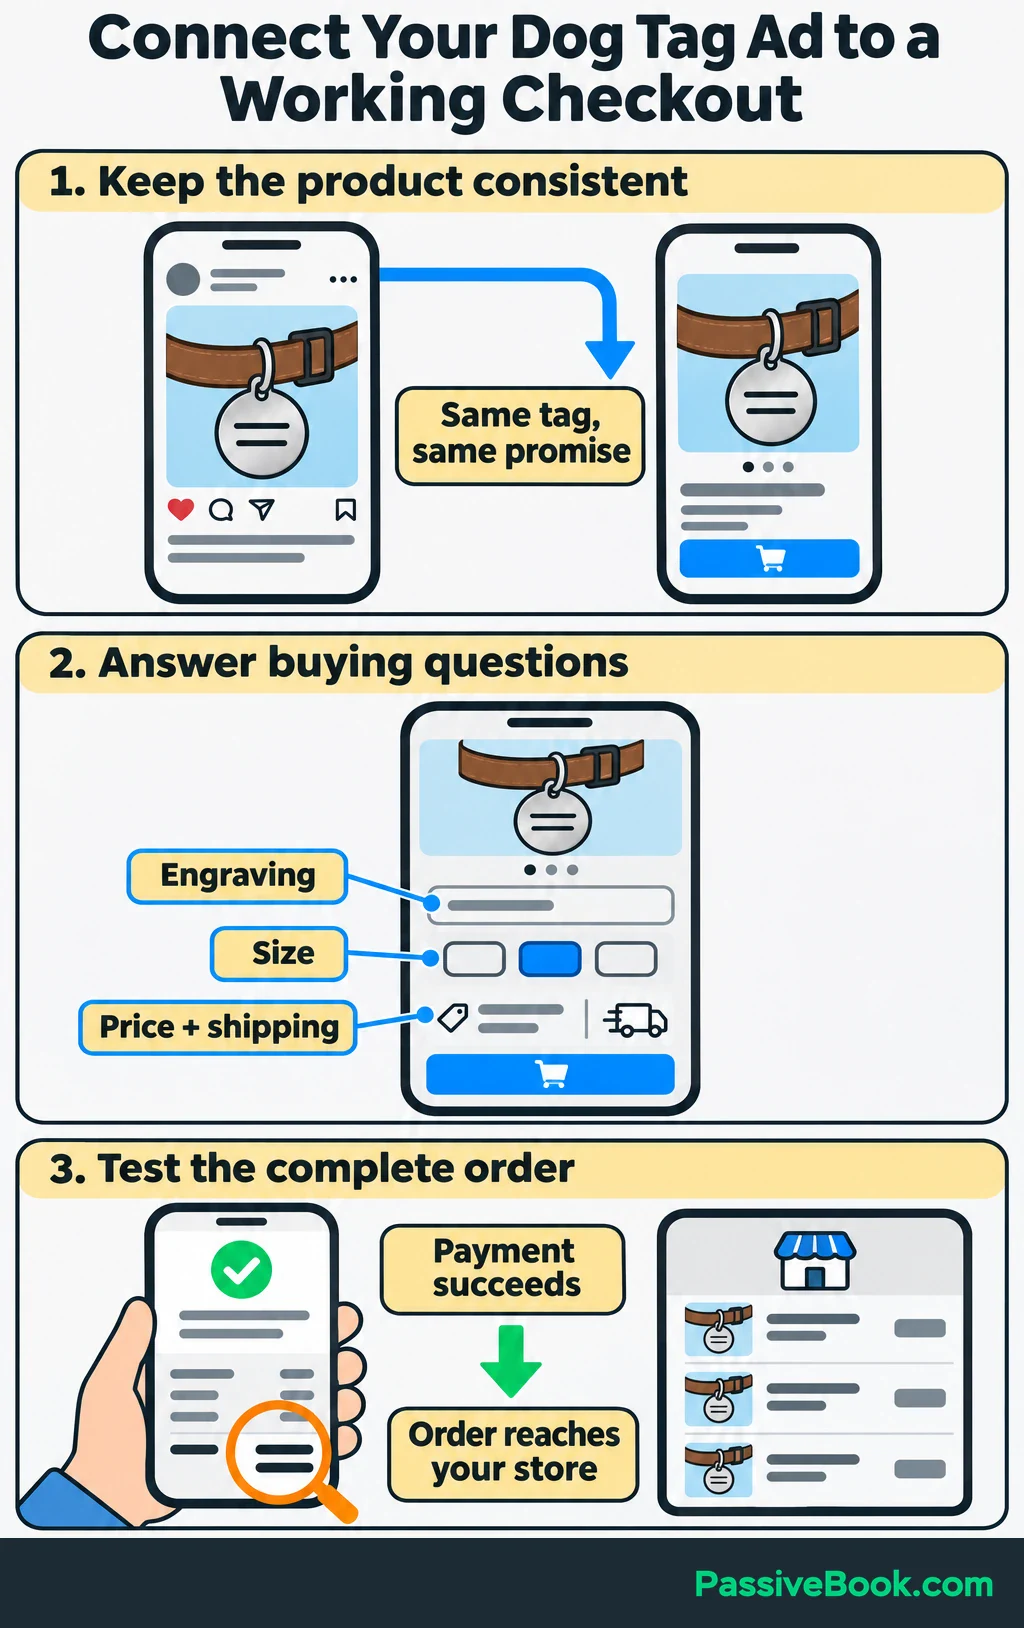
If the ad shows an engraved round tag, make that product immediately visible on the page.
Test customization and payment on your phone, including the final total. Confirm that you see the order confirmation and receive the order in your store.
For a lead campaign, submit the form yourself and check that the inquiry reaches your follow-up system. A cheerful confirmation message is only half the job.
Set up and Test Conversion Tracking
For purchases, track successful payment. Clicking “Buy” doesn’t mean the payment went through.
On one of my digital-product sites, I caught a purchase event firing when checkout opened. I hadn’t paid for anything. Now I check that the event fires after payment and stays absent before it.
Before collecting advertising-tracking data, provide the required notice, obtain legally sufficient consent, and provide opt-out instructions and the required mechanism. Your tracking setup must respect those choices. X’s tracking privacy requirements.
For a beginner website campaign, I would start with the X Pixel:
- In Ads Manager, open Events Manager to create and check tracking events, then select Add event source.
- Install the base code across your site, directly or through a supported tag manager.
- Create a Purchase event and install its event code so it fires after successful payment.
- Pass each order’s actual value and currency dynamically.
- Use an order-specific
conversion_idto prevent duplicate counting. If both Pixel and Conversion API report the order, send the same identifier through both.
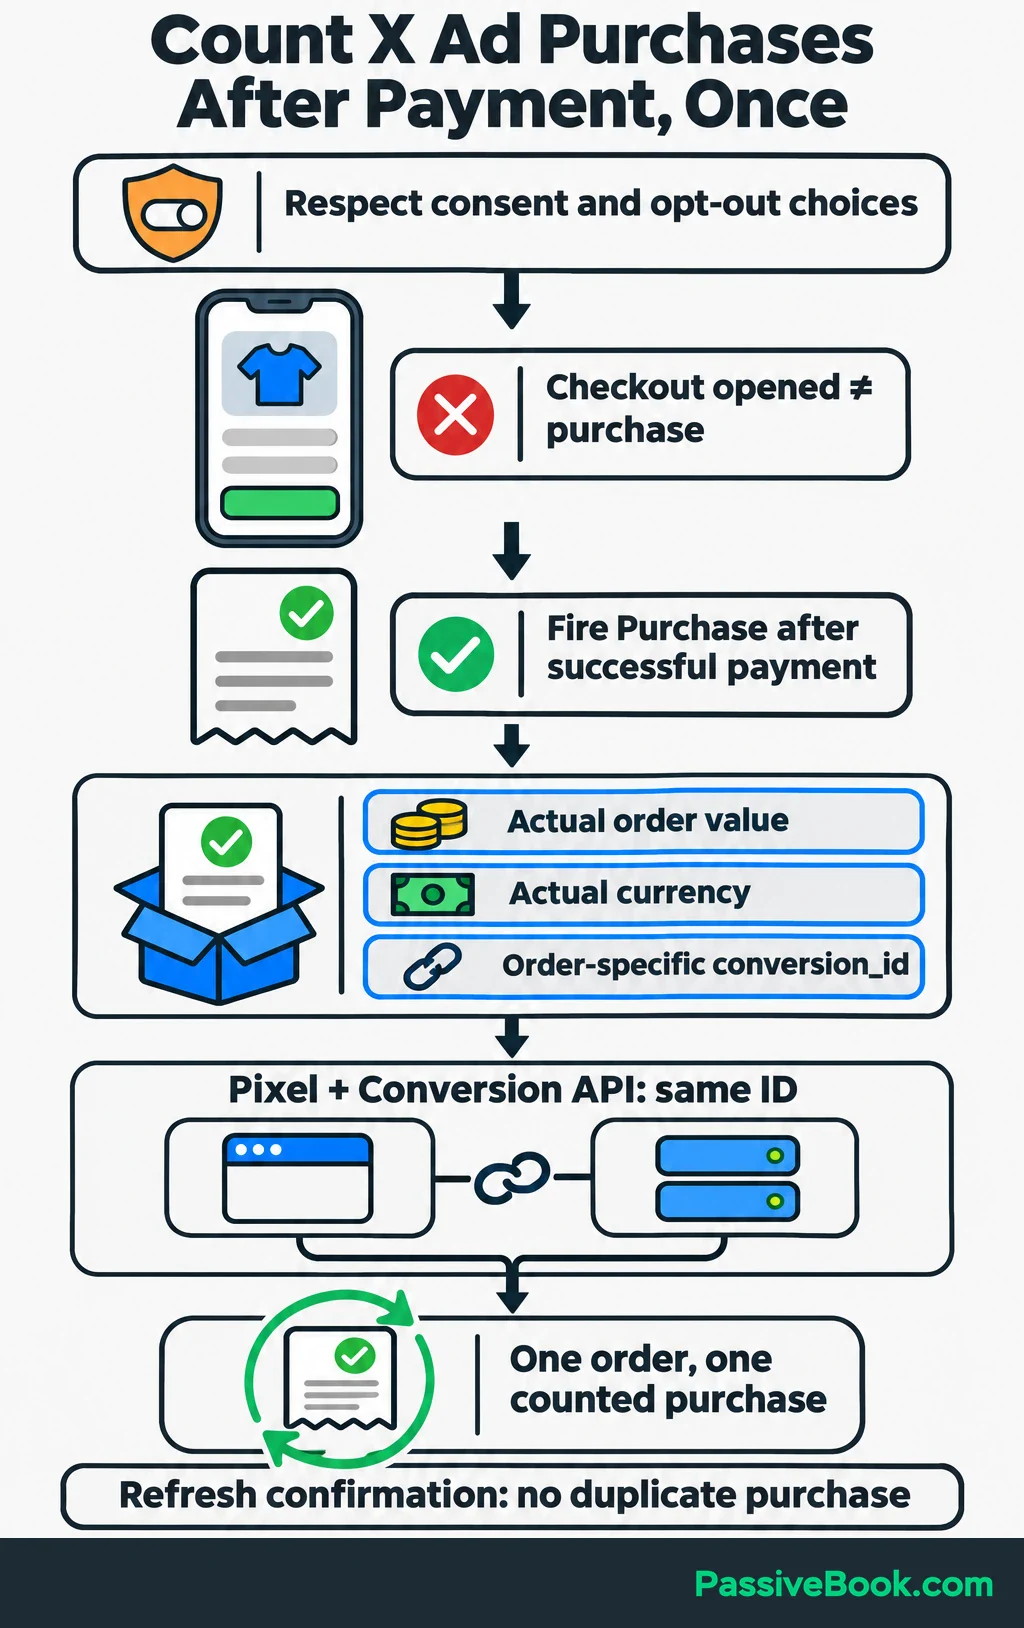
Selecting value and currency in the setup screen only creates a code template. Your checkout integration must supply the actual order details. X’s Pixel implementation guidance.
Use X Pixel Helper, a browser extension for checking tracking events, during a test purchase. Before selecting the event for your campaign, confirm it is Active in Events Manager, with the correct value and currency. Refresh the confirmation page to check that the purchase isn’t counted twice.
Also add campaign labels, called UTM parameters, to your destination URL. For the tag shop:
https://example.com/personalized-dog-tags?utm_source=x&utm_medium=paid_social&utm_campaign=dog_id_tags&utm_content=engraving_aReplace the example domain and page with your own. Change utm_content for the second ad so your website analytics can distinguish its traffic. These labels help identify visits; they don’t replace purchase tracking.
Build Your Campaign With a Spending Limit
Create a Simple Campaign Structure
Start with one campaign and one ad group containing two ads. An ad group holds ads that share an audience, budget, and schedule, so you can test two messages without splitting your budget across audiences.
| Level | What you choose | Tag shop example |
|---|---|---|
| Campaign | Objective, name, and funding source | Sales; Dog ID tags — purchases — test 1 |
| Ad group | Budget, schedule, bidding, audience, and placements | One audience with a fixed test period |
| Ads | Copy, image or video, and destination | Two messages promoting the same tag |
In Ads Manager, select Create campaign, choose the objective, name the campaign, and confirm the funding source.
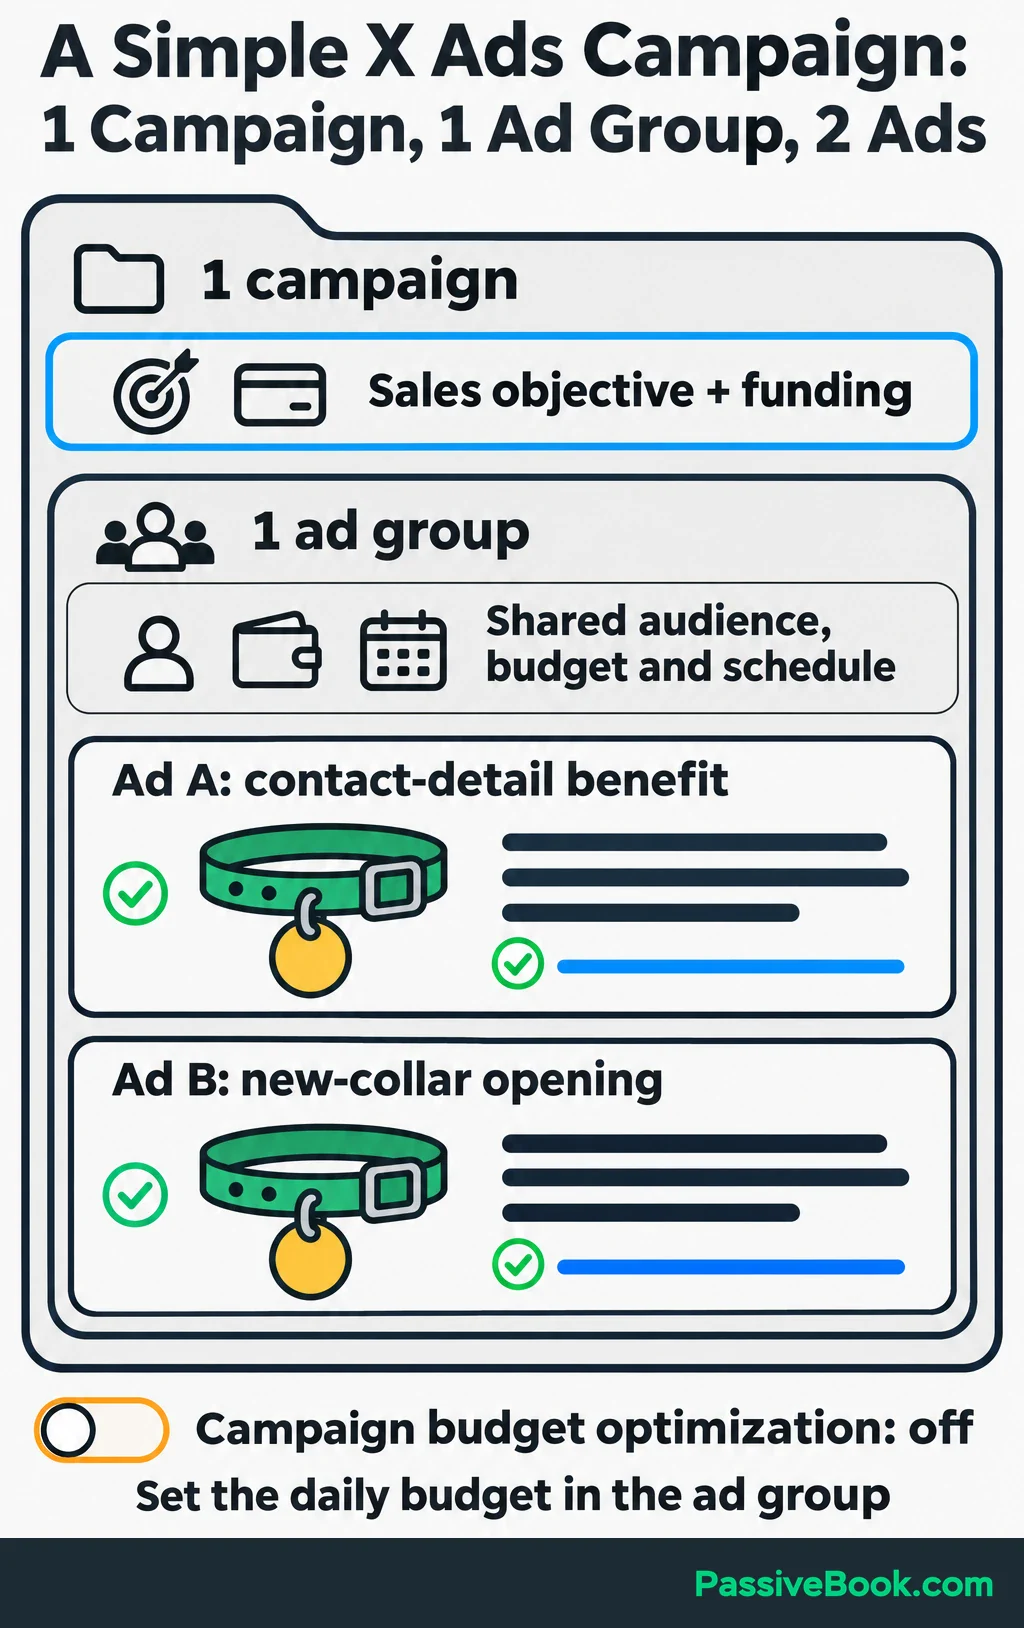
To set the daily budget for this ad group, turn Campaign budget optimization off. In the Sales ad group, select your tested Purchase event.
I would skip extra ad groups for the first test. Each one creates another set of spending and targeting decisions to review.
Set Your Budget, Schedule, and Bid
Choose the total amount you can afford to lose before deciding how much to spend per day.
X publishes no minimum media spend, but ad costs come from an auction. Your audience, competition, creative, and bidding affect what you pay, so there is no universal beginner cost per click. X’s advertising pricing explanation.
Work out what a sale can afford in advertising first. Count the revenue left after the costs that come with fulfilling that order.
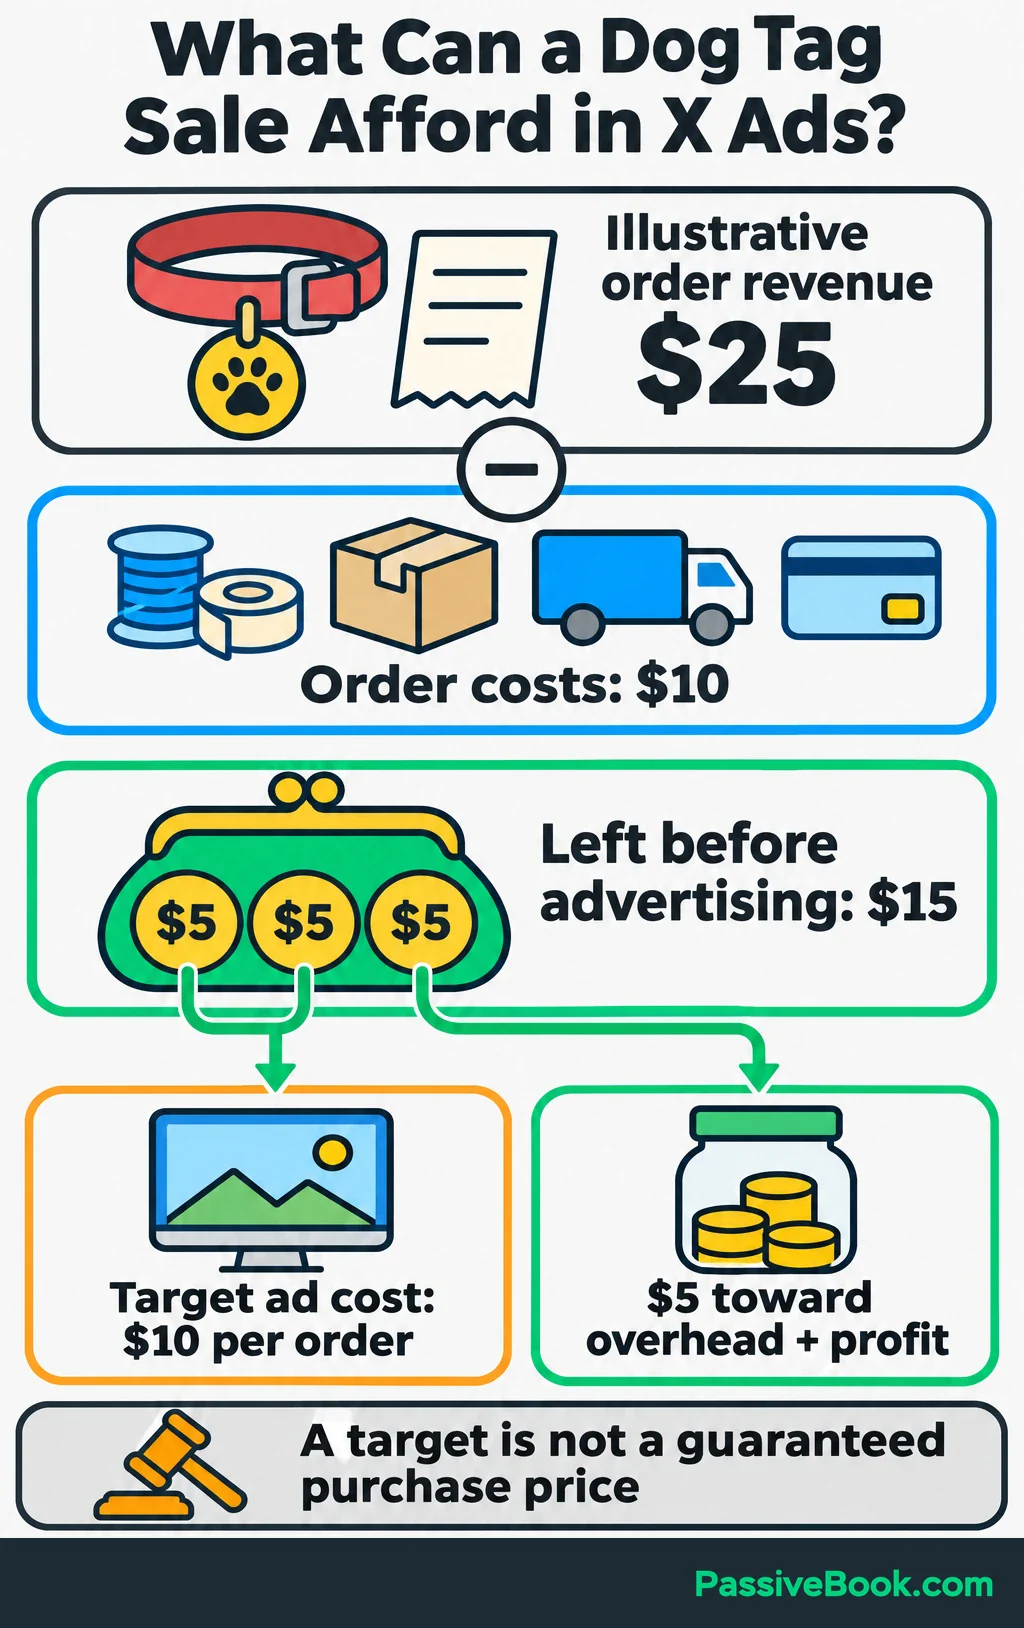
For illustration, a $25 tag order might leave $15 after materials, fulfillment, shipping subsidies, and payment fees. A target of $10 in ad spending per order would leave $5 toward fixed overhead and profit.
That target gives the campaign a business test. It doesn’t tell X to guarantee purchases at that price.
Your own margins may leave more—or less—room for advertising than the tag shop’s example. Use the calculator to find your cost target and see how different conversion assumptions change what your test budget could produce.
Free Marketing Profit Calculator


A small spending setup could look like this:
| Control | Illustrative setting | Purpose |
|---|---|---|
| Daily ad-group budget | $10 | Sets the daily spending allocation |
| Start and end times | Explicit times seven days apart | Prevents an open-ended test |
| Campaign spend cap | $70 | Limits total media spending for this campaign |
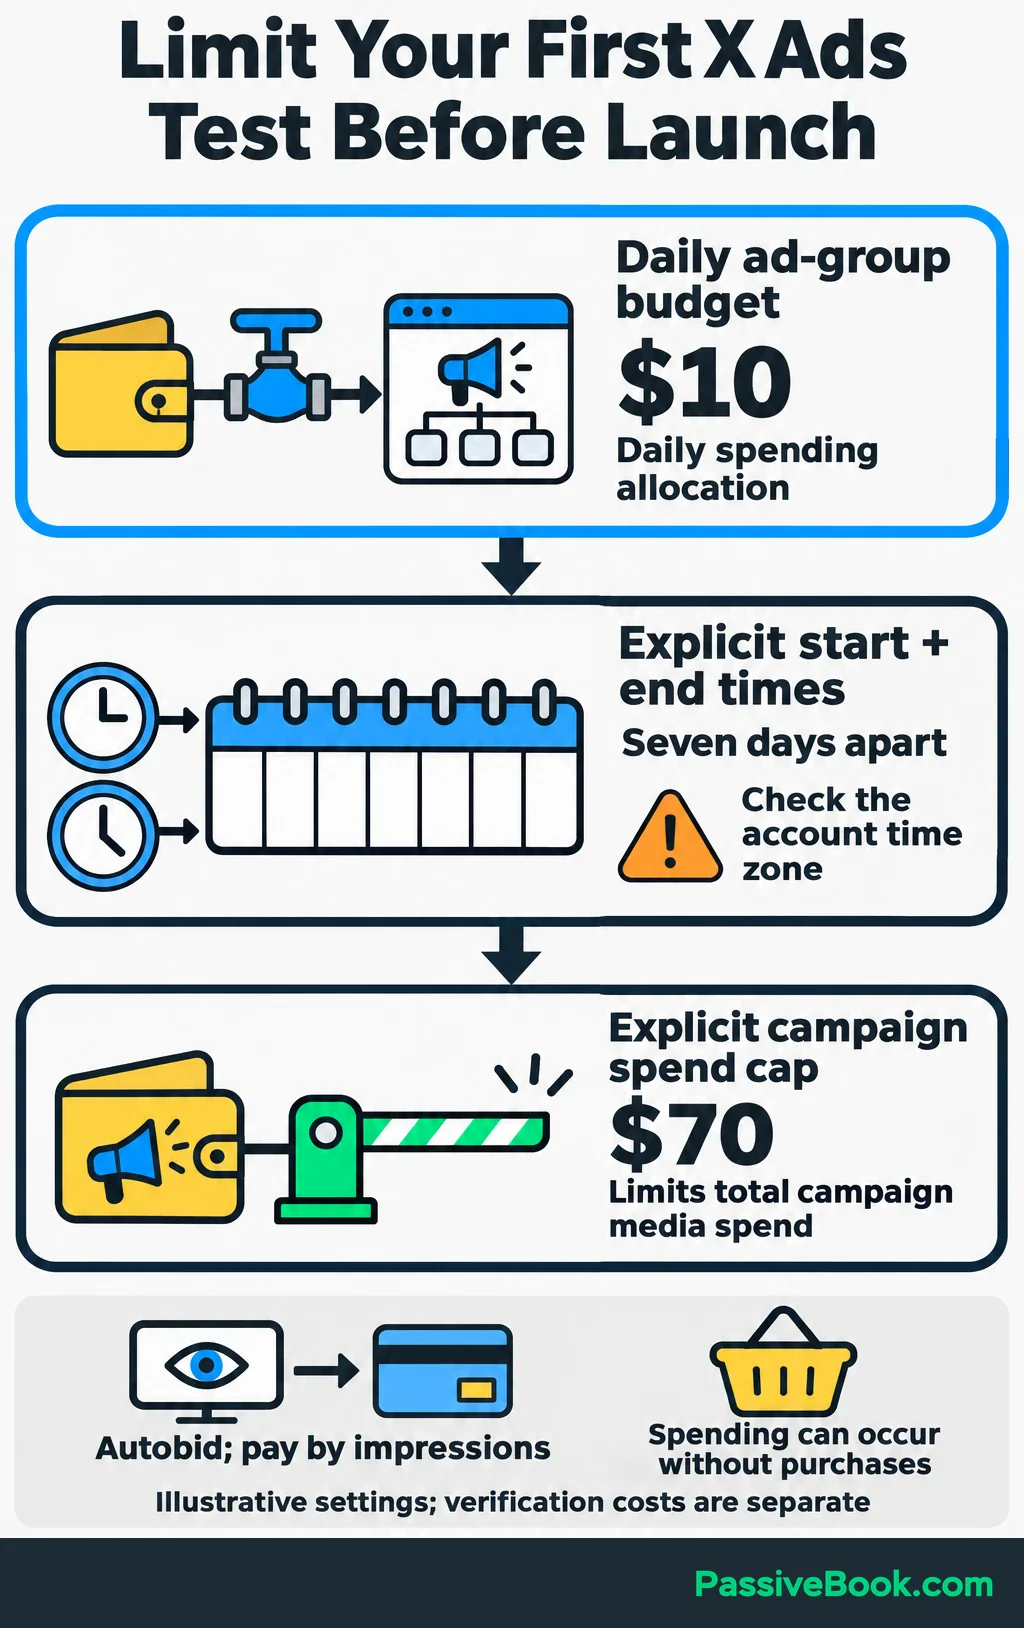
Enter the campaign spend cap explicitly. Don’t rely on remembering to pause after seven days. X documents the cap as a way to keep total campaign spending below a specified amount. X’s spending controls.
Check the account’s time zone when entering dates. Allow separately for verification costs and any other active campaigns.
Start with Autobid. For Sales, X recommends paying by impressions—ad displays—even though delivery optimizes for conversions. You can therefore spend money without receiving a purchase.
A $70 cap controls the size of the test. It may still produce too few purchases to establish whether the campaign is profitable.
Define the Audience You Want to Reach
Set practical boundaries first. Choose locations where customers can receive the product and languages supported by your ad and checkout.
I would leave age, gender, and device targeting broad unless the offer gives you a concrete reason to narrow them. Selling dog tags doesn’t require guessing which phone a buyer owns.
Next, choose one main audience approach. For the shop, I would begin with relevant keywords such as:
- dog ID tags
- personalized pet tags
- pet identification
- engraved dog tags
- replacement dog tags
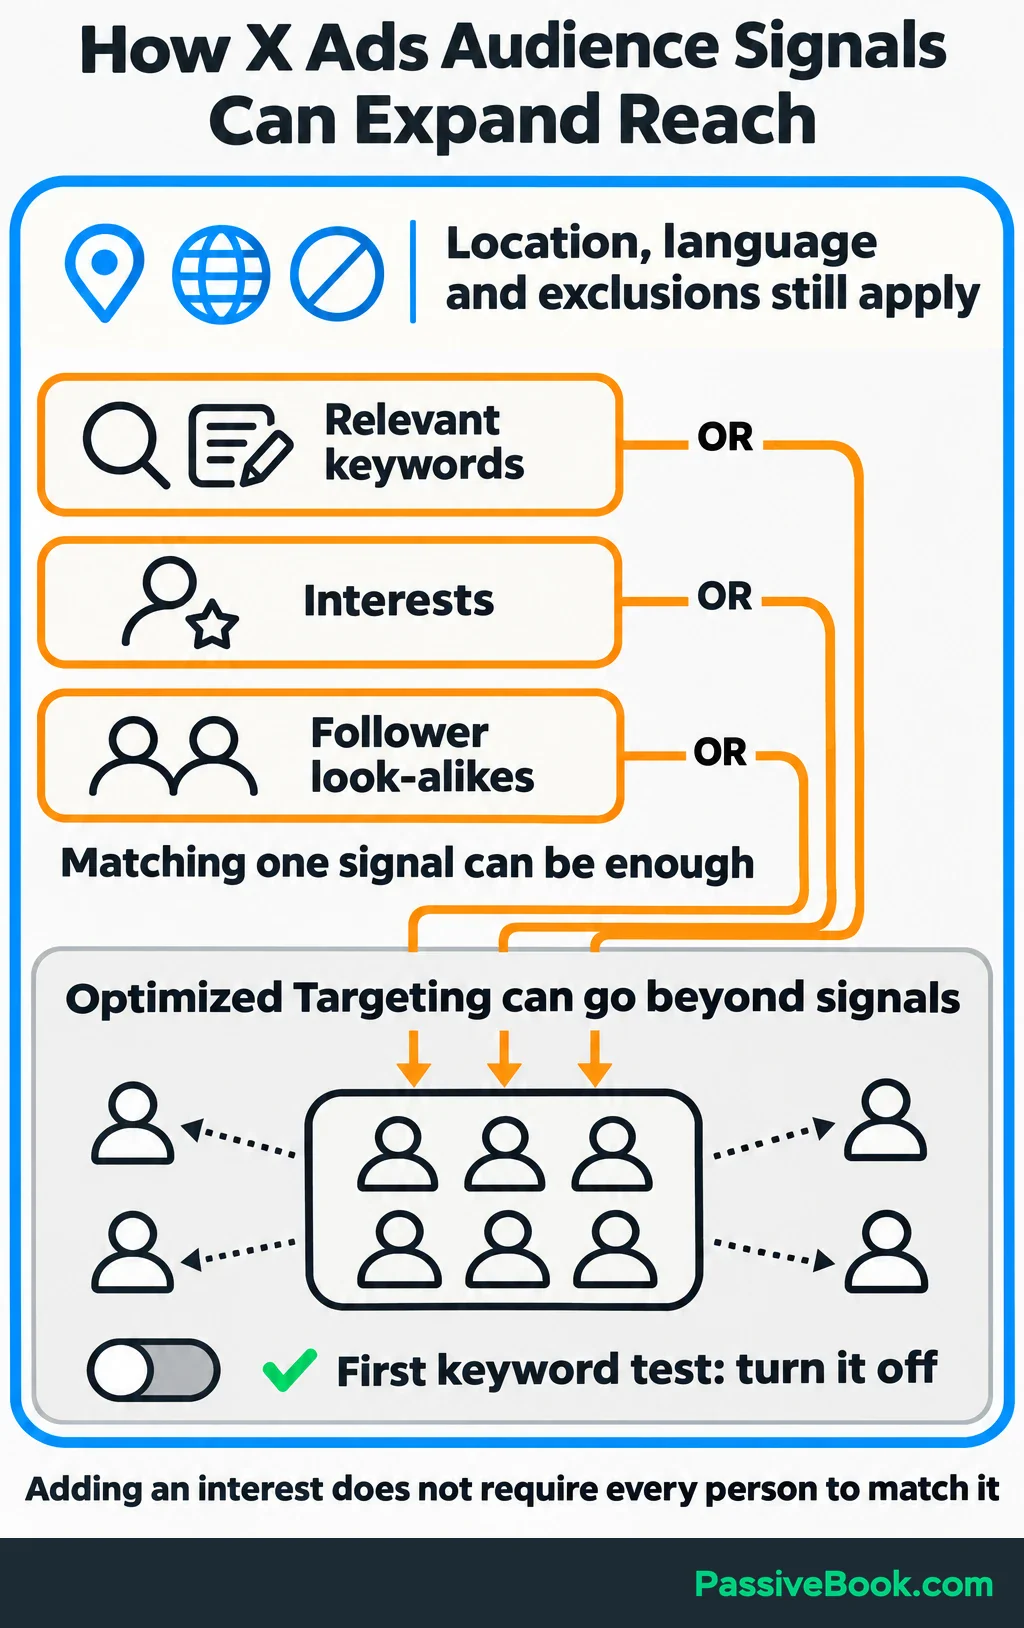
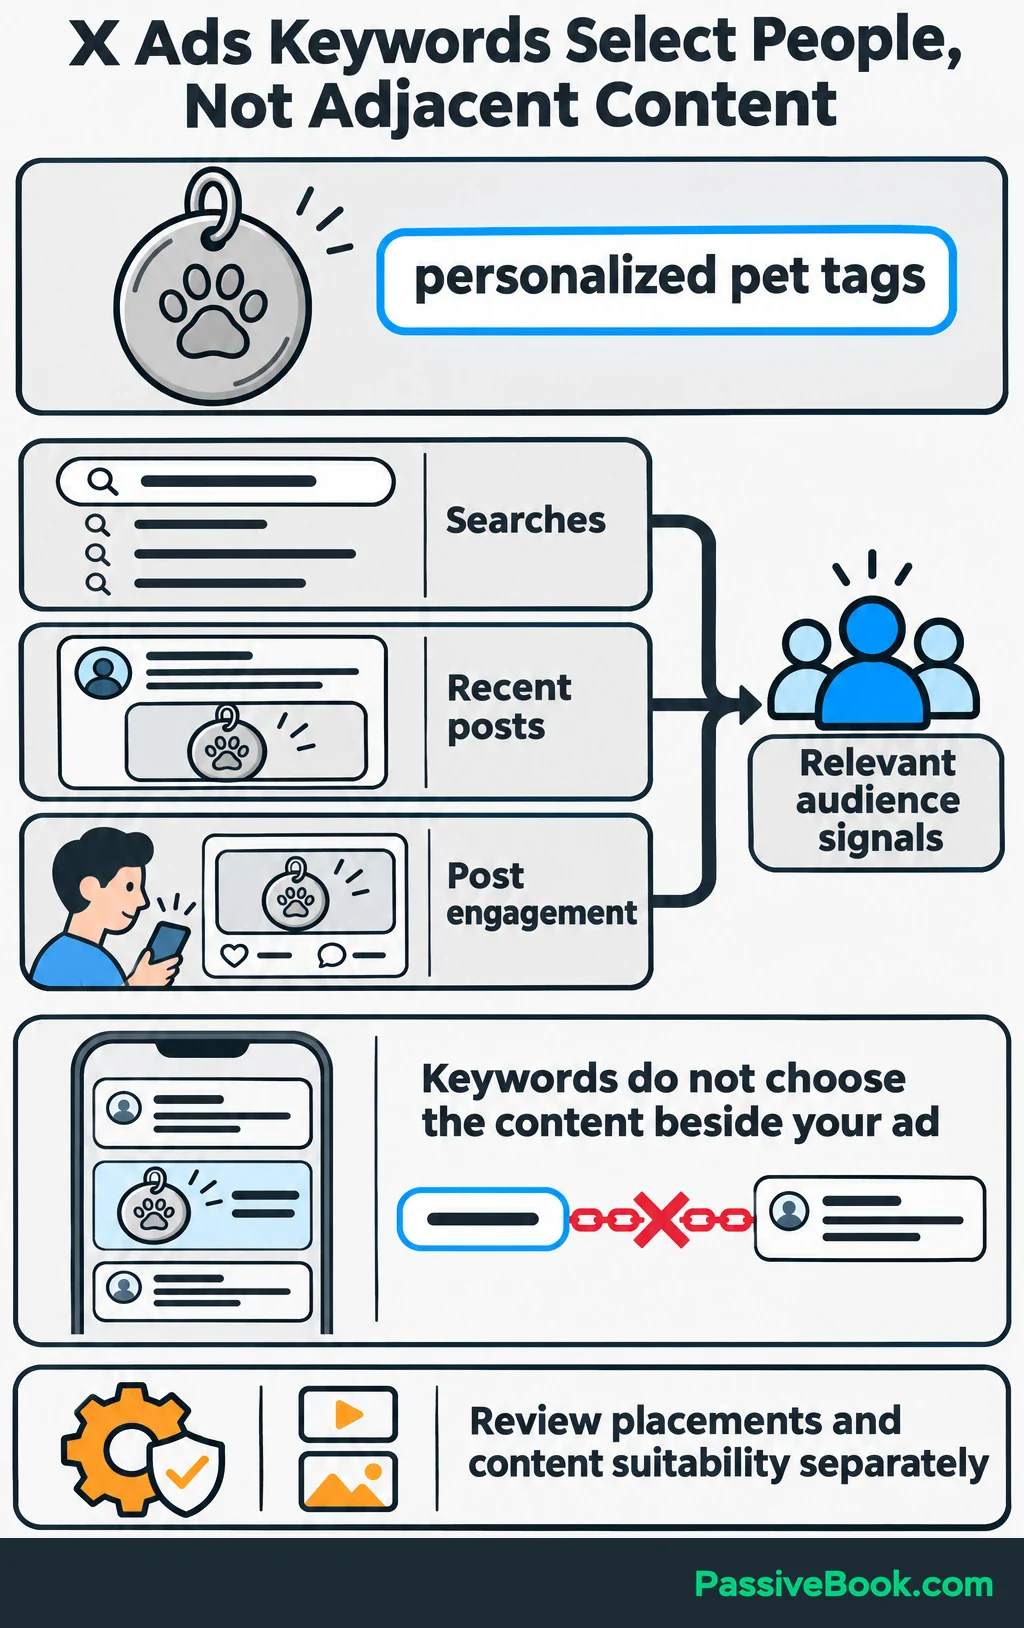
Build out that list with related terms that still describe the offer. X keyword targeting uses signals from searches, recent posts, and engagement with posts containing relevant terms. It reaches people showing those signals; it isn’t limited to placing your ad beside a matching search. How X keyword targeting works.
Interests and follower look-alikes are alternatives. Interests identify people interested in a topic, while follower look-alikes reach people resembling an account’s followers.
Be careful when combining these with keywords. They generally use OR logic: matching one signal can make someone eligible. Adding a broad interest can therefore expand the audience instead of narrowing it to people who match everything. Location and other restrictive criteria still apply. X’s targeting logic.
Also review Optimized Targeting. It is enabled by default for supported campaigns and can reach beyond your selected audience signals while respecting controls such as location, language, and exclusions. X’s expansion controls.
For this first keyword test, I would turn it off so the results are easier to interpret. If you later want to test broader discovery, change that setting deliberately and record when you changed it.
Check the audience estimate for accidental restrictions before continuing. Then review placements and content-suitability controls separately. Audience keywords influence whom you reach; they don’t control the content beside your ad.
Create Ads That Lead to One Clear Action
Choose a visual that helps someone understand the product quickly. For the tag shop, I would use a clear close-up of the engraving, with the tag attached to a collar.
A plain product photo earns its place when it answers a buying question. A decorative graphic that hides the product doesn’t.
Write one useful benefit and one next action. Here’s a complete short version to adapt:
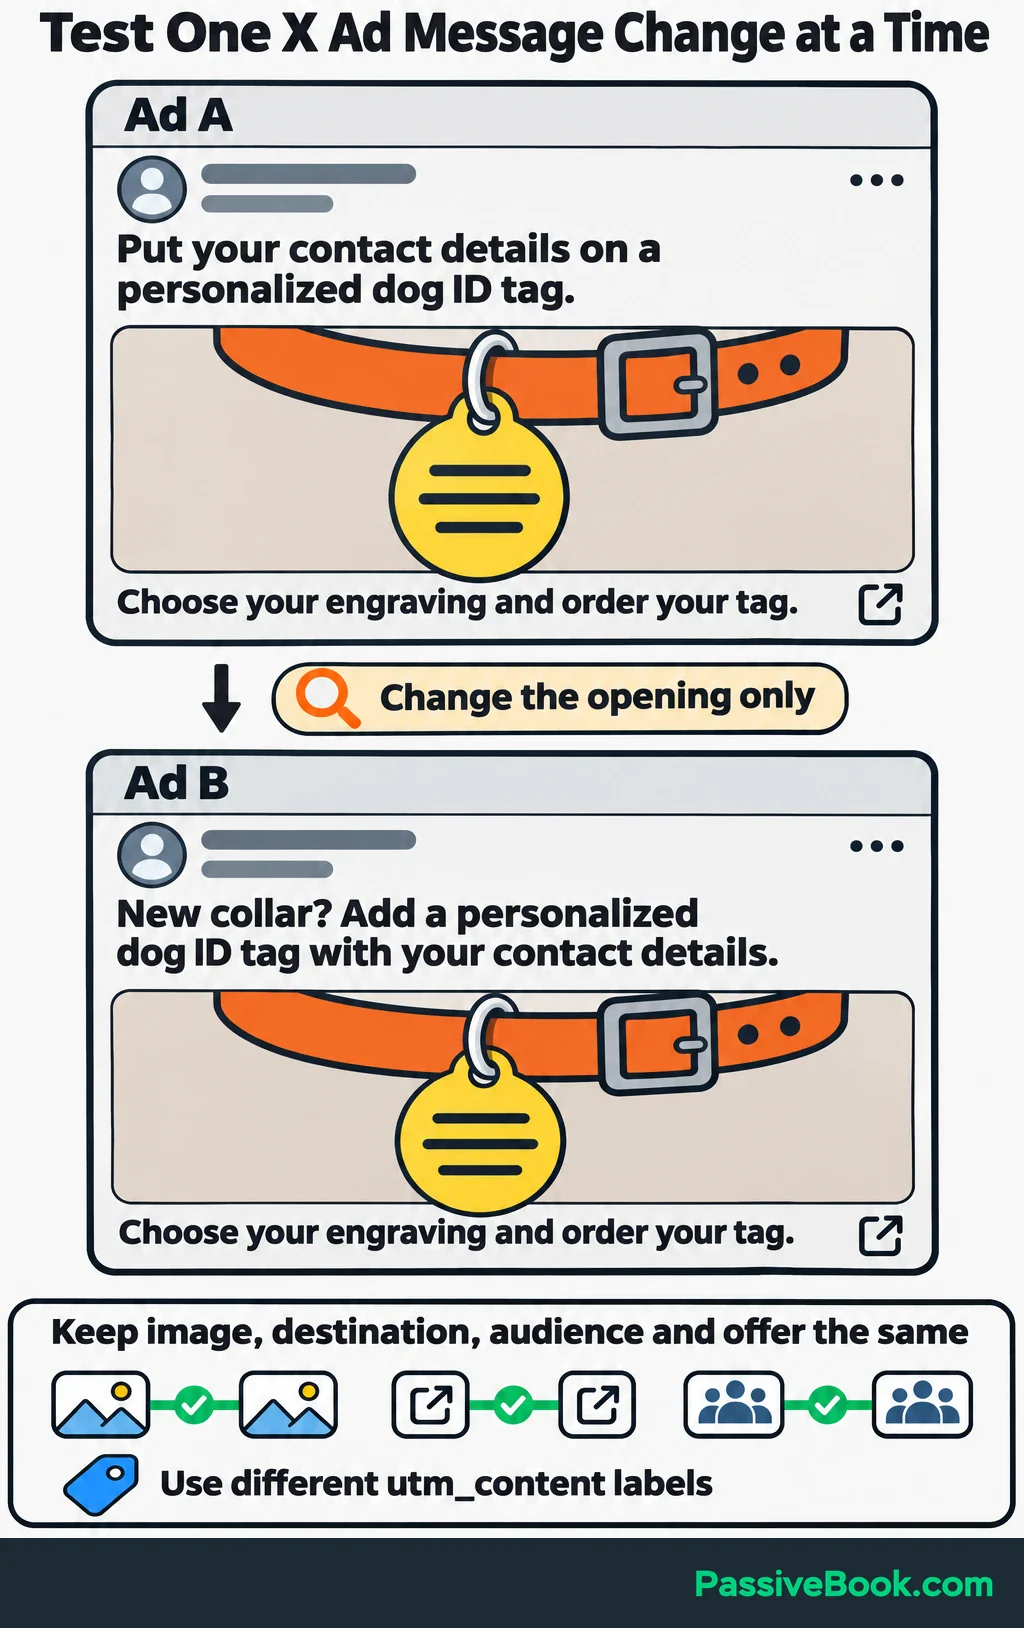
Put your contact details on a personalized dog ID tag. Choose your engraving and order your tag.
Pair that copy with the product image and the tagged product-page URL. Avoid distracting mentions and hashtags, and use contact details intended for public display in the photographed engraving.
Create the second ad by changing one meaningful element. Keep the image and destination the same, but try a different opening:
New collar? Add a personalized dog ID tag with your contact details. Choose your engraving and order your tag.
That comparison asks whether a different message helps. Changing the offer, image, audience, and copy together would leave you guessing which change mattered.
If you’re staring at an empty ad field, use your product or landing-page text to get a first pair of drafts. The AI Skill keeps the offer and next action consistent so you can compare two openings without rewriting everything.

Free AI Advertising Studio
In the campaign builder, create dedicated ad content or select a relevant existing post. Upload the media, add the destination, and attach both ads to the ad group.
Preview them on mobile. Check that the engraving is readable, the copy makes sense, and the destination opens correctly. Use assets you own or have permission to advertise, and keep product claims specific and supportable.
Review and Launch Your Campaign
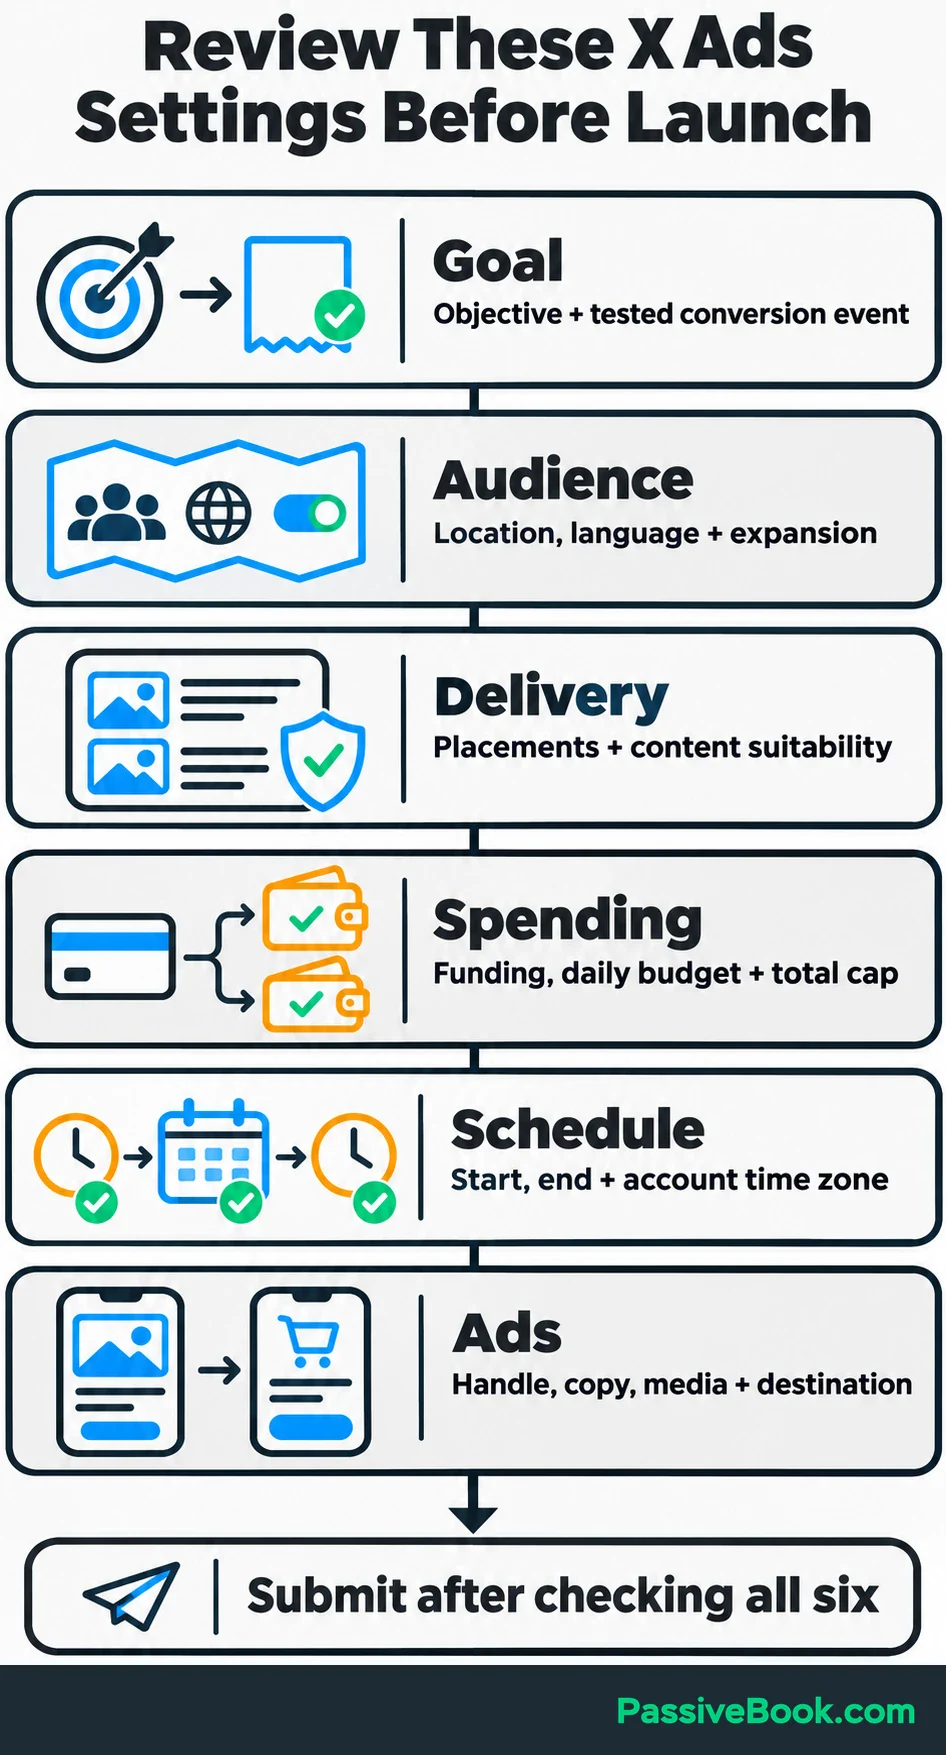
Review the setup before submitting it. I would check these items together:
- Goal: Correct objective and tested conversion event.
- Audience: Correct locations, languages, and expansion setting.
- Delivery: Intended placements and content-suitability controls.
- Spending: Correct funding source, daily budget, and total campaign cap.
- Schedule: Explicit start and end times in the account’s time zone.
- Ads: Correct handle, copy, media, and destination.
Open the final tagged link and test the purchase path again. Confirm that redirects preserve the campaign labels and X’s twclid click identifier, which X uses for conversion measurement.
Then submit the campaign and inspect its approval and delivery status. Submission doesn’t establish that it is serving: X reviews advertiser accounts and promoted content.
After activation, confirm that impressions and spending actually appear. Don’t judge performance while delivery is still at zero.
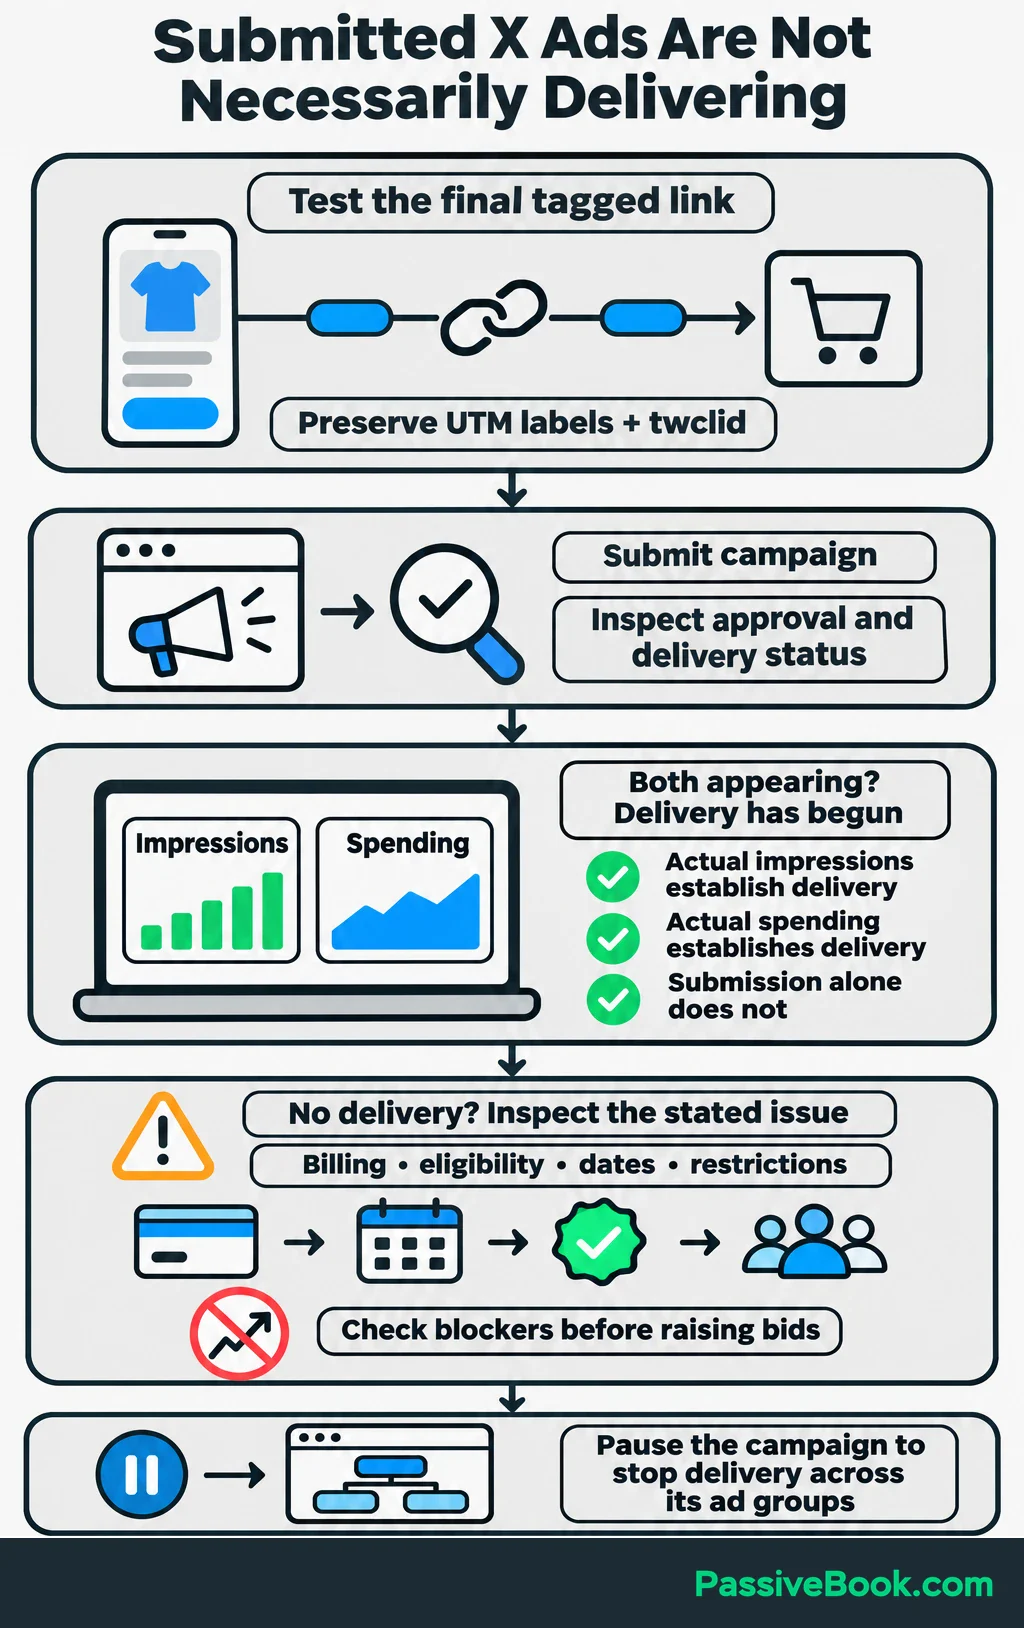
If the campaign is rejected, halted, or not delivering, inspect the stated issue first. Check billing, eligibility, dates, and audience restrictions before raising bids. An inactive payment method won’t become more active because you offer to pay more.
Pause the campaign when you need to stop delivery across its ad groups.
Measure Results Against Your Business Goal
Choose your reporting dates, then use Customize metrics to show spending beside your primary outcome. For the tag shop, include purchases and purchase value, then add impressions, link clicks, and site visits to understand the route to checkout.
Review the campaign total first, then the ad group and individual ads.
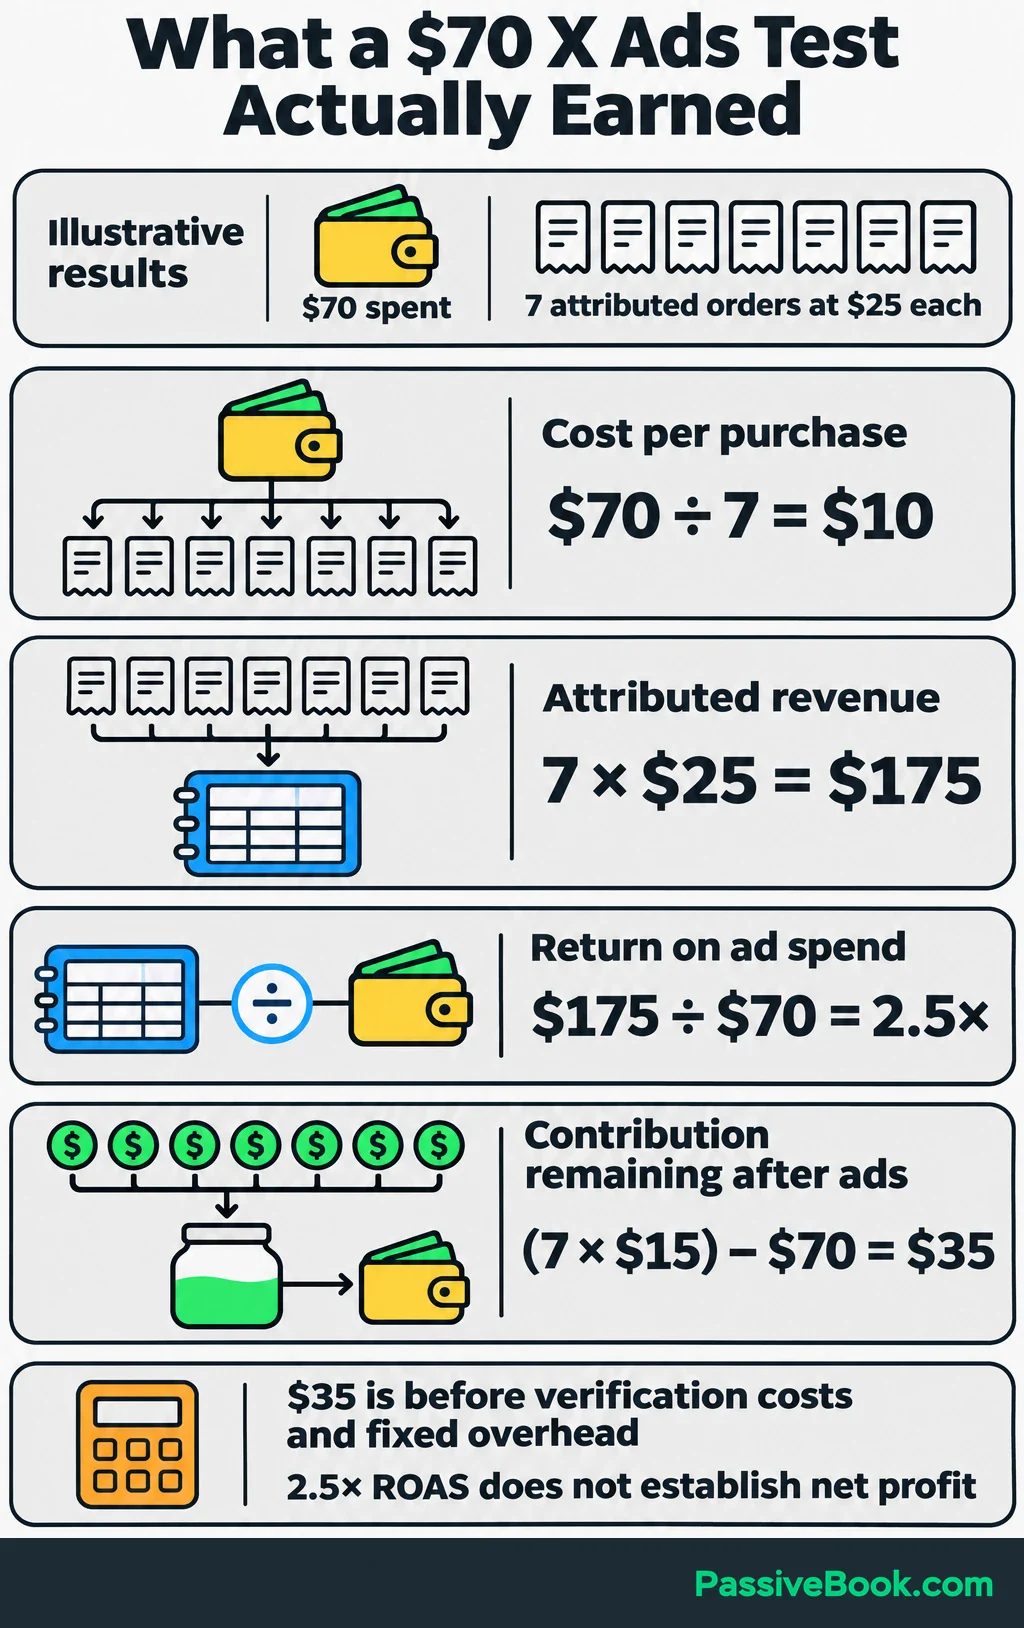
Start with what you paid per recorded order and how much purchase revenue X credited to the campaign. Use the same campaign and reporting dates for both calculations:
- Cost per purchase: Ad spending divided by completed purchases attributed to the campaign.
- Return on ad spend: Attributed purchase revenue divided by ad spending.
If you measure customer acquisition cost instead, count only new customers acquired through the campaign, rather than all orders.
Suppose the illustrative test spends $70 and X attributes seven $25 orders to it:
| Measure | Calculation | Result |
|---|---|---|
| Cost per purchase | $70 ÷ 7 orders | $10 |
| Attributed purchase revenue | 7 × $25 | $175 |
| Return on ad spend | $175 ÷ $70 | 2.5× |
| Contribution remaining after ads | (7 × $15) − $70 | $35 |
The last row uses the earlier assumption that each order leaves $15 before advertising. That $35 remains before verification costs and fixed overhead. A 2.5× return on ad spend is a revenue ratio, so it doesn’t establish net profit.
With zero purchases, record “$70 spent, zero purchases.” There is no numeric cost per purchase to calculate.
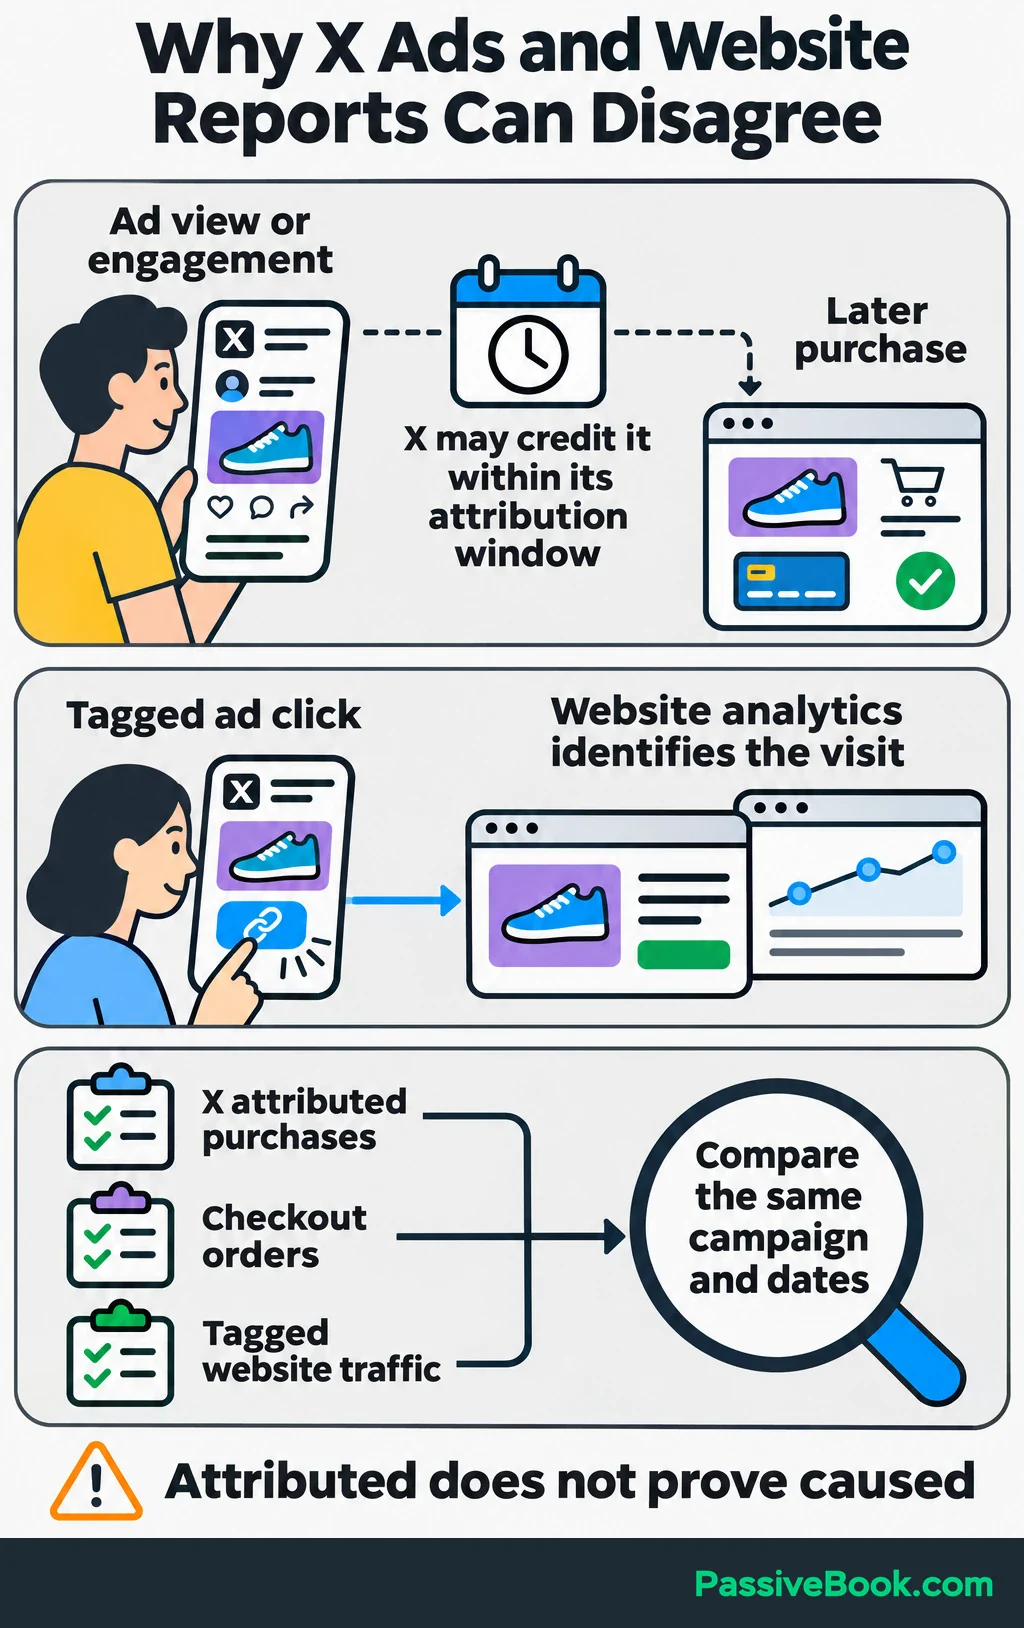
Compare X’s report with checkout records and tagged website traffic. Also review the conversion event’s attribution windows: these determine how long after an ad view or engagement X can credit a conversion. X may credit sales from people who saw an ad without clicking it. X’s attribution definitions.
That explains why X and website analytics can report different totals. It also means an attributed sale doesn’t prove the ad caused that purchase. Keep those limits in mind when deciding how much more to spend.
Improve the Weakest Step Before Increasing Spend
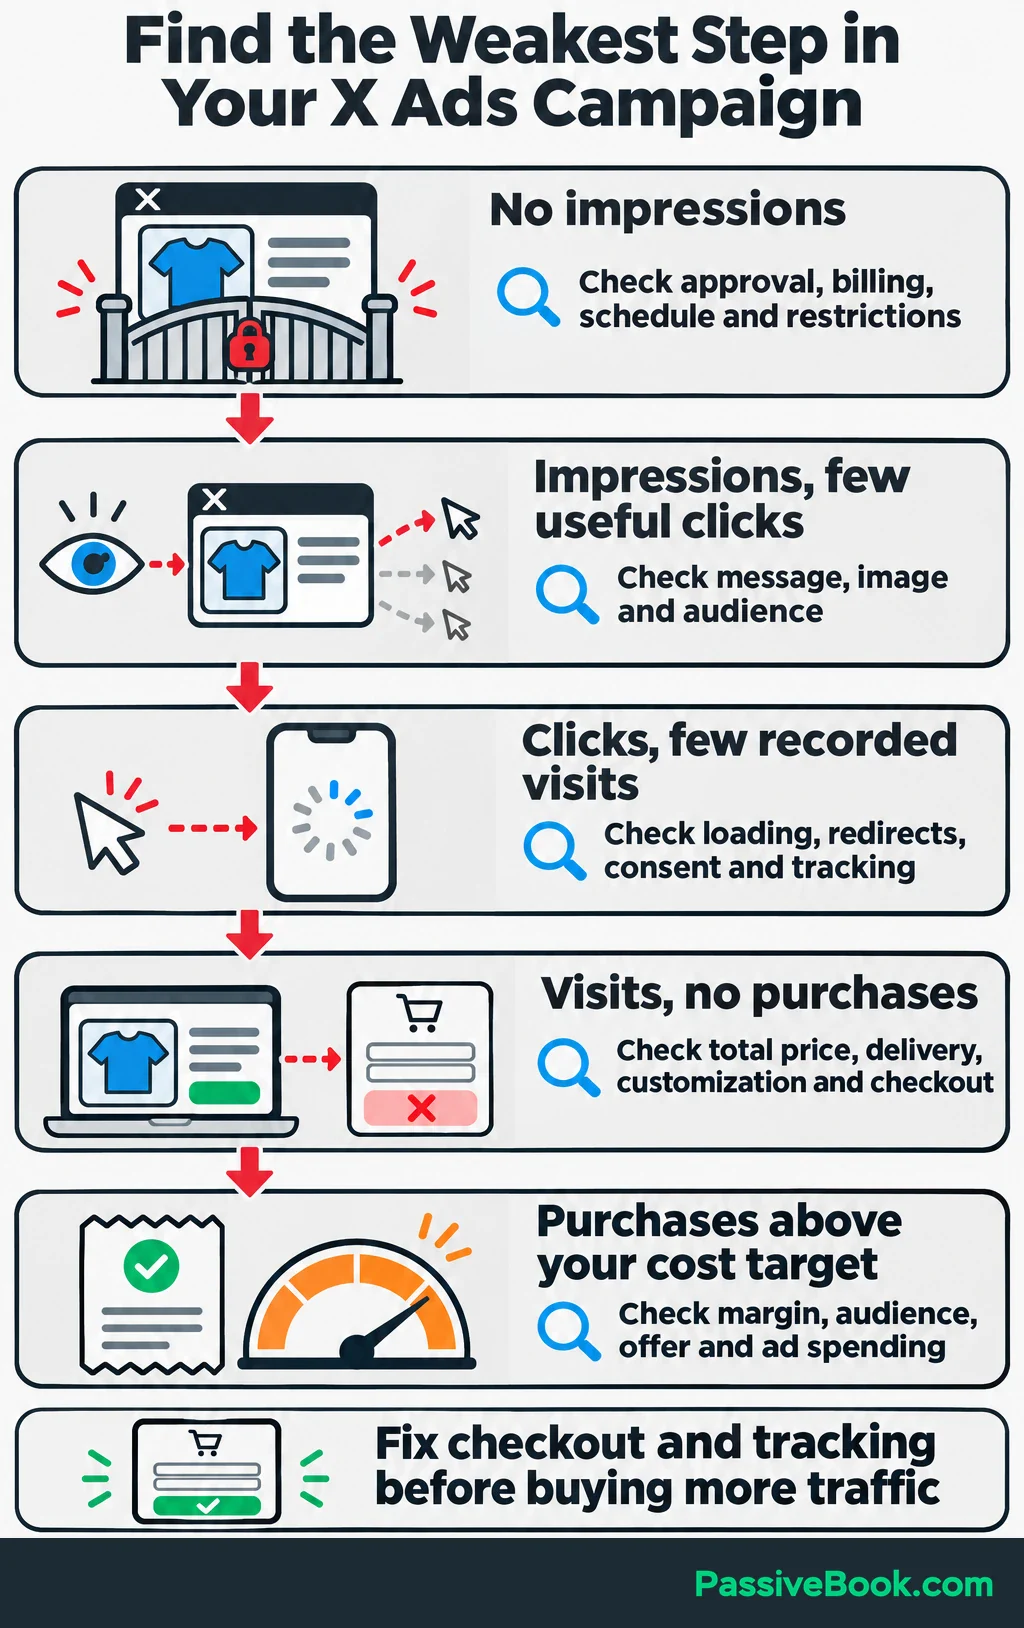
Use the campaign’s weak point to choose the next change.
| What you observe | What to inspect first |
|---|---|
| No impressions | Approval, payment status, schedule, active controls, and audience restrictions |
| Impressions but few useful clicks | Message clarity, product image, and audience relevance |
| Clicks but few recorded visits | Page loading, redirects, consent behavior, and tracking |
| Visits but no purchases | Total price, delivery details, customization, checkout, and purchase tracking |
| Purchases above your cost target | Margin, audience quality, offer, and which ads received spending |
Fix broken checkout or tracking before buying more traffic. Then change one meaningful variable at a time and record it.
For example, if visitors reach the tag page but abandon customization, check whether the engraving instructions are clear. Buying a larger audience won’t explain a confusing text field.
Compare ads using completed outcomes alongside actual spending. X automatically favors creative it predicts will perform better, so the two ads may receive unequal delivery. One purchase from a lightly served ad is a reason to investigate, not enough evidence to declare a winner.
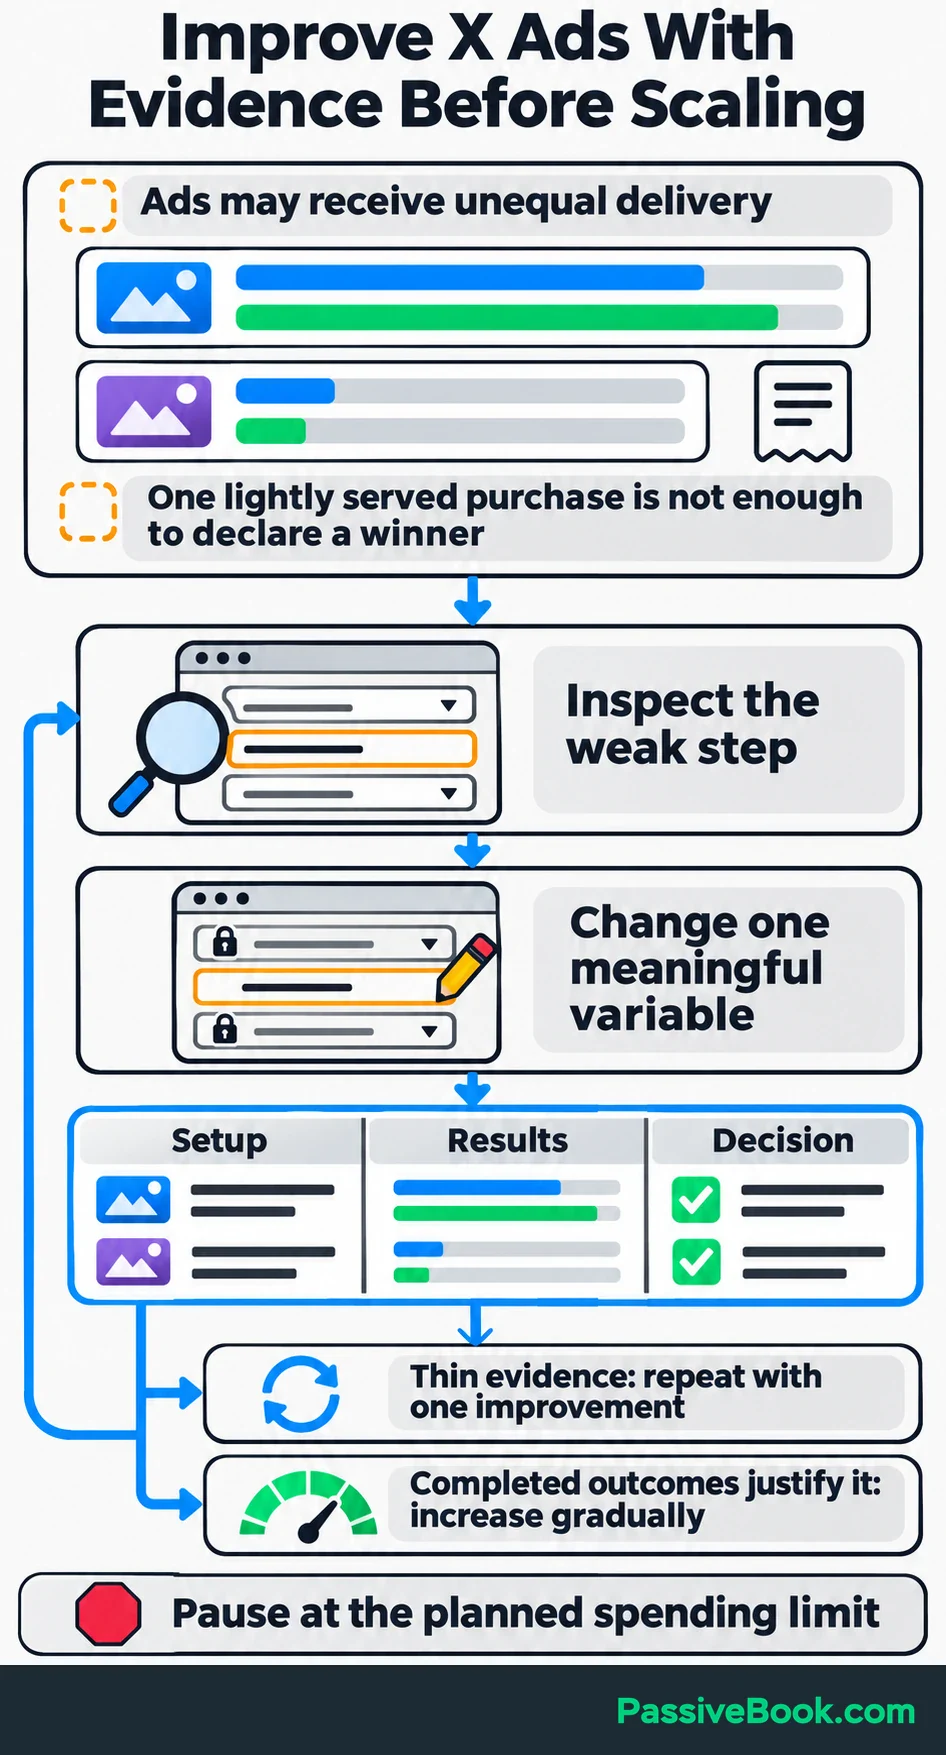
I would check delivery and tracking soon after launch, then use a scheduled review instead of watching the dashboard all day. Allow for the time customers need to buy, but pause at the planned spending limit.
Keep a short campaign log with:
- Setup: Dates, audience, expansion setting, and creative versions.
- Results: Spending, completed outcomes, purchase value, and cost per outcome.
- Decision: What changed, why it changed, and whether to pause, repeat, or increase spending.
Increase the budget gradually when completed outcomes justify continuing. If the evidence is thin, a repeat test with one clear improvement is more useful than declaring the channel a success or failure.
What Next?
Test your purchase or lead path on your phone and write down the total amount you’re willing to spend on the first campaign. Those two actions give the launch a working destination and a stopping point.
Use the social buttons to share this guide when a conversation about X ads needs a practical way to control spending and judge results.
Which part of your first campaign needs the most work: the offer, tracking, audience, or spending limit? Share your answer—and any other questions—in the comments.
Share this post with your friends & followers: