Someone requests your free checklist. You know what to send first, but what belongs in the second email? Another tip, your story, a product link—or nothing until your next newsletter?
That gap is where a simple task starts turning into an unfinished project. You keep rewriting the introduction because you haven’t decided where the conversation should lead. To finish that draft and get it sending automatically, we’ll work through a four-email example, with copy you can adapt and rules for deciding who receives each message.
What Is an Email Welcome Sequence?
An email welcome sequence is an automated series of emails that starts when someone subscribes. It delivers what you promised, introduces your business, helps the subscriber make progress, and presents a relevant next step.
The basic flow looks like this:
- Someone signs up and meets your enrollment rules.
- Your first email welcomes them and delivers the requested resource.
- Follow-up emails help them use it.
- A relevant offer explains how they can go further.
- The subscriber moves into your ongoing email schedule.
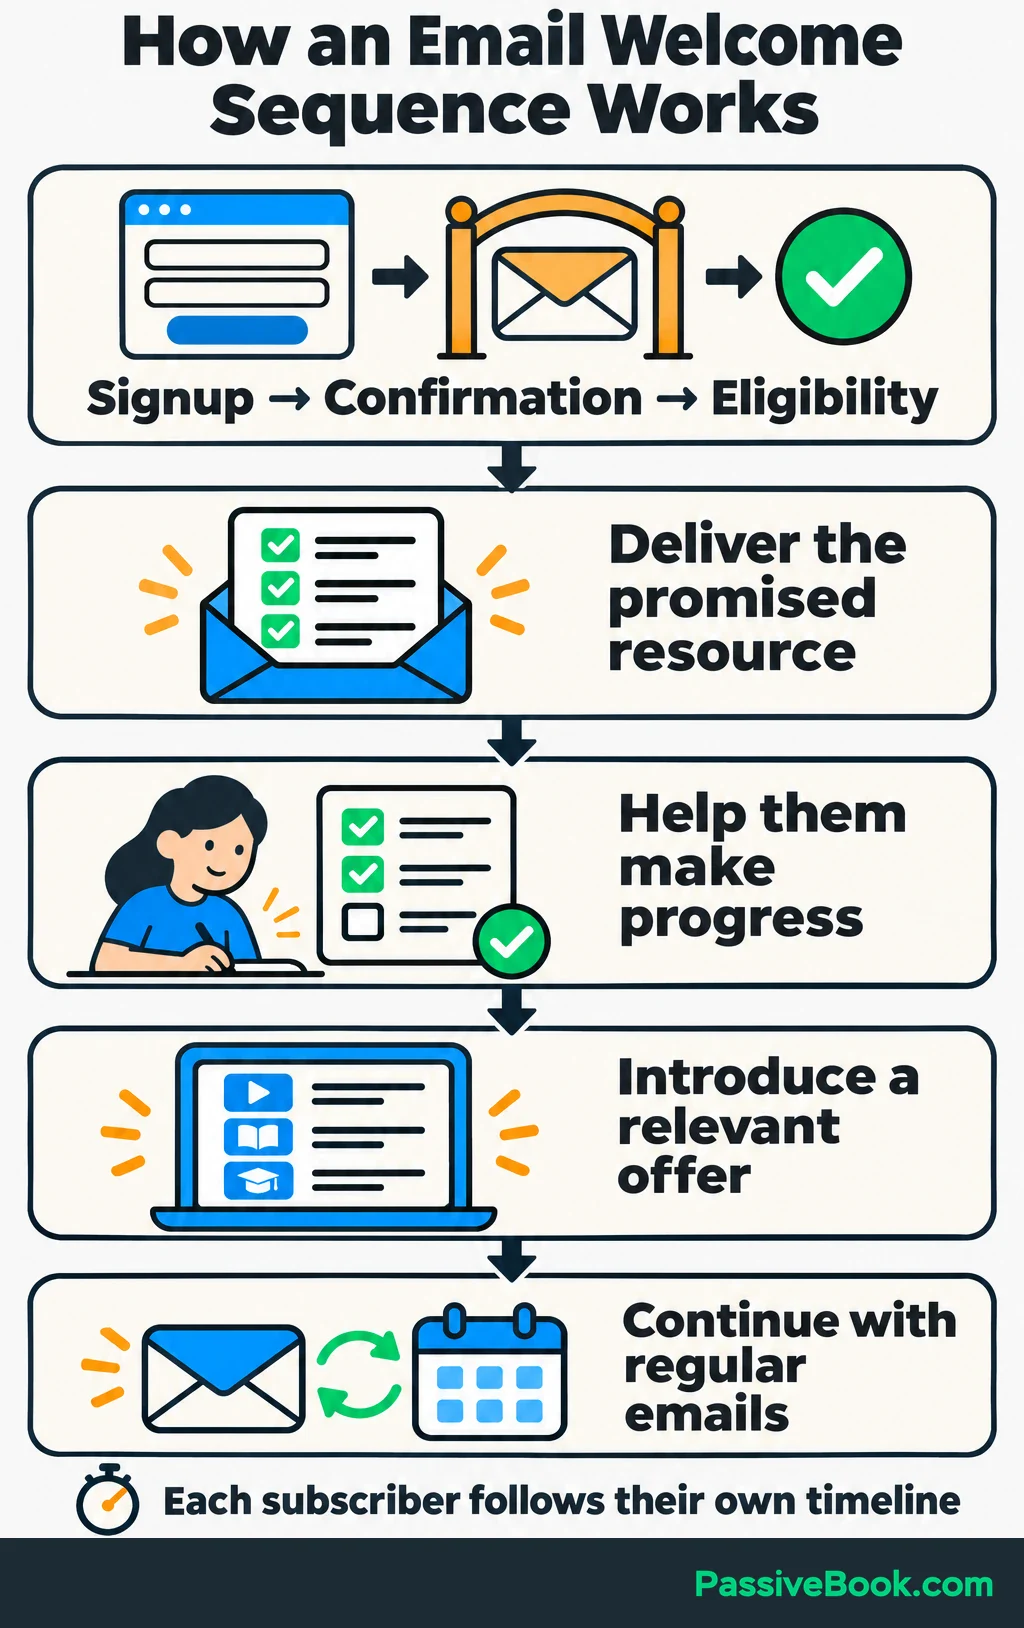
Each person follows their own timeline. Someone who joins on Friday receives the same introduction as someone who joins on Monday, relative to when they enrolled.
A confirmation email has a different job: it asks someone to verify their address before subscription emails begin. Your newsletter comes later and provides ongoing tips, news, or offers. The welcome sequence connects that first signup to the continuing conversation.
Match the Sequence to the Signup Promise
Before writing, finish this sentence:
Someone joined because they wanted ______, and the next useful step is ______.
Choose one main outcome for the sequence, such as a purchase or booking. Then give each email a smaller job that helps someone decide whether to take that step.
For our example, imagine you sell a beginner smartphone food photography course. Your free signup resource is a window-light photo checklist. The sequence helps subscribers try the checklist, solve a common problem, and decide whether the course suits them.
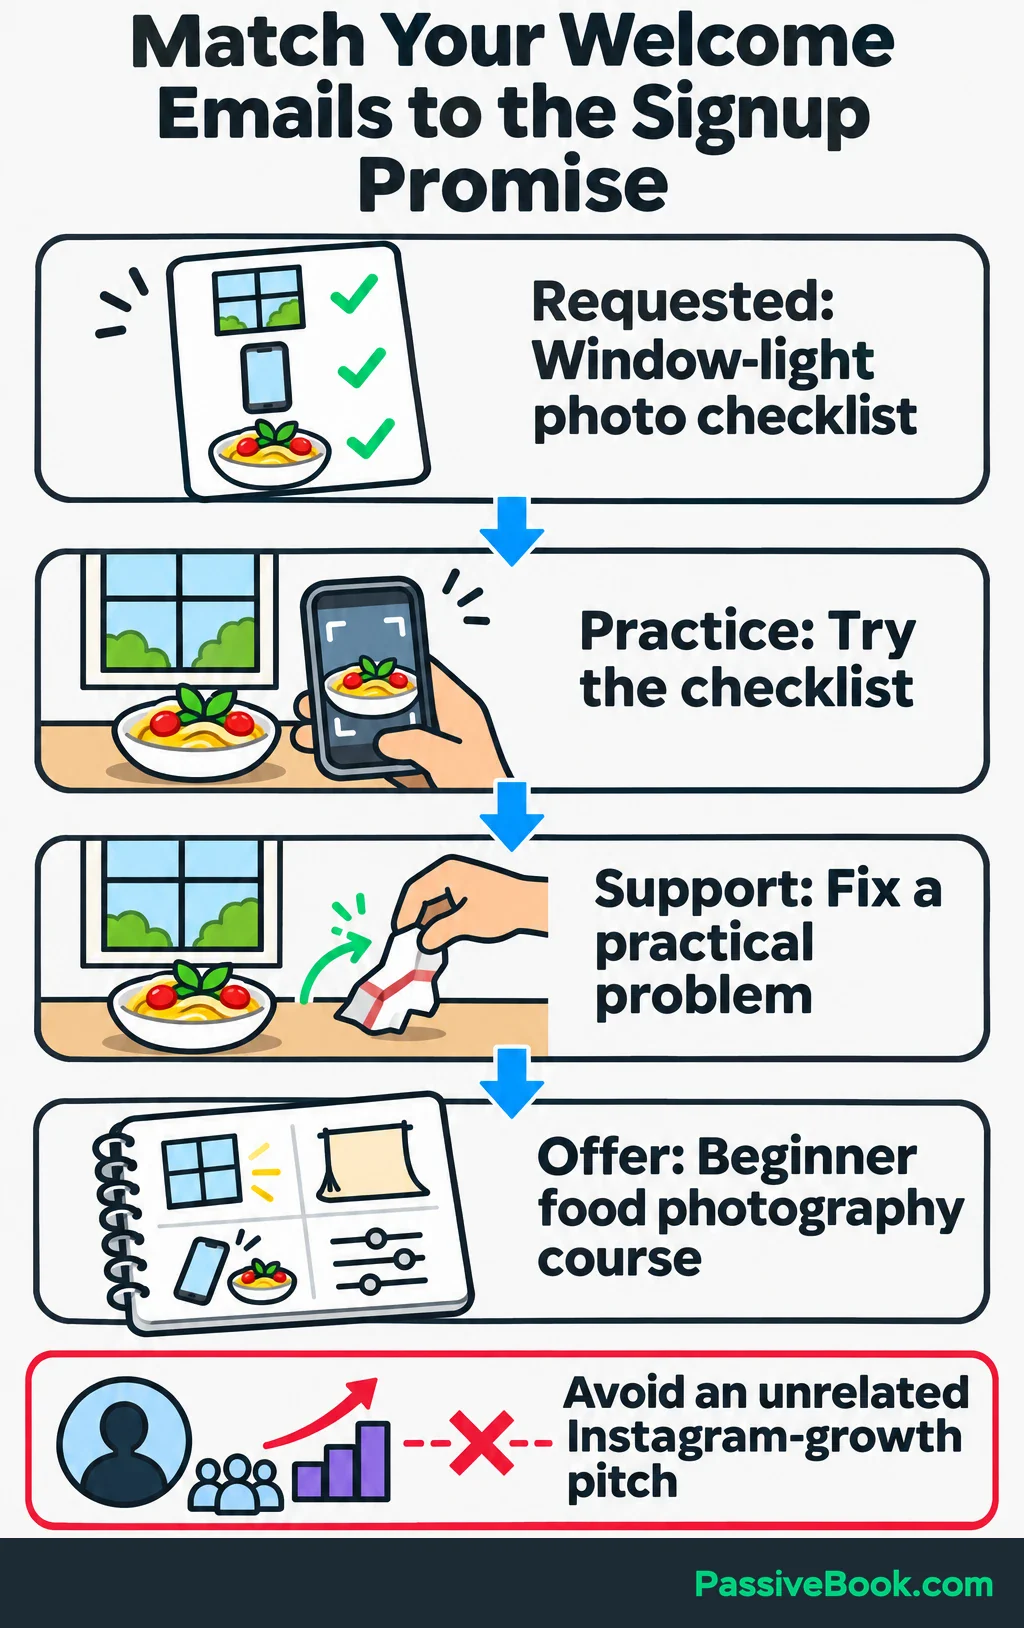
The business, resources, course details, sample emails, and figures below are illustrations you can adapt.
Keep those pieces connected. A person who requested help photographing lunch shouldn’t suddenly receive a pitch about growing an Instagram account.
Make the follow-up clear on the signup form, too. For example:
Get the free window-light photo checklist, followed by three emails over the next week with practice tips and an introduction to my course. After that, I’ll send one photography tip each week. Unsubscribe whenever you like.
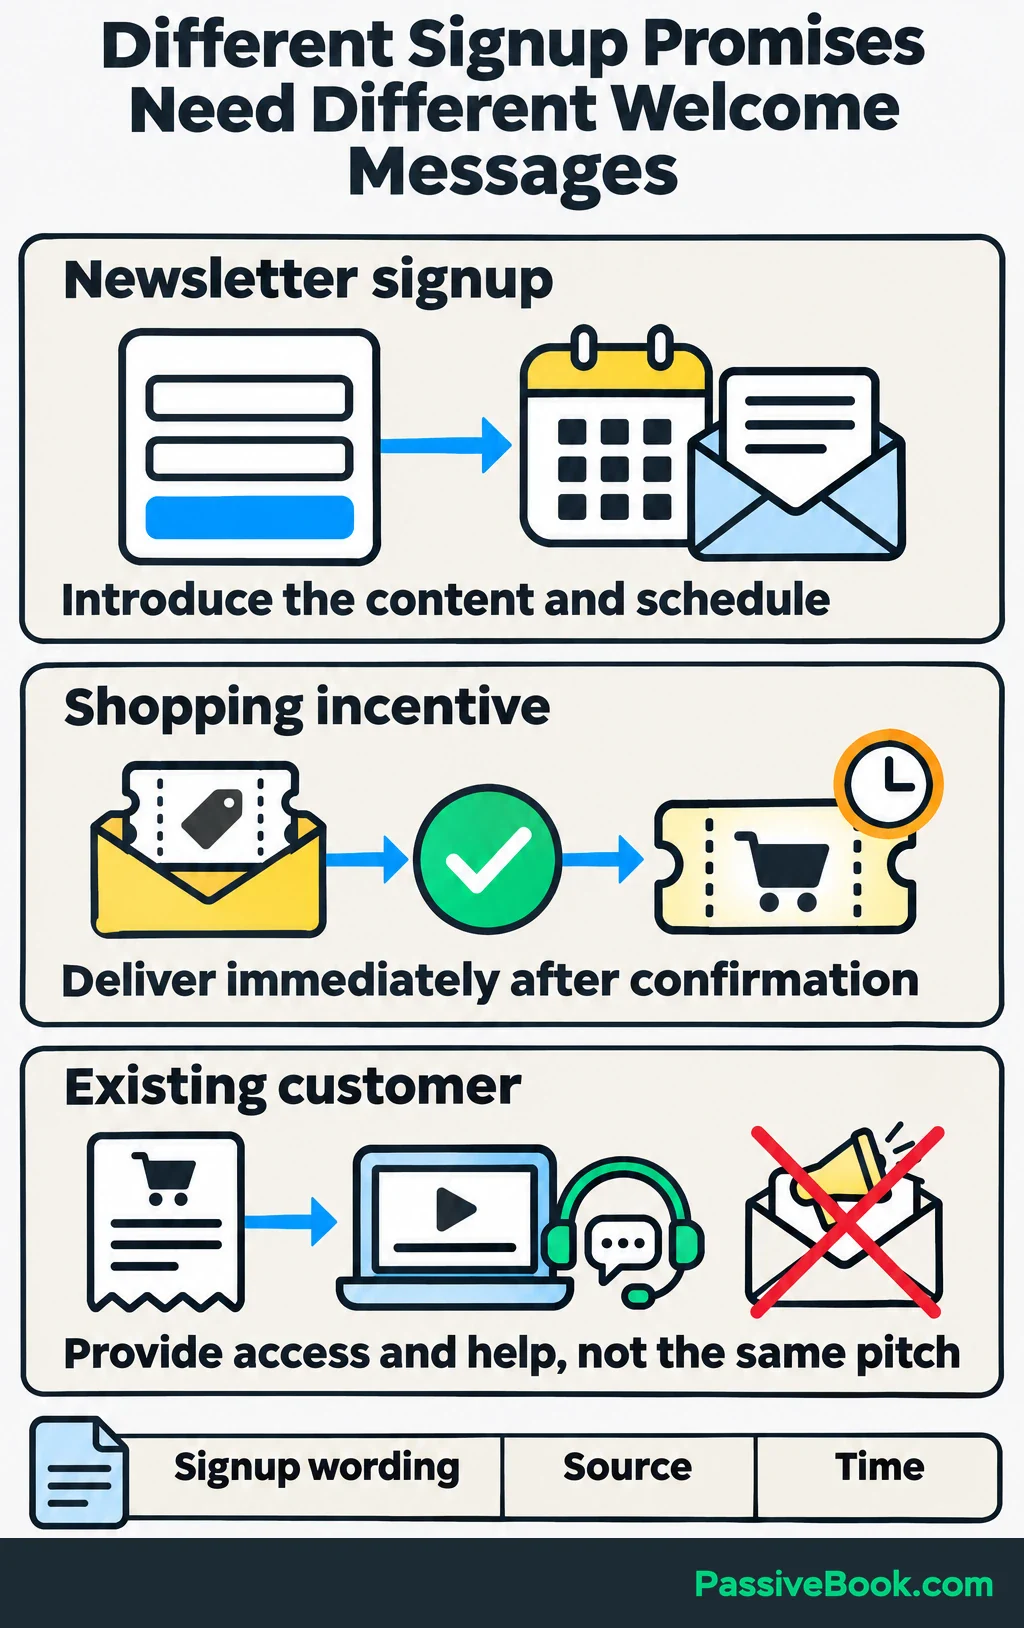
Keep a record of the signup wording, source, and time. I would also use address confirmation before enrollment. Google’s subscription guidance calls for this; it is provider guidance, rather than a universal legal requirement.
Different signup promises need small adjustments:
- A newsletter signup should introduce the content someone requested and when to expect it.
- A requested shopping incentive should arrive immediately after confirmation. There is no reason to hide it behind several lessons.
- An existing customer needs access and help using their purchase. Exclude them from another pitch for the same product.
Those differences earn separate messages. Having several products doesn’t automatically mean you need several complicated funnels.
Write a Four-email Welcome Sequence
Give each email one main job and one primary call to action. That action can be opening a resource, trying a task, viewing a demonstration, or exploring an offer.
Use this order within each message:
- A subject that says what the email contains.
- An opening connected to the signup or previous lesson.
- Enough useful explanation to act.
- One specific next step.
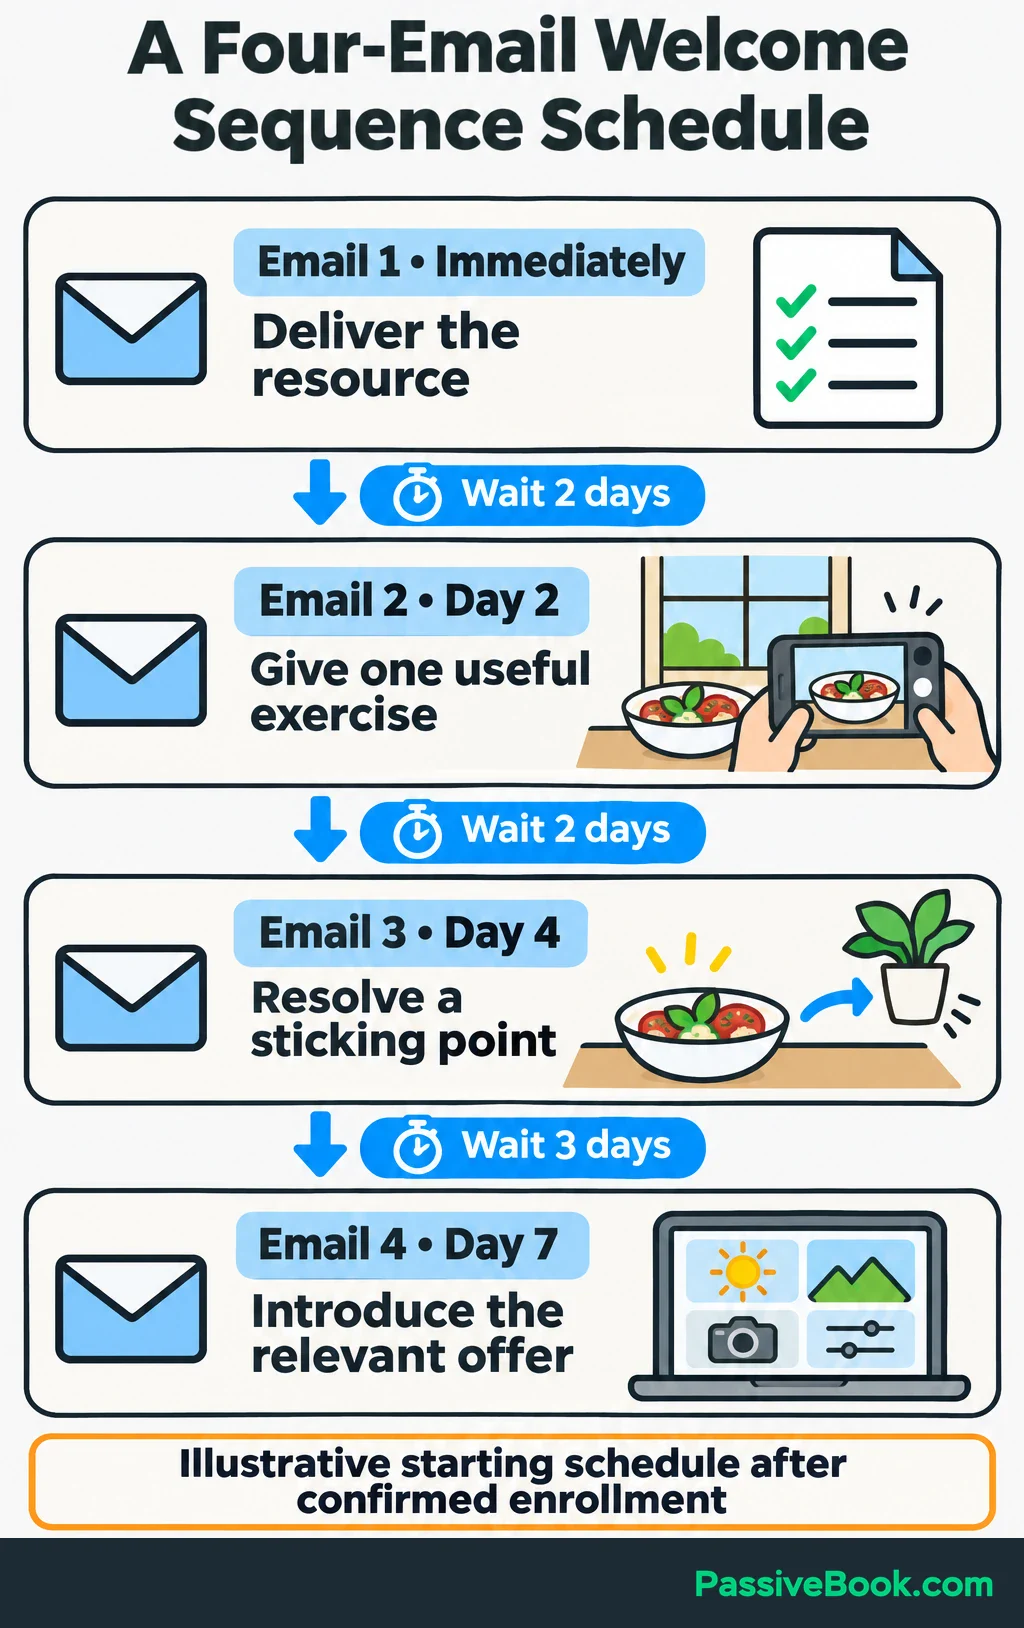
For this example, send the emails immediately after confirmed enrollment, then on days two, four, and seven. That gives subscribers time to try the exercises. Four emails and this spacing are a starting point, not a proven optimum.
Keep paragraphs short and use preview text—the snippet shown beside the subject—to add context. Essential instructions should make sense without images. If you insert first names, set a fallback such as “Hi there,” so missing details don’t produce a broken greeting.
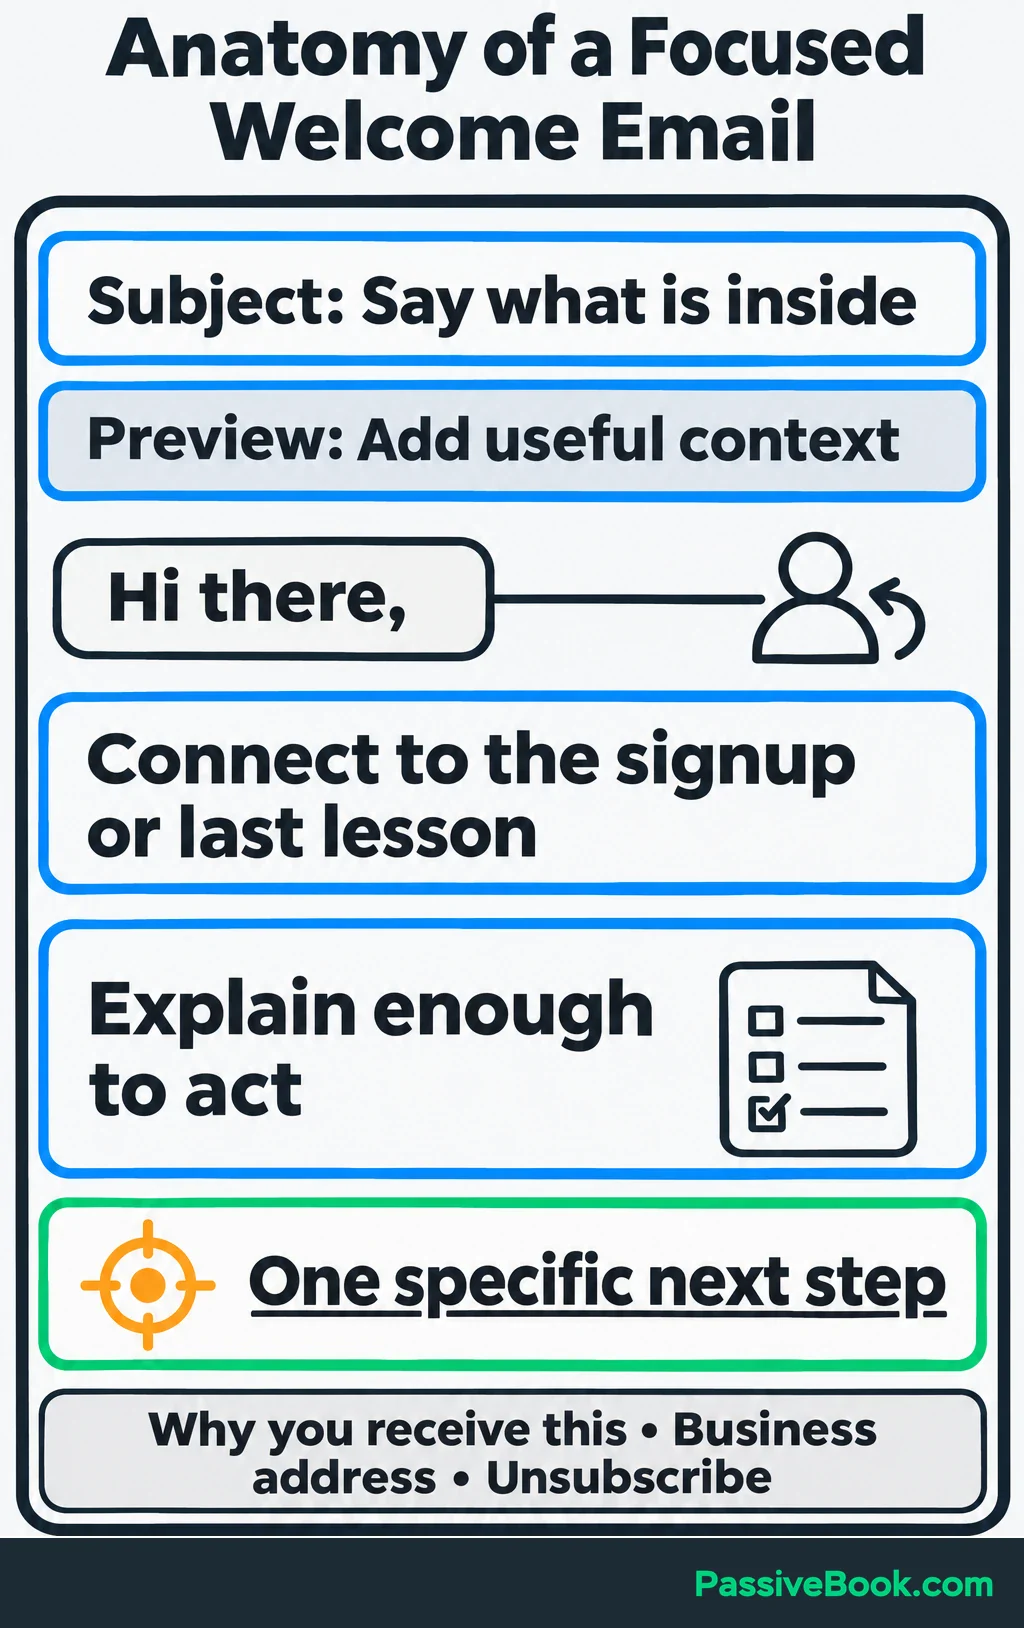
For US commercial email, use accurate sender details and truthful subjects, clearly identify advertising, and include a valid postal address and an easy opt-out. The FTC’s CAN-SPAM guide requires honoring opt-outs within ten business days. Set your platform to stop marketing sends immediately when someone unsubscribes.
The samples below use Maya as the course owner. Replace the bracketed details and add this shared footer to every email:
You’re receiving this because you requested my window-light photo checklist and photography emails.
[Business name and valid postal address]
Unsubscribe: [unsubscribe link]
Email 1: Deliver What You Promised
Put the resource near the beginning. Then briefly explain who you are, what to try first, and what comes next.
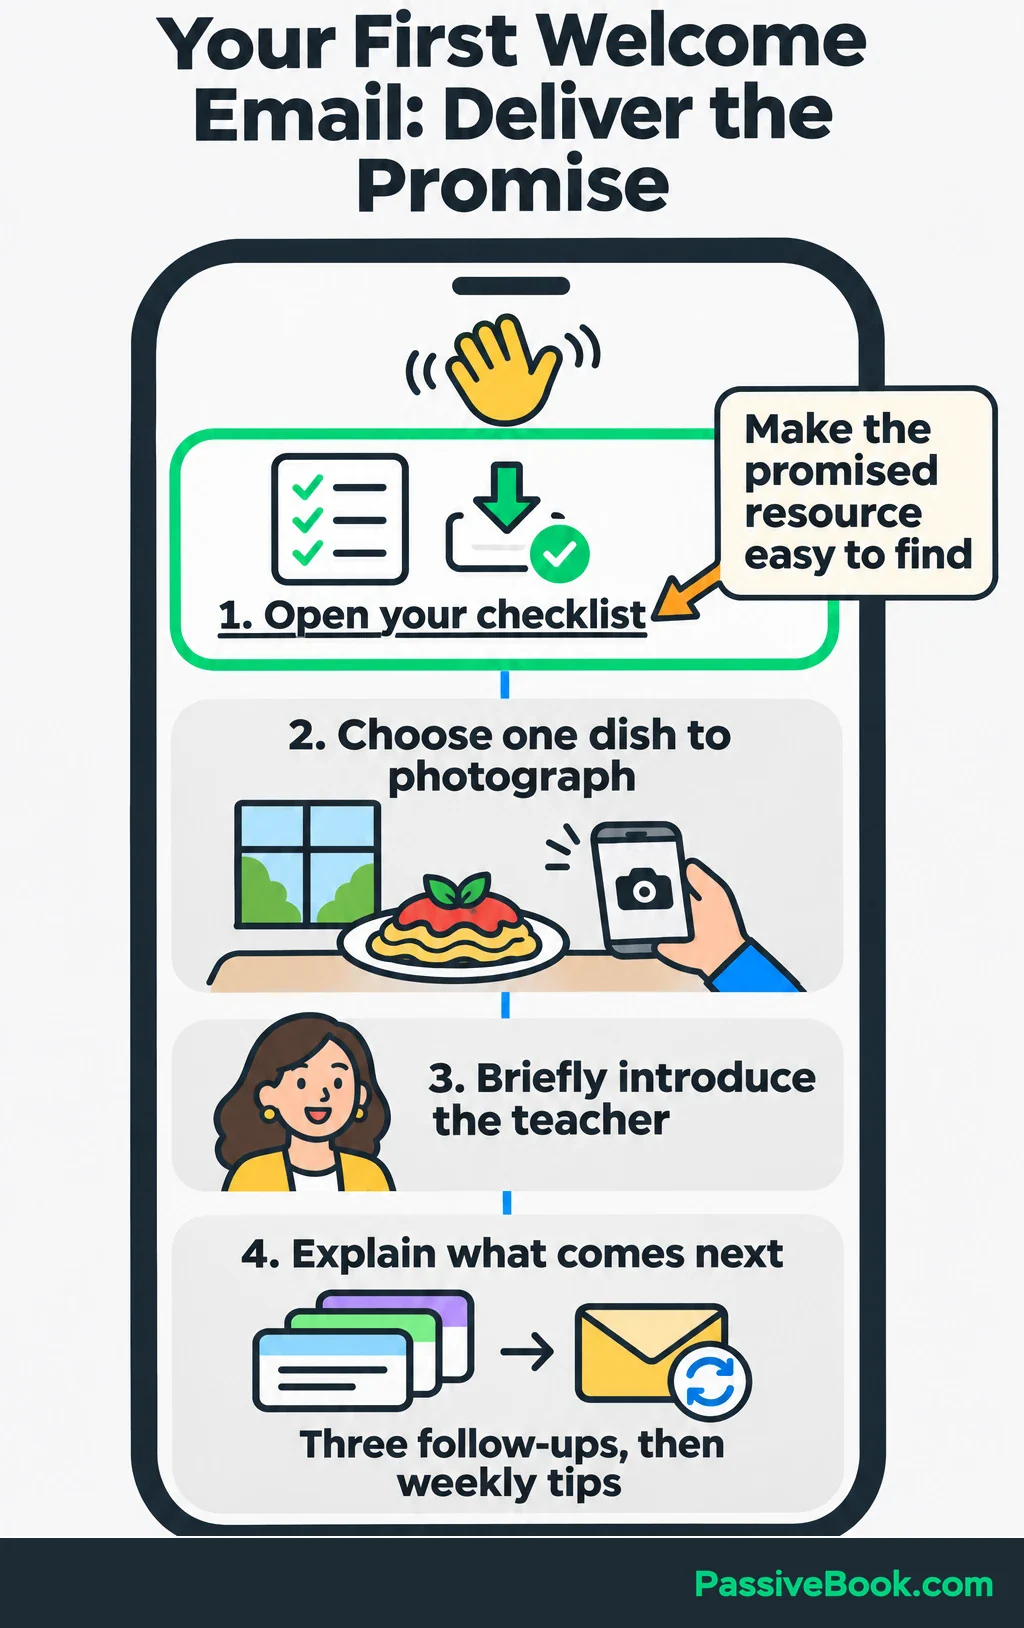
The download shouldn’t require a tour of your business history.
Subject: Your window-light photo checklist
Preview: Start with one dish and your phone.
Hi there,
Here’s your window-light photo checklist:
Open your checklist: [checklist link]
Start by choosing one dish you can photograph beside a window. You don’t need to prepare a whole meal for this exercise.
I’m Maya, and I teach beginners how to photograph food with a smartphone.
Over the next week, I’ll send you a short practice exercise, a background comparison, and an introduction to my beginner course. After that, expect one photography tip each week.
For now, keep the checklist handy and choose your dish.
Maya
The resource link fulfills the promise. The introduction explains why Maya is sending advice, and the final lines set expectations without competing with the download.
Email 2: Help Them Take One Useful Action
Choose a task someone can complete with what they already have. Explain how to do it and what to look for.
For the photography example, the task is comparing two lighting positions. The subscriber can try it without buying the course.
Subject: Try your first checklist photo
Preview: Take two pictures and compare the texture.
Hi there,
Ready to try your checklist?
Place one dish beside a window and switch off the overhead light. Take a photo with your phone.
Now turn the plate so the window light reaches it from another direction, and take a second photo. Keep your phone in roughly the same position.
Compare the two pictures. In which one can you see the food’s texture more clearly? Look at something specific, such as the crust on bread or the surface of a sauce.
Save the photo you prefer. We’ll use it for the next exercise.
Maya
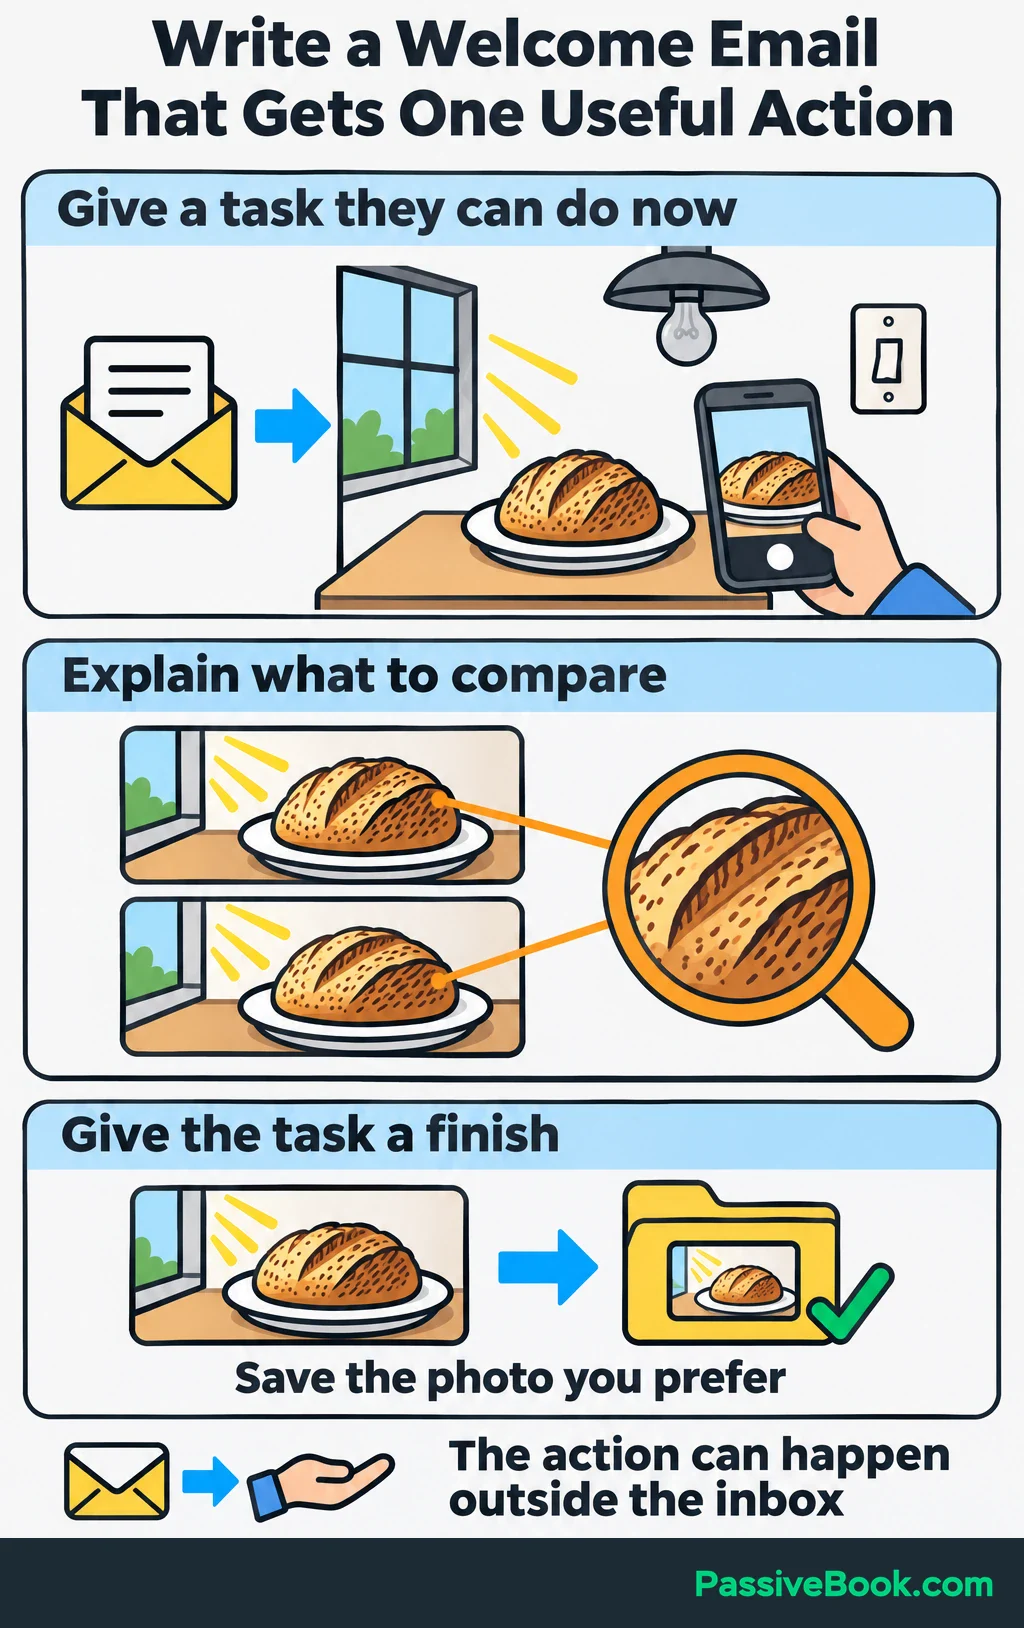
The main action happens away from the inbox, so this email doesn’t need a button. “Save the photo you prefer” gives the reader a clear finish.
I would keep the course link out of this message. The exercise should work on its own.
Email 3: Resolve a Practical Sticking Point
Address something that could prevent the subscriber from using the previous lesson. Explain what to change, then show the difference.
Here, the food may be clearly lit but surrounded by distracting objects. Before sending, create a comparison page showing the same dish with a busy background and a simpler one. Keep the lighting and camera position consistent so readers can judge that change.
Subject: Is the background competing with your food?
Preview: Try removing something before adding another prop.
Hi there,
Open the photo you saved from the last exercise.
Look around the edges. Is there packaging, cutlery, or a bright object pulling your attention away from the dish?
I’ve put a busy background beside a simpler version here:
See the background comparison: [comparison link]
Use the comparison to choose one distracting item to remove next time you photograph food.
Take a picture before and after removing it. Keep the plate, lighting, and phone position the same for both shots.
Compare your two pictures and decide which background you prefer.
Maya
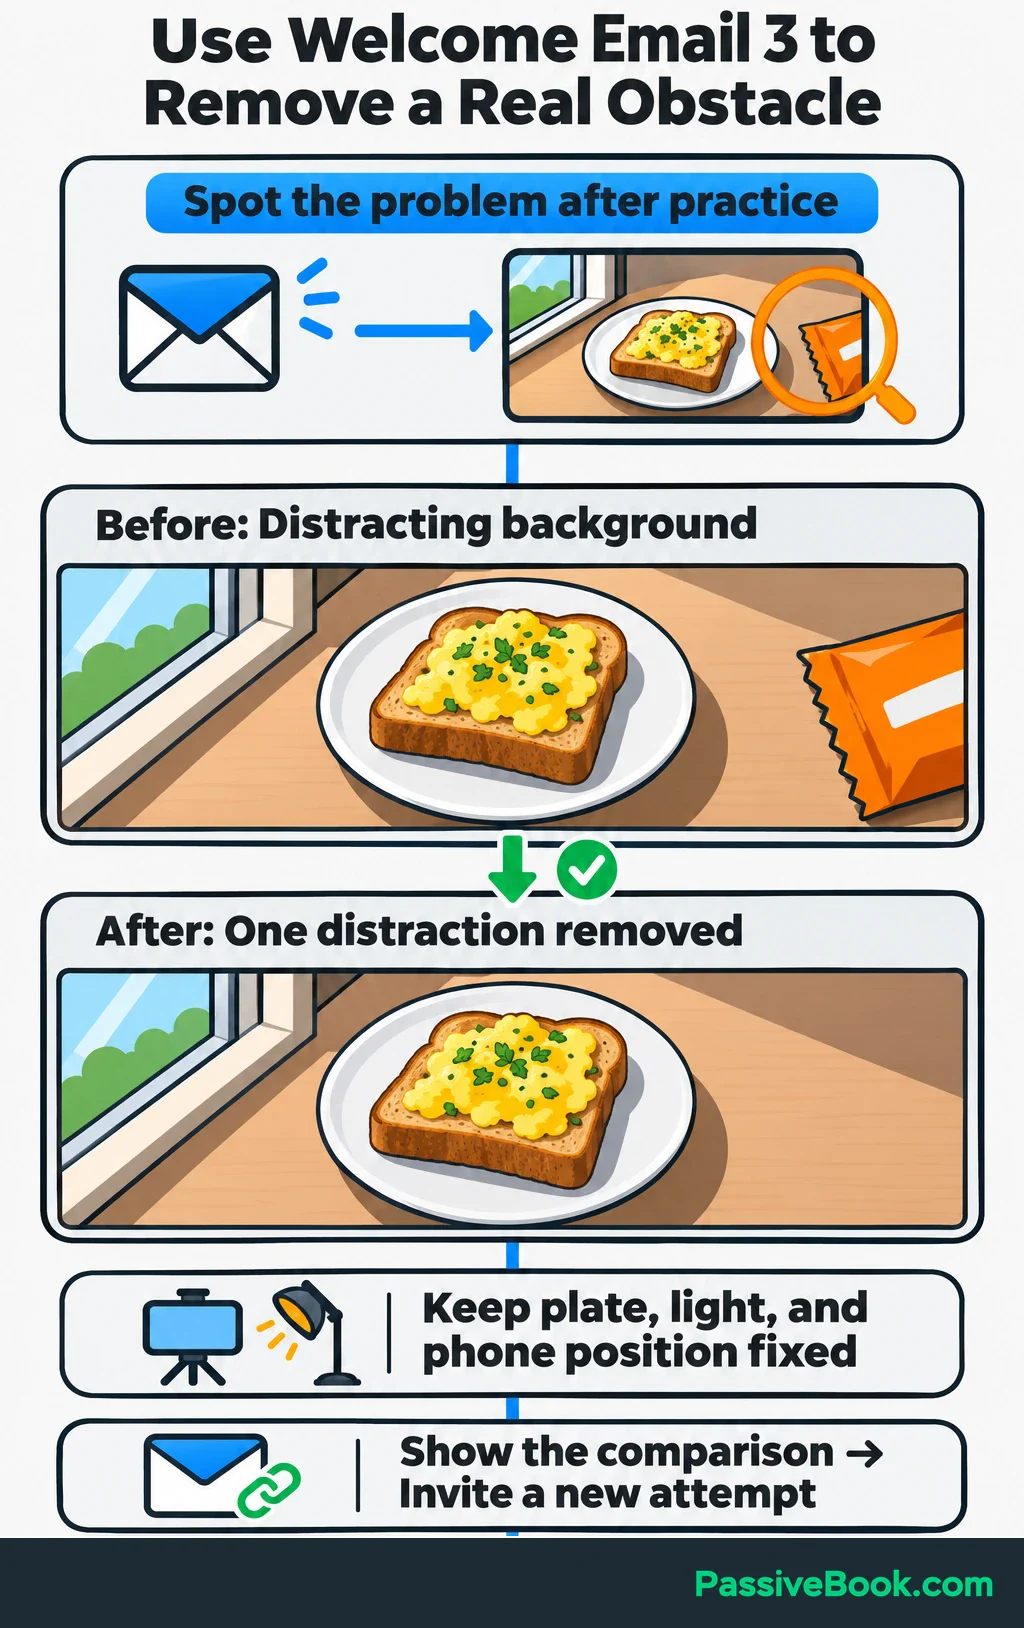
This message answers a problem created by doing the work. That is a good reason for another email.
I would skip extra messages that repeat the same lesson with a different subject line. An empty slot in the automation doesn’t need feeding.
Email 4: Introduce the Relevant Offer
Connect the practice so far to a larger task your product helps with. Explain what it includes, who it suits, and one important requirement.
In this illustrative course, assume the lessons cover lighting, backgrounds, camera angles, and basic editing, and require a smartphone camera but no separate lighting equipment. Replace those details with your actual product requirements.
Subject: Your next step in smartphone food photography
Preview: See what the beginner course covers.
Hi there,
You’ve now had a chance to try window light and simplify a photo’s background.
If you’d like a guided way to keep practicing, my paid beginner smartphone food photography course builds on those exercises.
It includes lessons on lighting, backgrounds, choosing camera angles, and basic editing, with a practice task for each topic.
You’ll need a smartphone with a working camera. No separate camera or studio lights are required for the lessons.
The course is for beginners who want a repeatable way to plan and take their food photos.
View the course outline: [course link]
That’s the last email in this introduction. From here, I’ll send one photography tip each week.
Maya
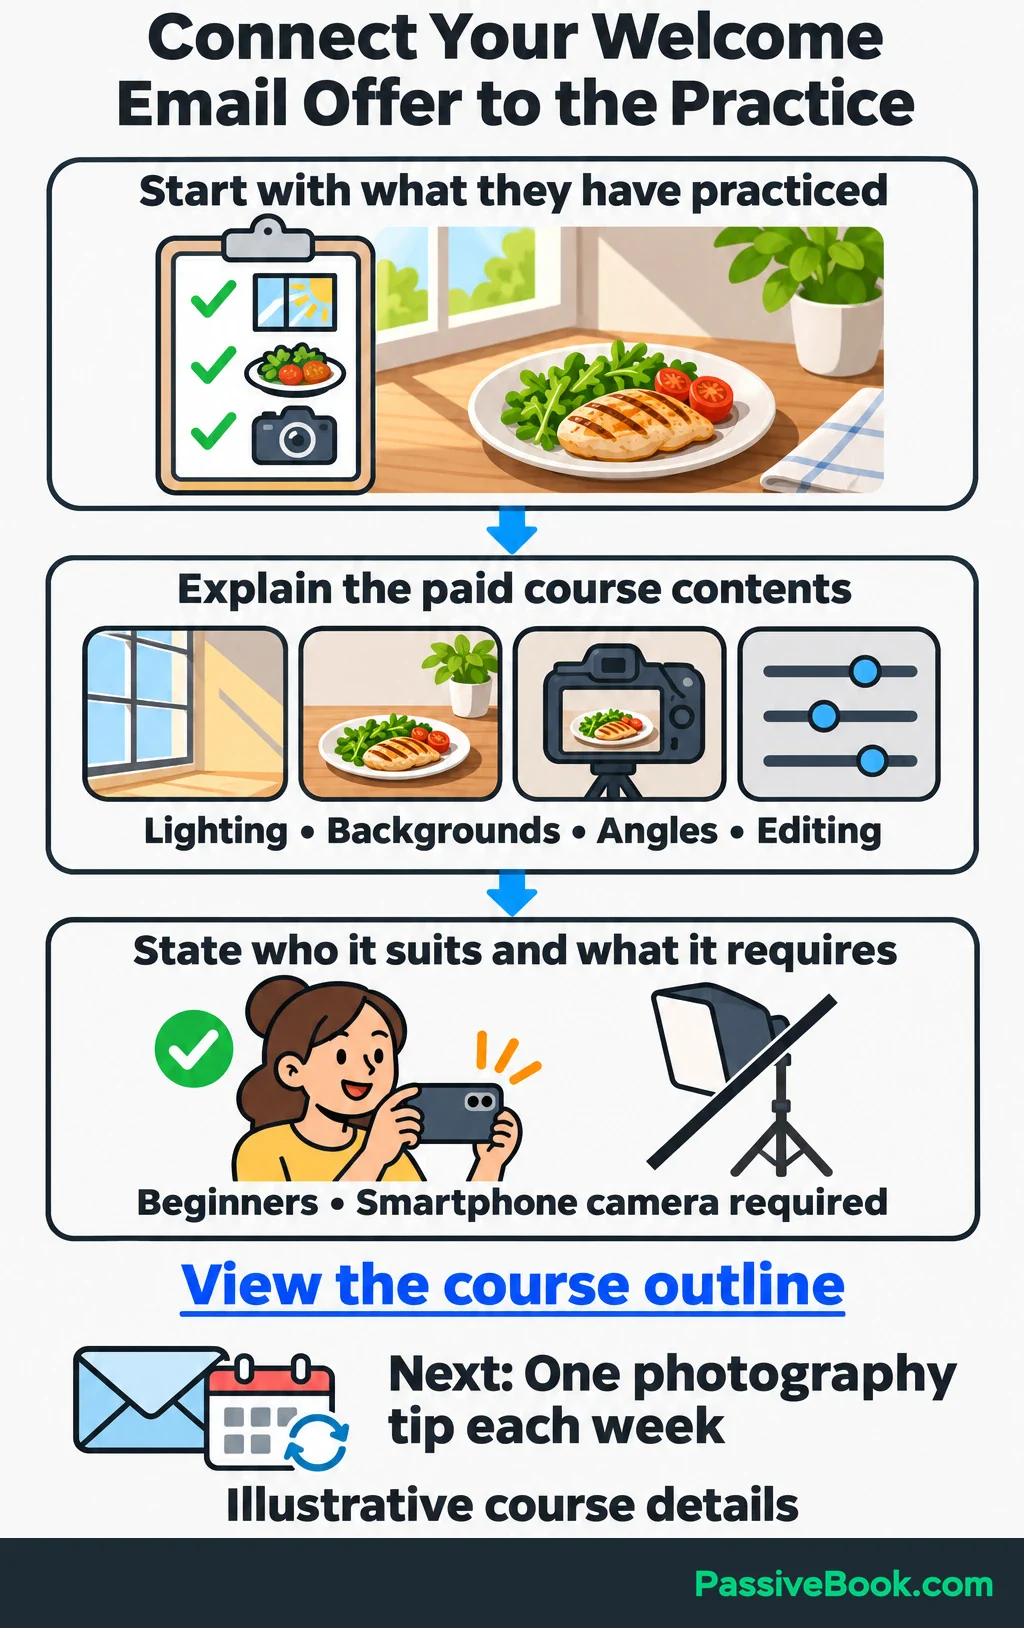
The offer is clear, and the link lets someone inspect the contents before deciding.
You don’t need a discount, a countdown, or an extra sales email to finish the sequence.
If you’re still staring at a blank draft, AI Messaging Studio can write a first version around your resource and offer. You’ll get the four messages together, so you can review how each one leads to the next.
Free AI Messaging Studio


Automate Enrollment and Delivery
Prepare the Sender and Email Platform
Start with the platform you already have. Check whether your plan supports the signup trigger, four emails, delays, and buyer exclusions. A subscriber allowance alone doesn’t tell you whether it can run this workflow.
If you’re choosing from scratch, I favor FluentCRM for managing email automation inside WordPress. You’ll also need a sending service to deliver the messages. For a hosted creator platform, I would consider Kit. Check the automation features you need before paying for either setup.
Use a recognizable sender name, such as “Maya at [Business],” and a reply address you monitor.
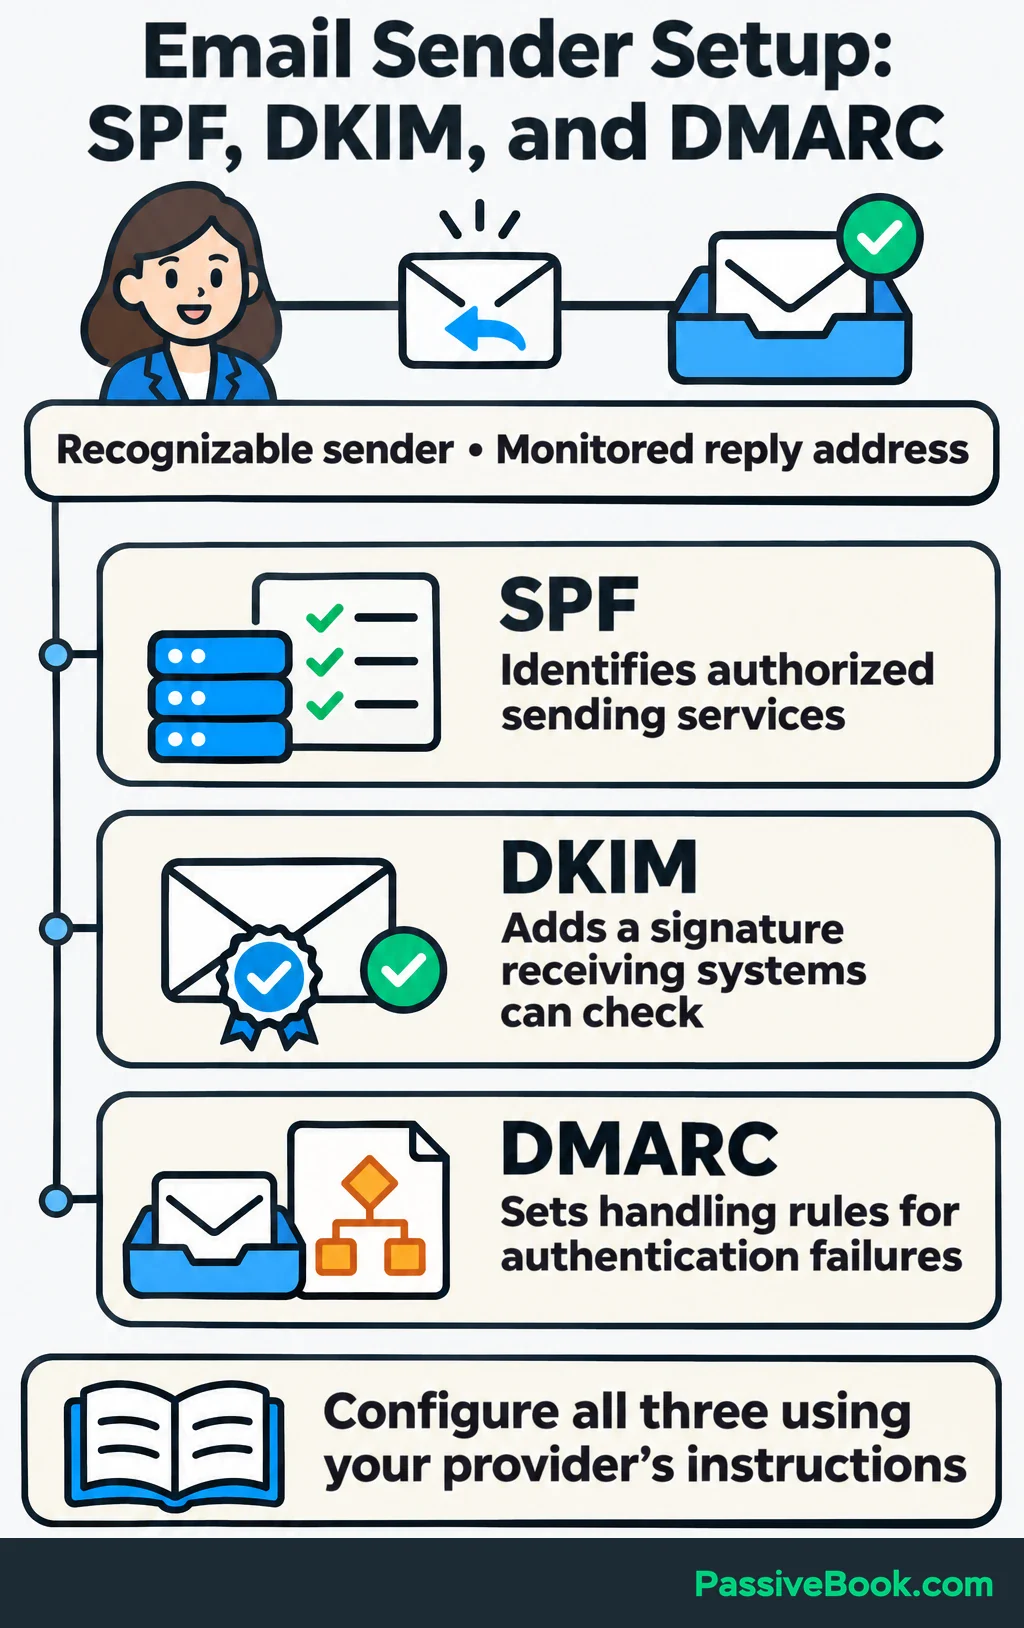
Authenticate your sending domain using your provider’s instructions. SPF identifies authorized sending services, DKIM adds a signature receiving systems can check, and DMARC sets rules for handling messages that fail authentication checks. Google recommends configuring all three.
Before opening the automation builder, map the workflow:
| Entry Event | Eligibility Rule | Delay | Exit Condition | Next Destination | |
|---|---|---|---|---|---|
| Checklist signup confirmed | Subscribed, not a course buyer, and not previously welcomed | Deliver checklist | None | Unsubscribe, complaint, permanent delivery failure, or purchase | Wait for Email 2 |
| Email 1 sent | Still subscribed and not a buyer | First photo exercise | Two days | Same stop conditions | Wait for Email 3 |
| Email 2 sent | Still subscribed and not a buyer | Background comparison | Two more days | Same stop conditions | Wait for Email 4 |
| Email 3 sent | Still subscribed and not a buyer | Course introduction | Three more days | Same stop conditions | Promised weekly emails |
Buyers should move toward course access and help using their purchase. Unsubscribed or undeliverable contacts should leave marketing delivery.
Connect Signup to the Email Schedule
Connect the relevant form to confirmed enrollment. If your tool uses a tag—a label attached to a contact—use one that identifies this resource request.
The entry rule should mean:
This person requested the checklist, confirmed their address, remains subscribed, doesn’t own the course, and hasn’t already received the introduction.
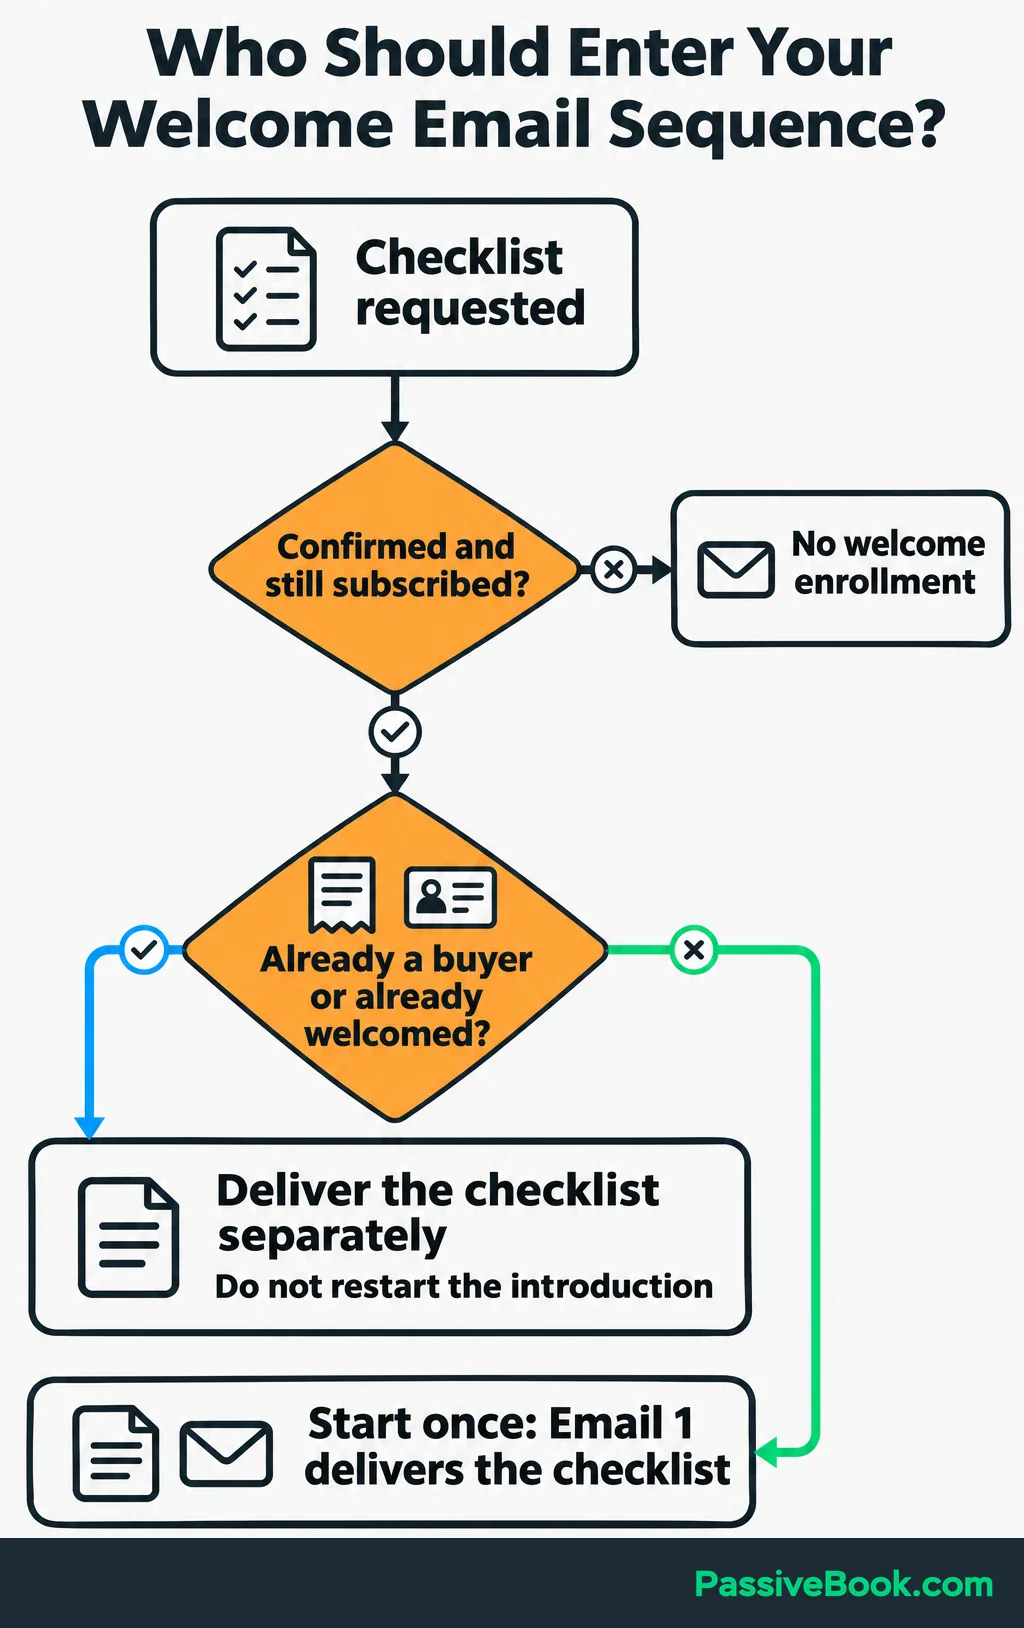
A raw form submission should not bypass those conditions.
Next, add the four messages in order. If your platform uses delays between steps, enter gaps of two days, two days, and three days. If it schedules by time since enrollment, use days two, four, and seven.
Keep the first email immediate. A weekday-only sending rule shouldn’t make someone wait until Monday for a resource requested on Saturday.
Allow each eligible person to receive the general introduction once. If someone has already received it or owns the course, deliver their requested checklist separately without starting these four emails. Keep resource delivery separate from welcome-sequence eligibility so those subscribers still get what they requested.
Stop Irrelevant Messages and Hand Off to Ongoing Email
Connect purchase updates from your checkout to the email platform. Before the course pitch, check whether the subscriber has already bought it.
If someone purchases during a delay, the workflow should remove them from the remaining course promotion and start the appropriate customer messages. Test that connection before relying on it.
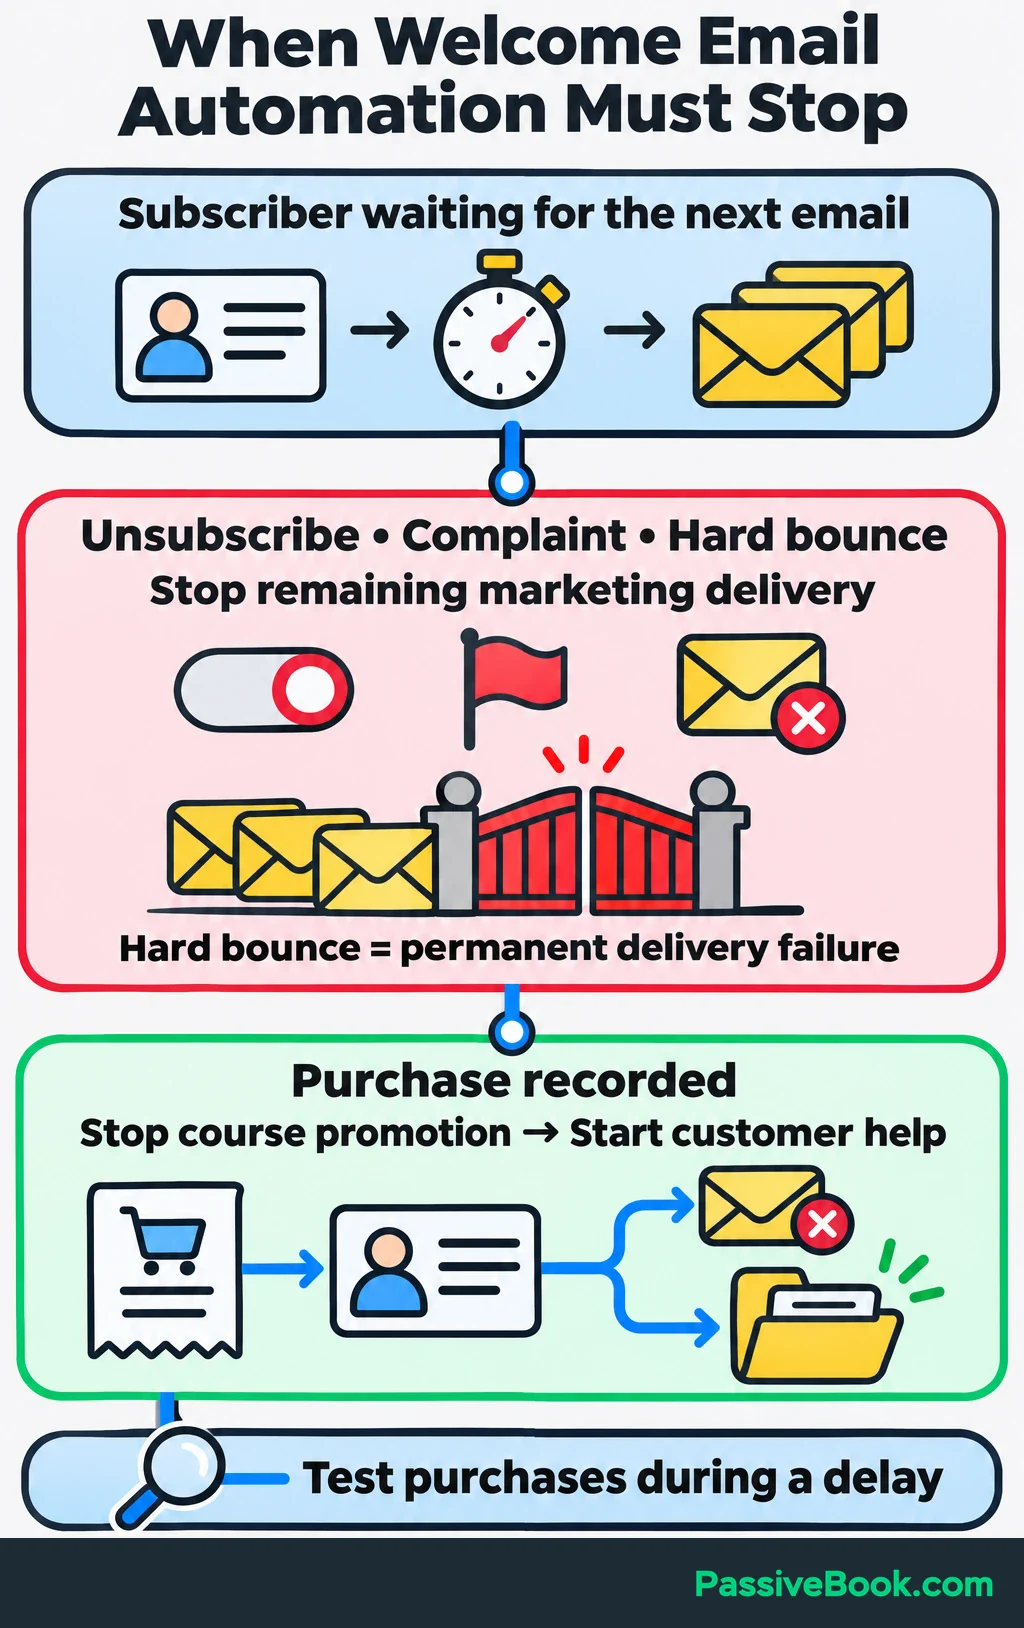
Apply unsubscribe, complaint, and hard-bounce suppression throughout the workflow, including while contacts wait. A hard bounce means delivery failed permanently, such as when an address doesn’t exist.
Coordinate your regular newsletters and promotions, too. I would exclude people in this introduction from unrelated promotions. Keep necessary receipts and account messages in their own delivery flow.
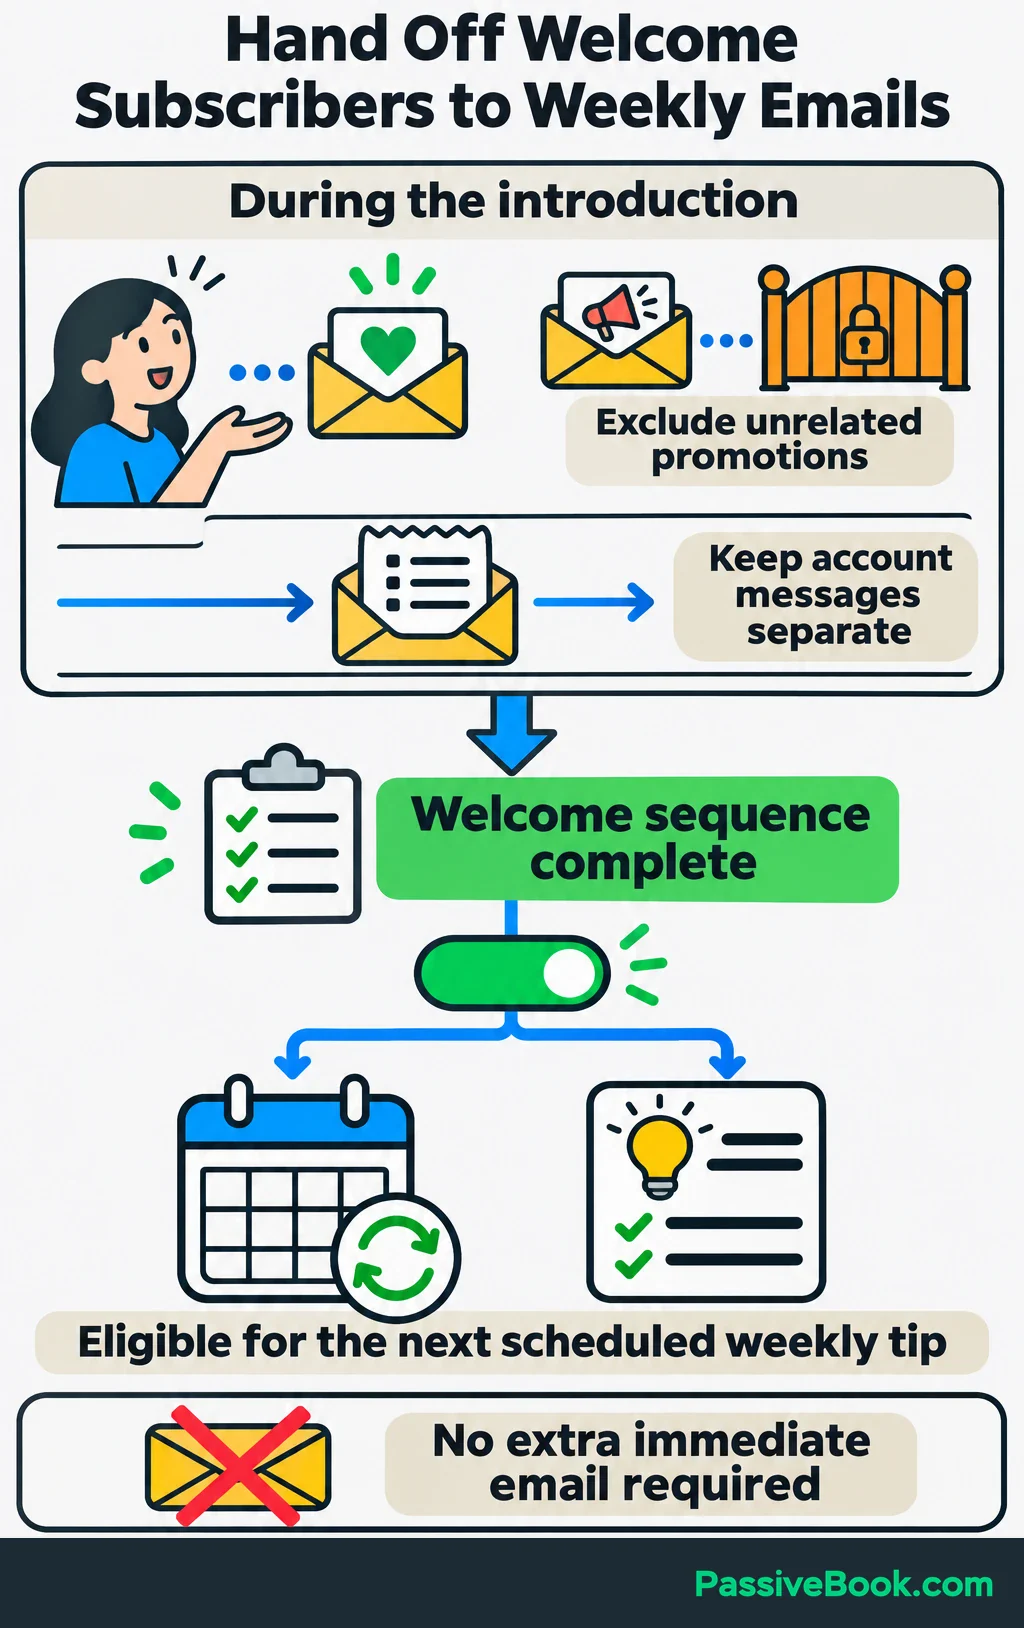
After the sequence, make remaining subscribers eligible for the weekly tips promised at signup. They can receive the next scheduled edition; completion doesn’t need to trigger another immediate email.
Add branches only when they change what someone should receive. Buyer status earns a branch. A preference you never use does not.
Test the Complete Signup Journey
Subscribe through the real form with a fresh test address. Don’t rely only on sending yourself previews.
On a newsletter I ran in another niche, my preview email arrived correctly, but a signup through the live form left the contact waiting for confirmation. I had checked the message and missed the entry rule. Following the journey from the form showed me where delivery actually stopped.
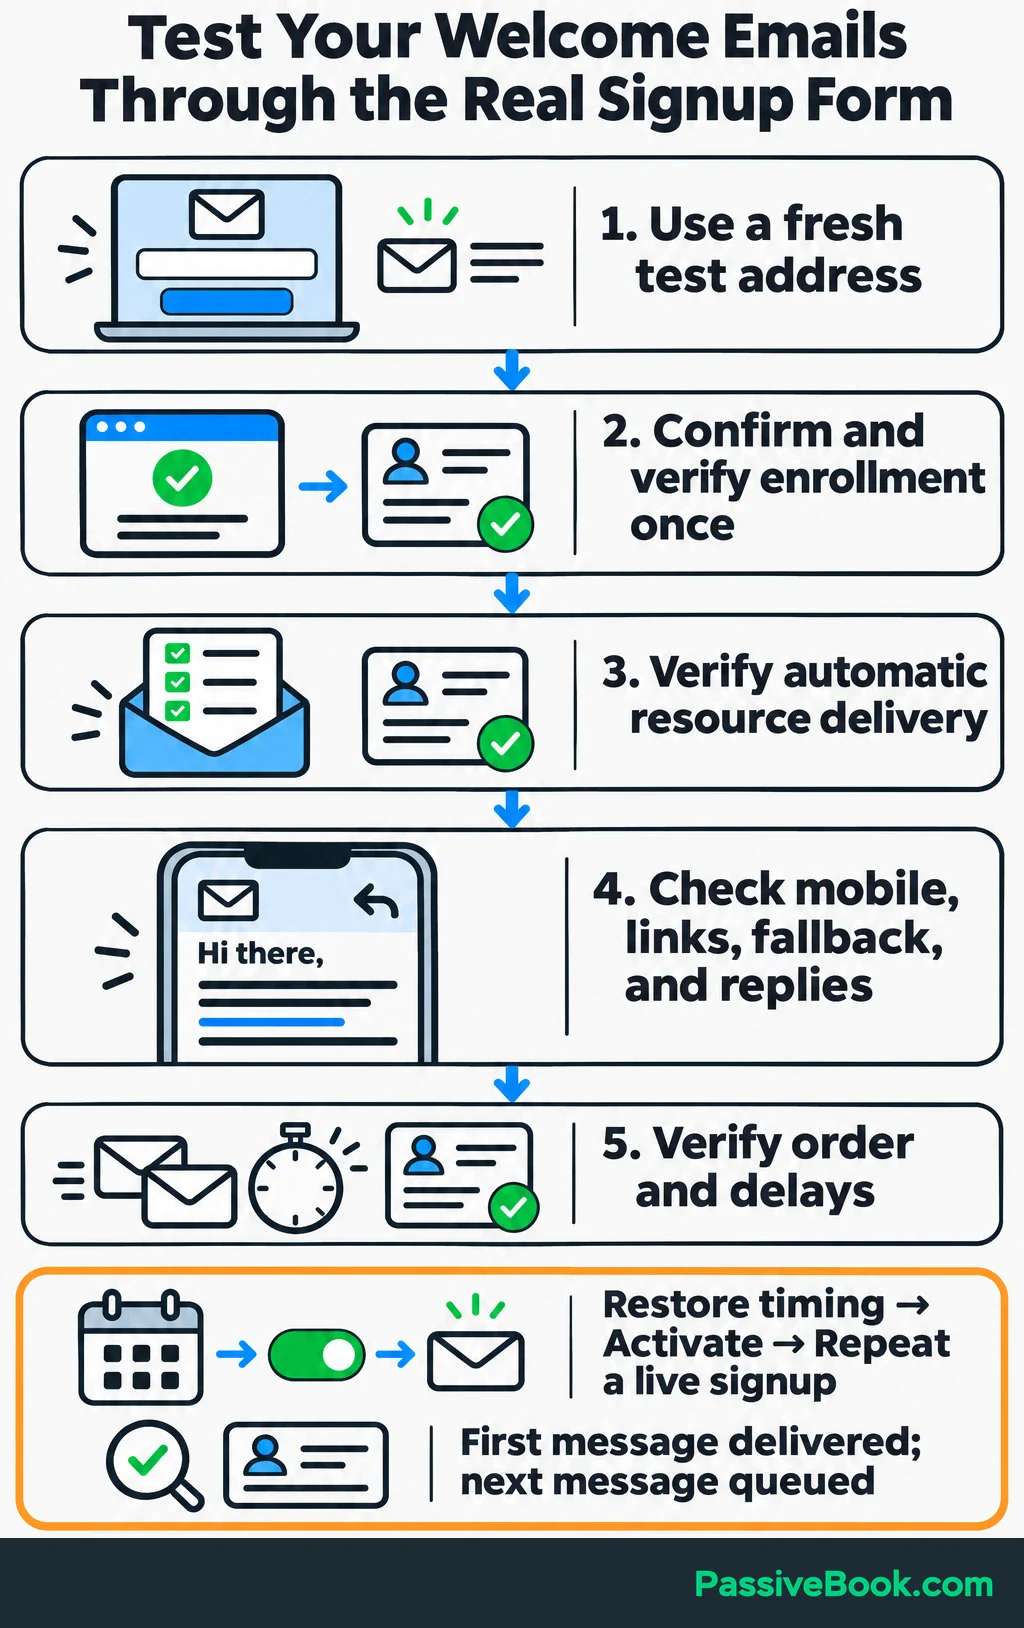
Check the experience and the contact record together:
- The confirmation arrives, and confirming enrolls the subscriber once.
- The first email arrives automatically and opens the correct resource.
- Sender details are recognizable, and replies reach your inbox.
- Text and links are readable on a phone, including when images are hidden.
- Missing first names use the fallback greeting.
- Later emails appear in the correct order with the intended delays.
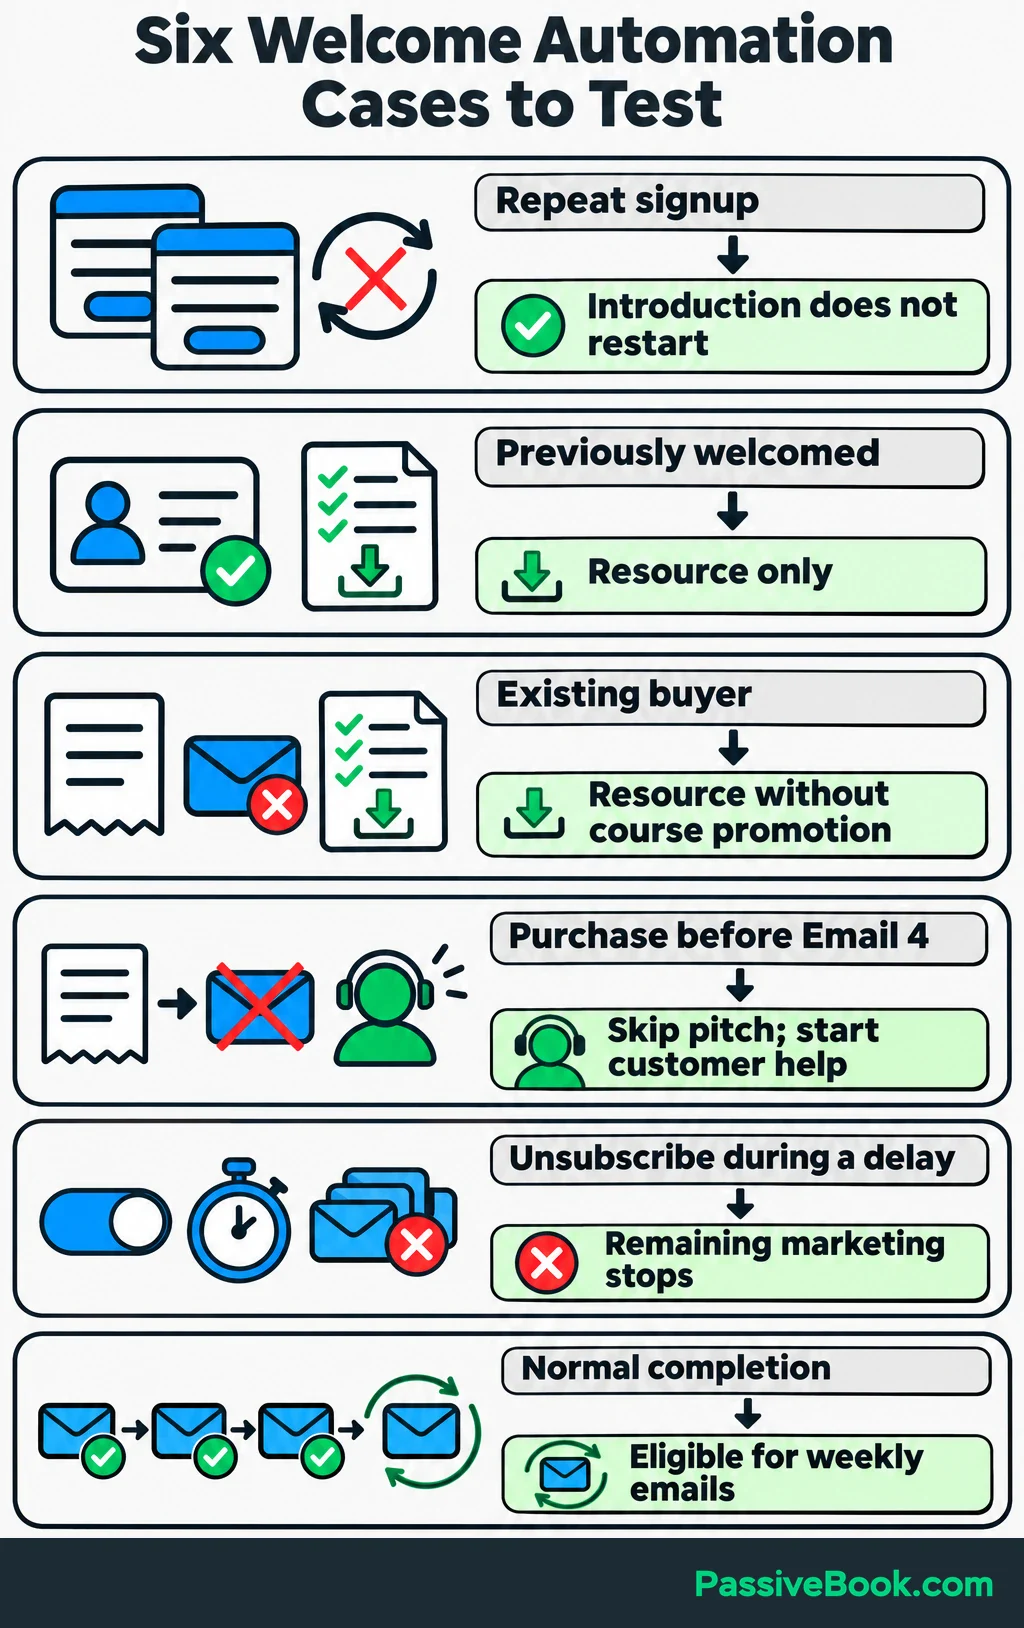
Then test the cases that change delivery:
| Test | Expected Result |
|---|---|
| The same person submits the form again | The introduction doesn’t restart |
| A previously welcomed subscriber requests the checklist | They receive the resource without repeating the welcome sequence |
| A course buyer requests the checklist | They receive the resource without entering the course promotion |
| Someone purchases before Email 4 | The pitch is skipped, and customer help begins |
| Someone unsubscribes during a delay | Remaining marketing emails stop |
| A subscriber finishes normally | They become eligible for the promised weekly emails |
Use a test copy or your platform’s testing controls to inspect later steps quickly. Restore the intended schedule before activation.
Finally, activate the workflow and complete another live signup. Verify that the first message arrives without intervention and the next message is queued correctly.
Improve the Sequence Using Subscriber Actions
Measure the outcome you chose at the start, alongside the actions that help explain it.
For the photography sequence, I would watch checklist access, course-page visits, replies, purchases, unsubscribes, complaints, and delivery failures.
Treat opens and clicks as clues. Privacy features and security scanners can inflate email reports, so a recorded open or click doesn’t always mean a person read your message or followed a link. Compare those reports with replies and purchases before rewriting your sequence.
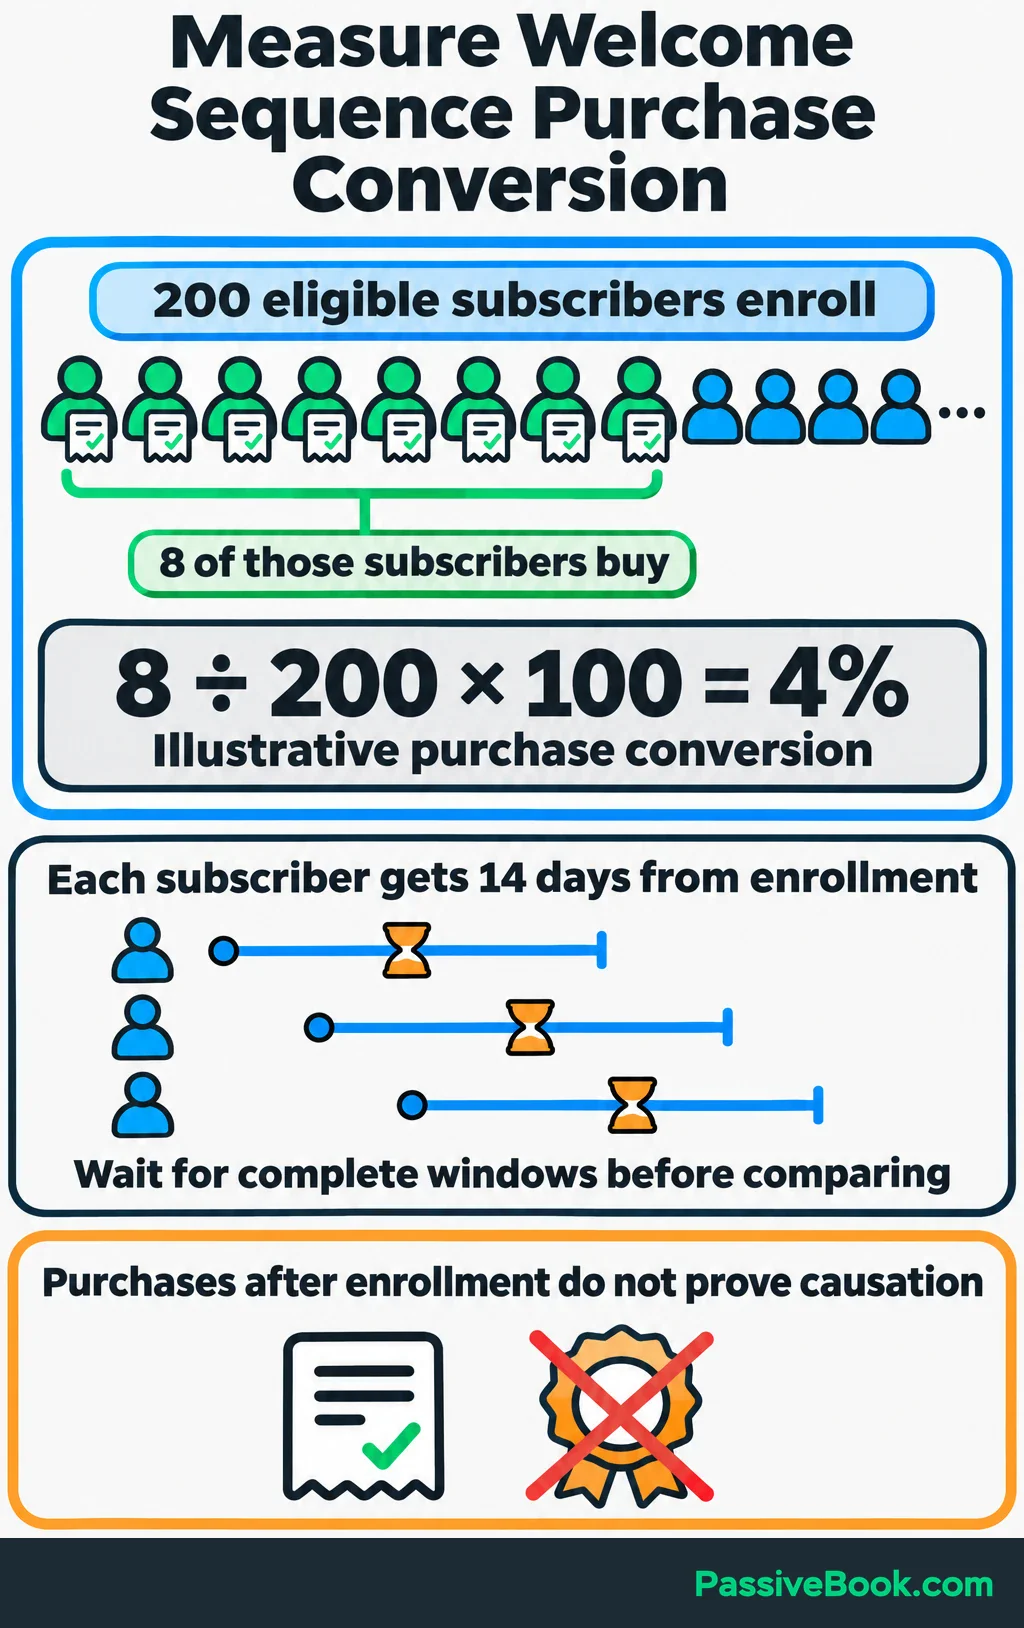
To calculate purchase conversion, count the unique eligible subscribers who enrolled and how many of those same people bought within a fixed period.
For illustration:
- 200 eligible subscribers enroll.
- Eight of those subscribers buy within 14 days of their own enrollment.
- Purchase conversion is 8 ÷ 200 × 100 = 4%.
Give every entrant the full 14-day window before comparing groups. This measures purchases following enrollment; it doesn’t establish how many purchases the sequence caused.
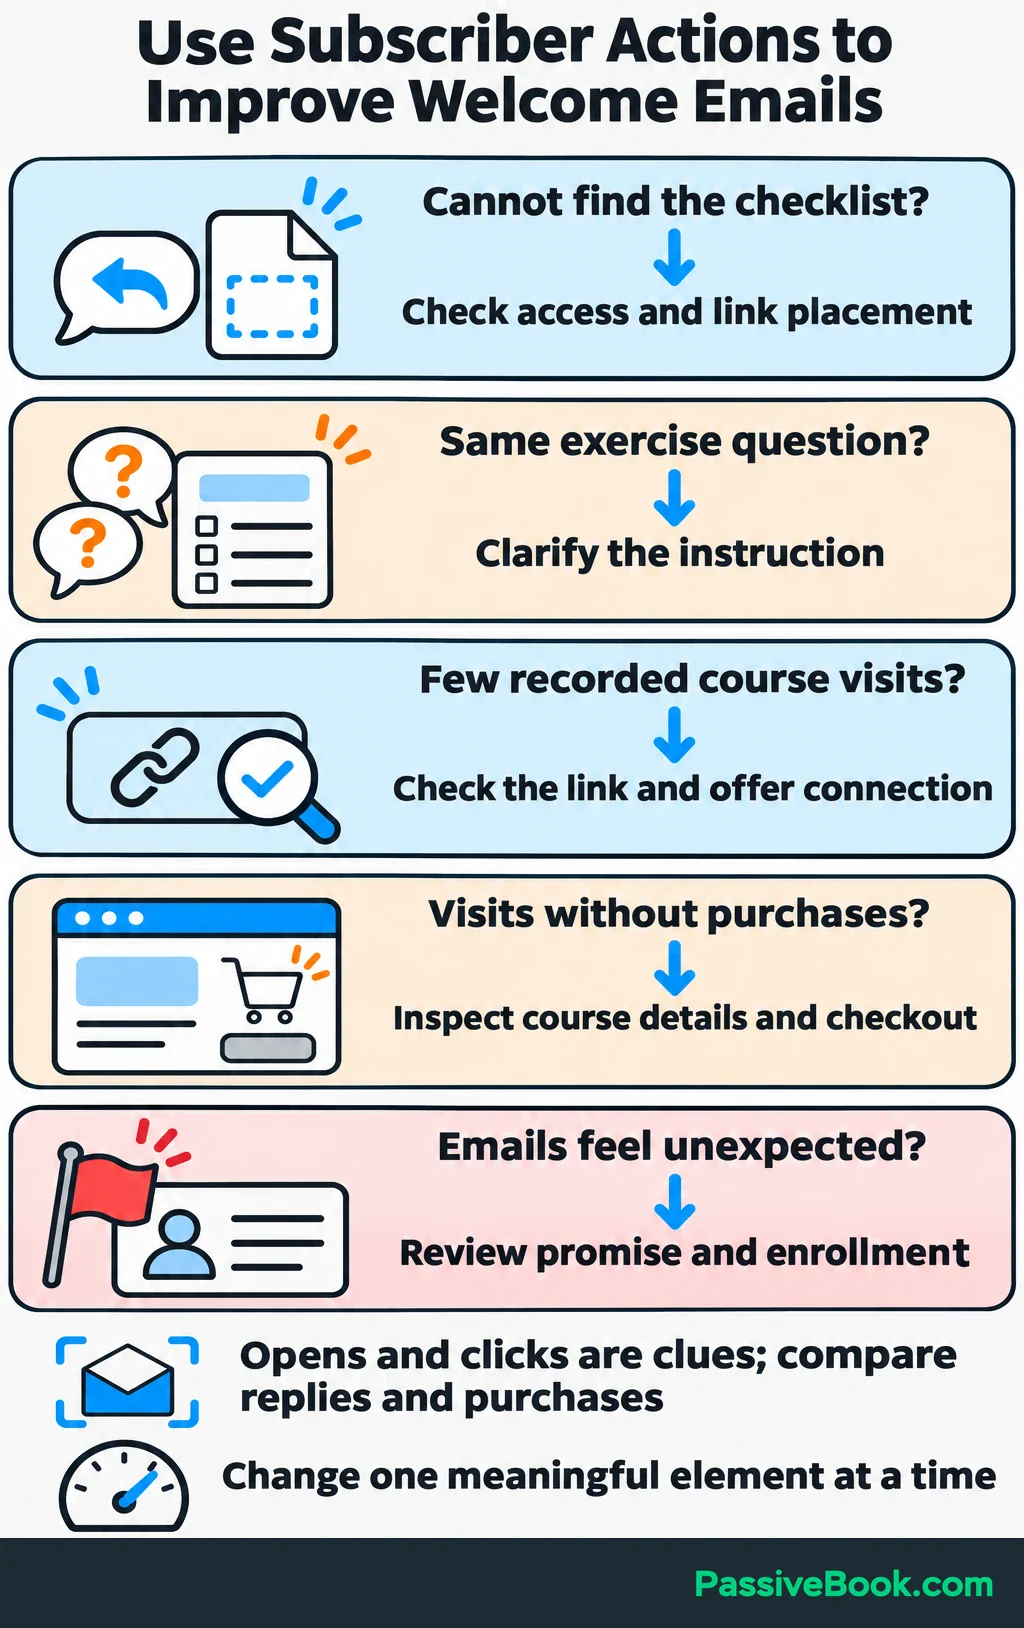
Use the evidence to choose what to inspect:
| What You Observe | What to Check First |
|---|---|
| Replies ask where the checklist is | Move the resource link higher and check access |
| Readers ask the same exercise question | Clarify that instruction in the relevant email |
| Few recorded course-page visits | Check the link, then review how the offer connects to the lessons |
| People visit the course page but don’t buy | Inspect the course details, requirements, and checkout |
| Complaints say the emails were unexpected | Review the signup promise and enrollment rules |
Change one meaningful element at a time. Then compare entrants who have had enough time to finish.
I would fix a confusing instruction before testing clever subject lines. More people opening an unclear email doesn’t solve the unclear email.
What Next?
Write the signup promise and draft the email that delivers it. Once those agree, give each follow-up one job and build the schedule around that progression.
Use the social buttons to share this guide when planning a sequence together—it gives the copy and automation a common starting point.
What would a subscriber need to accomplish before your offer feels like a useful next step? Share your answer in the comments, and bring any setup or writing questions with it.
Share this post with your friends & followers: