You have an idea for a podcast, but turning it into an episode brings a shopping list and several unfamiliar decisions. Which microphone do you need? Where does the audio go? And how does anyone find it?
It’s easy to spend your launch budget before you know whether you enjoy making the show.
The harder cost is committing your evenings to a production routine you haven’t tested. This guide follows a first episode from planning and recording to publication, then covers finding listeners and connecting the show to a business without assuming it will pay for itself.
How Podcasting Works
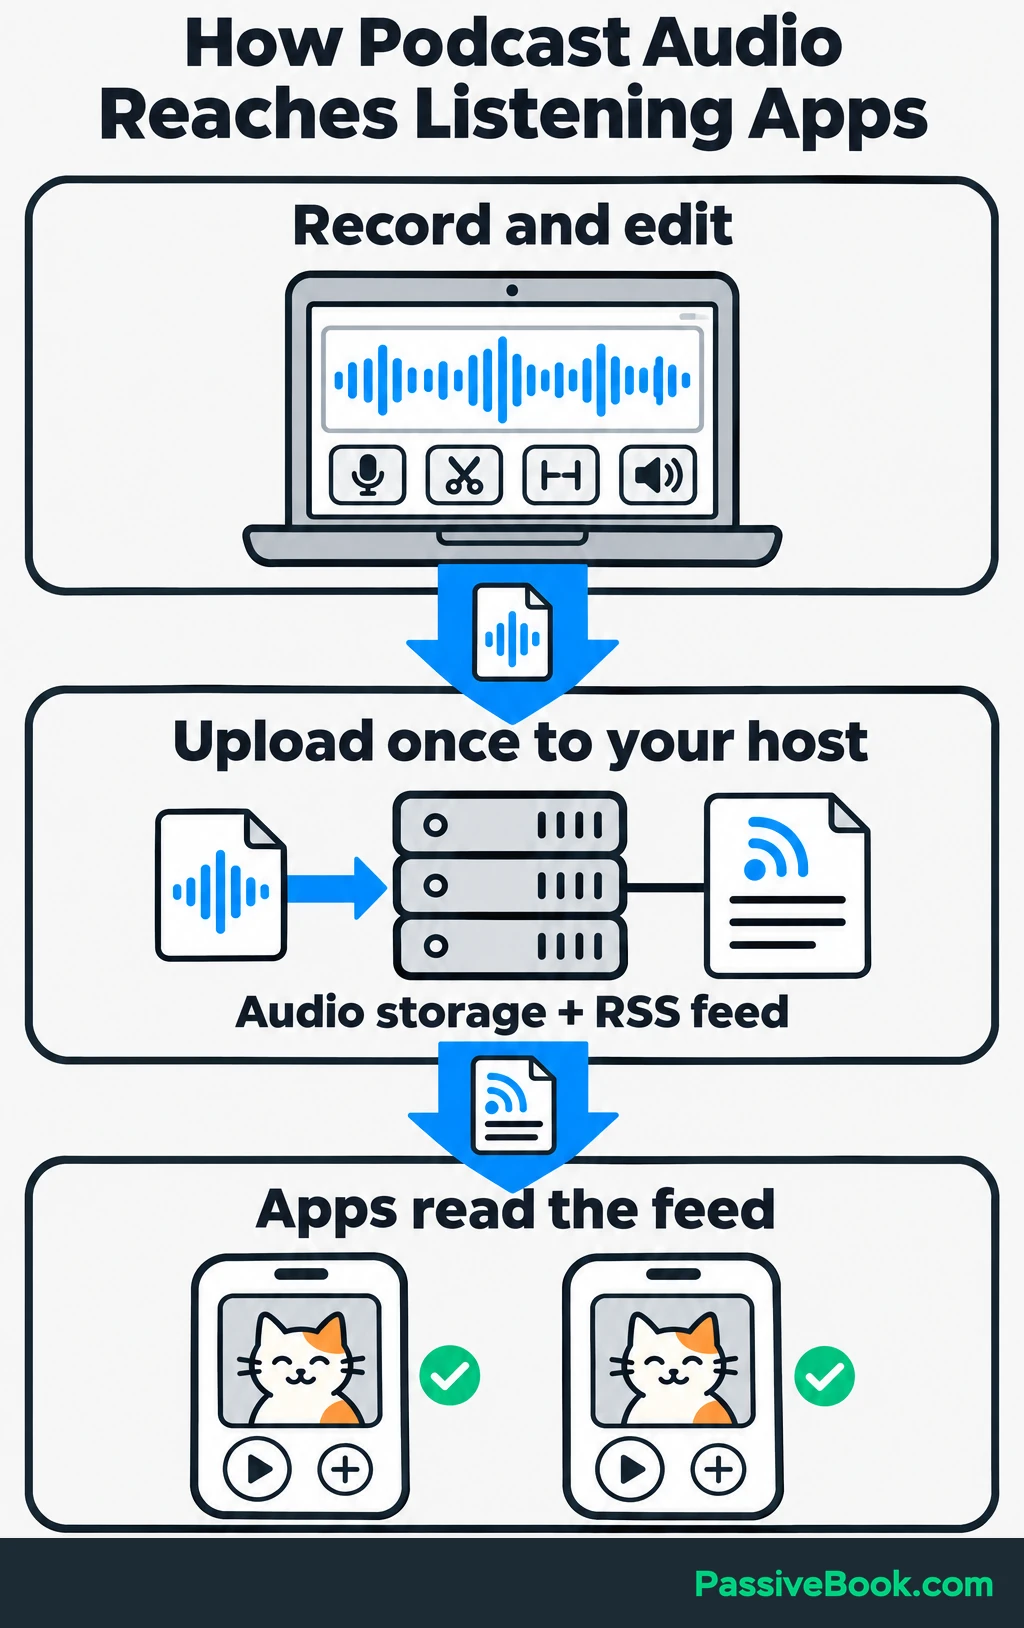
People can play podcast episodes on demand or follow a show to receive future releases. Behind that simple experience are three separate jobs:
- Recording software captures your voice and lets you edit the recording.
- A podcast host stores the finished audio and creates an RSS feed—a public file containing episode details and links to the audio.
- Listening apps, such as Apple Podcasts, use that feed to find and display your episodes.
You normally upload each episode once, to your host. Connected apps then pick up the update.
A separate website is optional, and so is video. You can make a private pilot before buying dedicated equipment, opening hosting accounts, or telling anyone you’re launching.
Throughout this guide, imagine you run a cat-sitting business that also sells printable handover packs. You’re starting Cat-Sitter Notes, a show about preparing for cat-sitting visits. The business, show name, sample copy, and sales figures are illustrative.
Choose a Podcast Concept You Can Sustain
Start by finishing this sentence:
“This show helps ___ accomplish ___ through ___.”
Name a person’s problem and the kind of help you’ll provide. “A show about pets” leaves almost every editorial decision open.
For Cat-Sitter Notes, the promise could be:
“This show helps cat owners prepare for sitter visits through short, practical lessons on handover notes, supplies, and visit arrangements.”
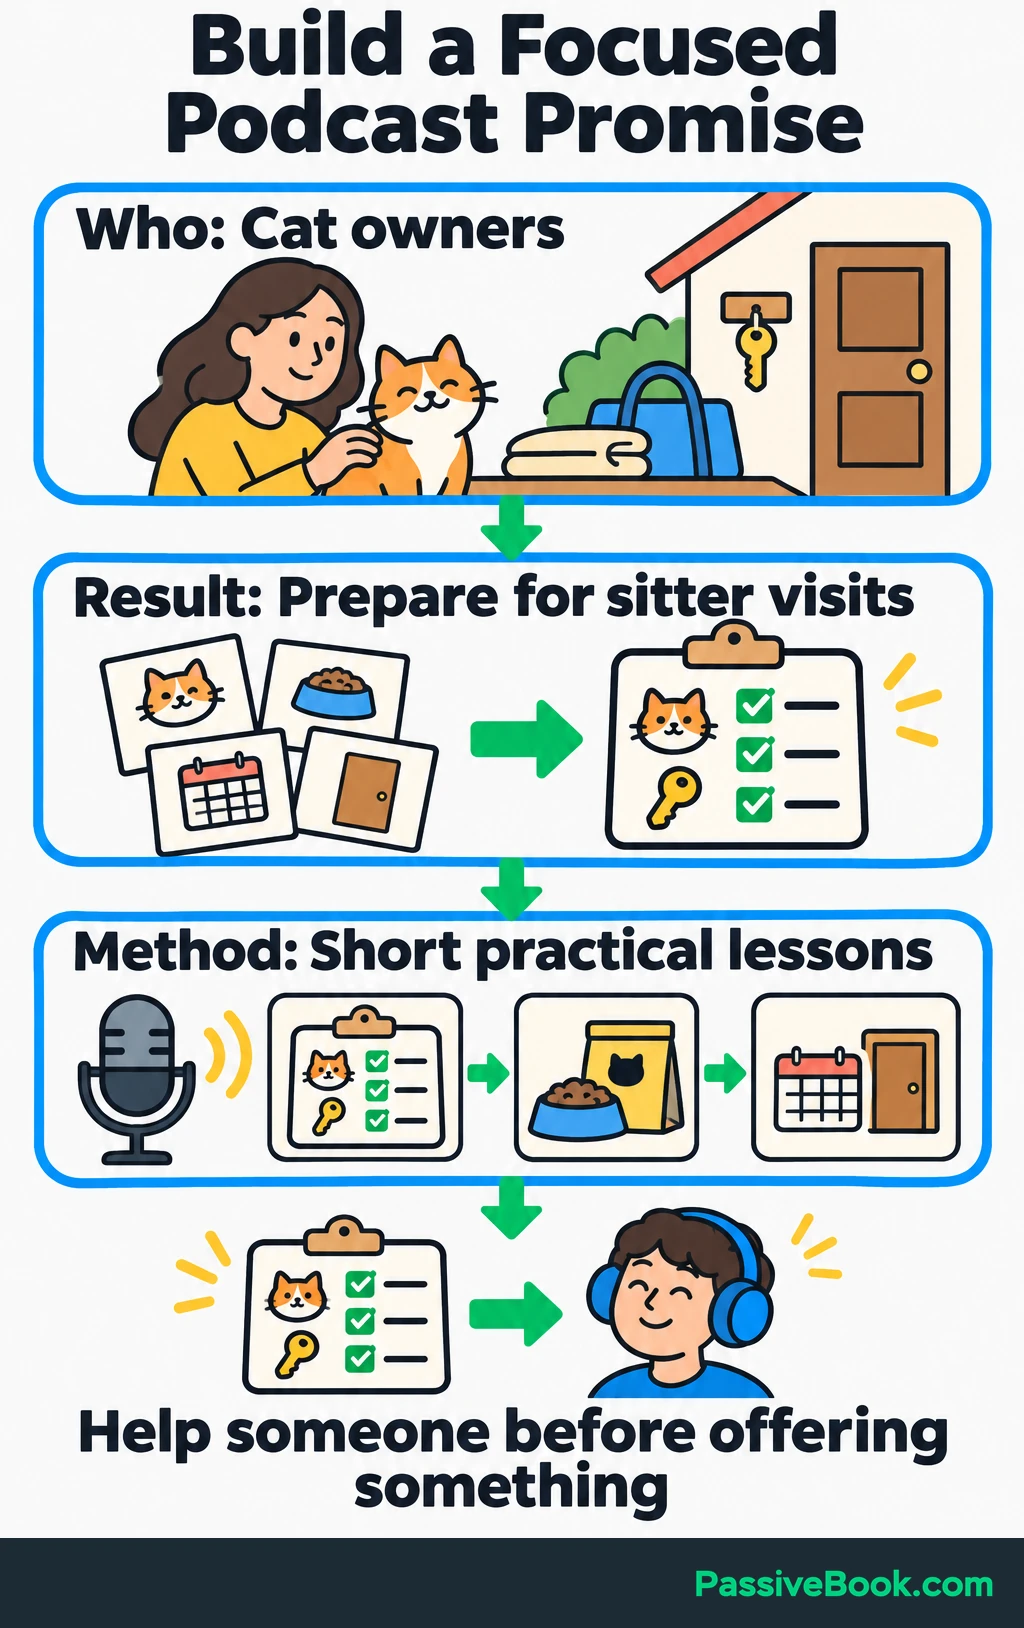
That promise gives you a useful filter. Organizing key collection belongs. An unrelated story about your weekend probably doesn’t.
Before settling on the concept, listen to related shows and read questions in relevant communities. Notice what people struggle to do, which explanations leave gaps, and what you can contribute from experience. You’re looking for a useful perspective, not an empty category.
Draft several distinct episode ideas. For the example:
- How to Prepare a Cat-Sitter Handover
- What to Label Before Your Sitter Arrives
- How to Organize Visit Updates
- How to Arrange Key Collection and Return
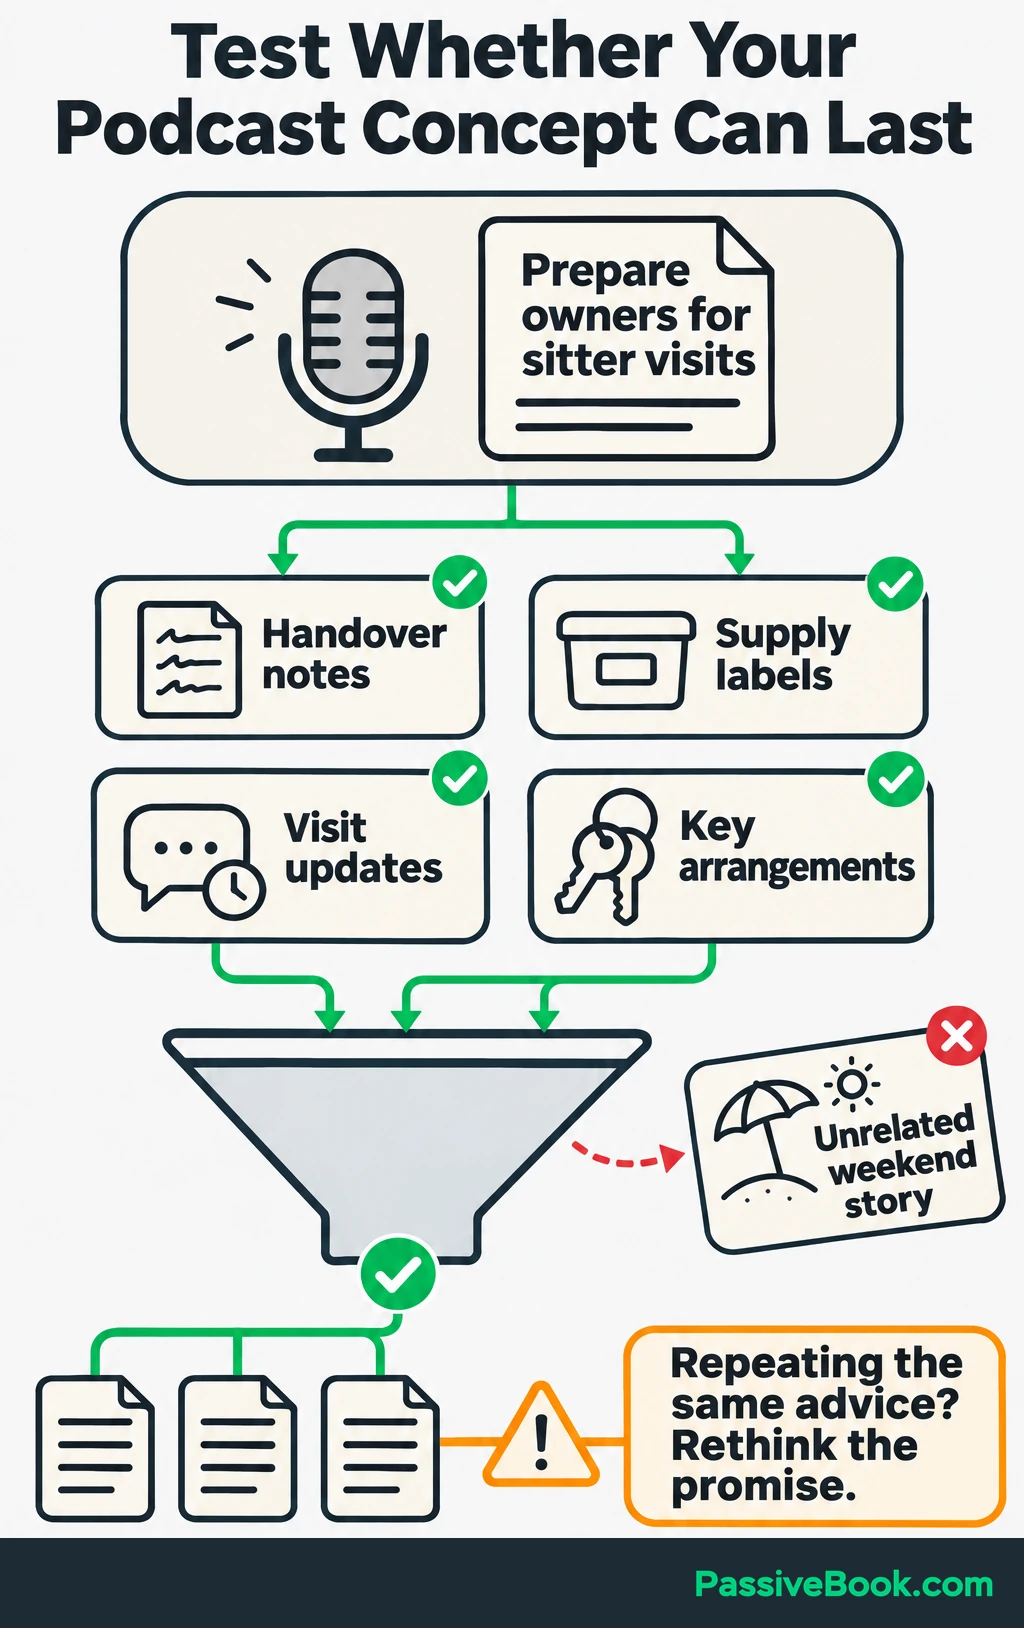
If every idea repeats the same advice, narrow or rethink the promise before designing a logo.
Choose a working name that people can recognize and say aloud. Search listening apps and the web for confusingly similar names before investing in artwork.
Keep your business objective separate from the listener’s reason to press play. An episode should solve a problem. A download, enquiry, or product can provide the next step, but the episode still needs to help someone who never buys.
Pick a Repeatable Format
Choose the format by the work it creates:
- Solo episodes: You control the schedule, but you handle the explanation and pacing yourself.
- Cohosted conversations: You can share preparation and bring different views, but recording depends on two calendars.
- Interviews: Guests contribute experience, but you also need outreach, preparation, sound checks, and follow-up.
I would start solo when you can teach the subject yourself. Add guests when their contribution earns the extra coordination.
Let the question determine the episode’s length. A useful answer doesn’t become better because you stretch it to fill half an hour.
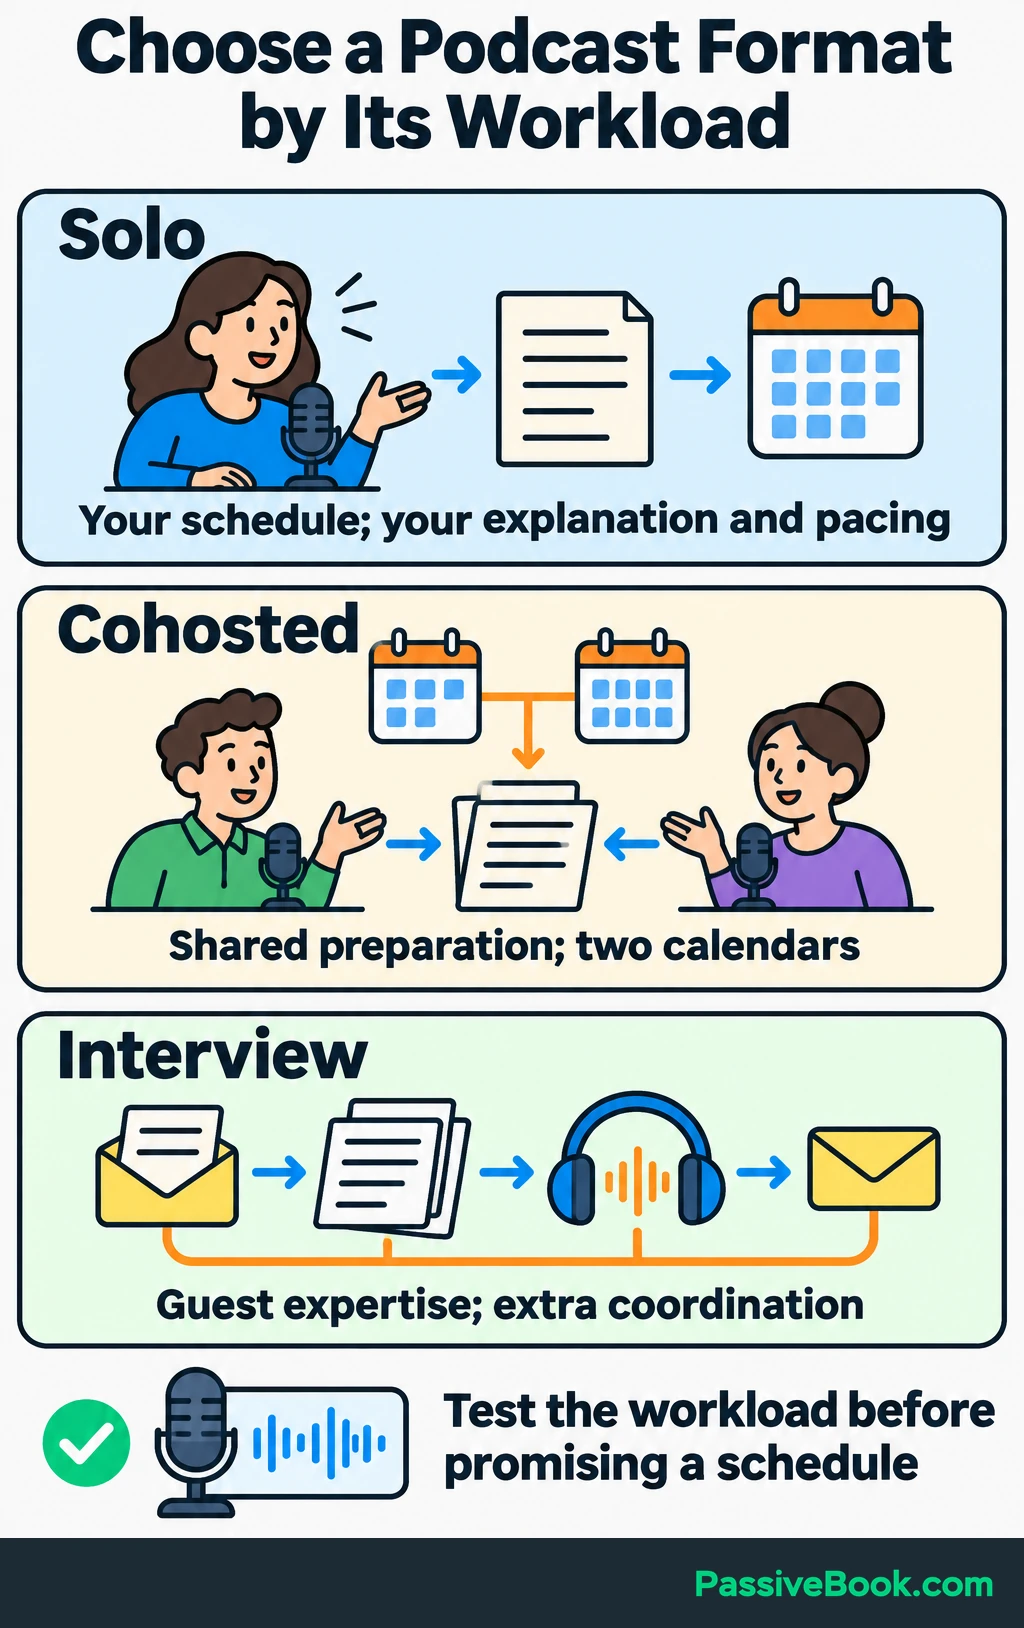
Choose a provisional release rhythm, then confirm it after making the pilot. Publishing every other week is a reasonable experiment if weekly production would consume your available evenings.
You can also make a defined season. Cat-Sitter Notes could begin with a short season covering preparation before a first booking. That gives you a clear stopping point to review the workload.
Film episodes when showing something materially improves the lesson. Audio is enough for explaining how to organize handover information.
Choose a Beginner Recording Setup
Set two spending limits: one for equipment and another for recurring hosting and software costs.
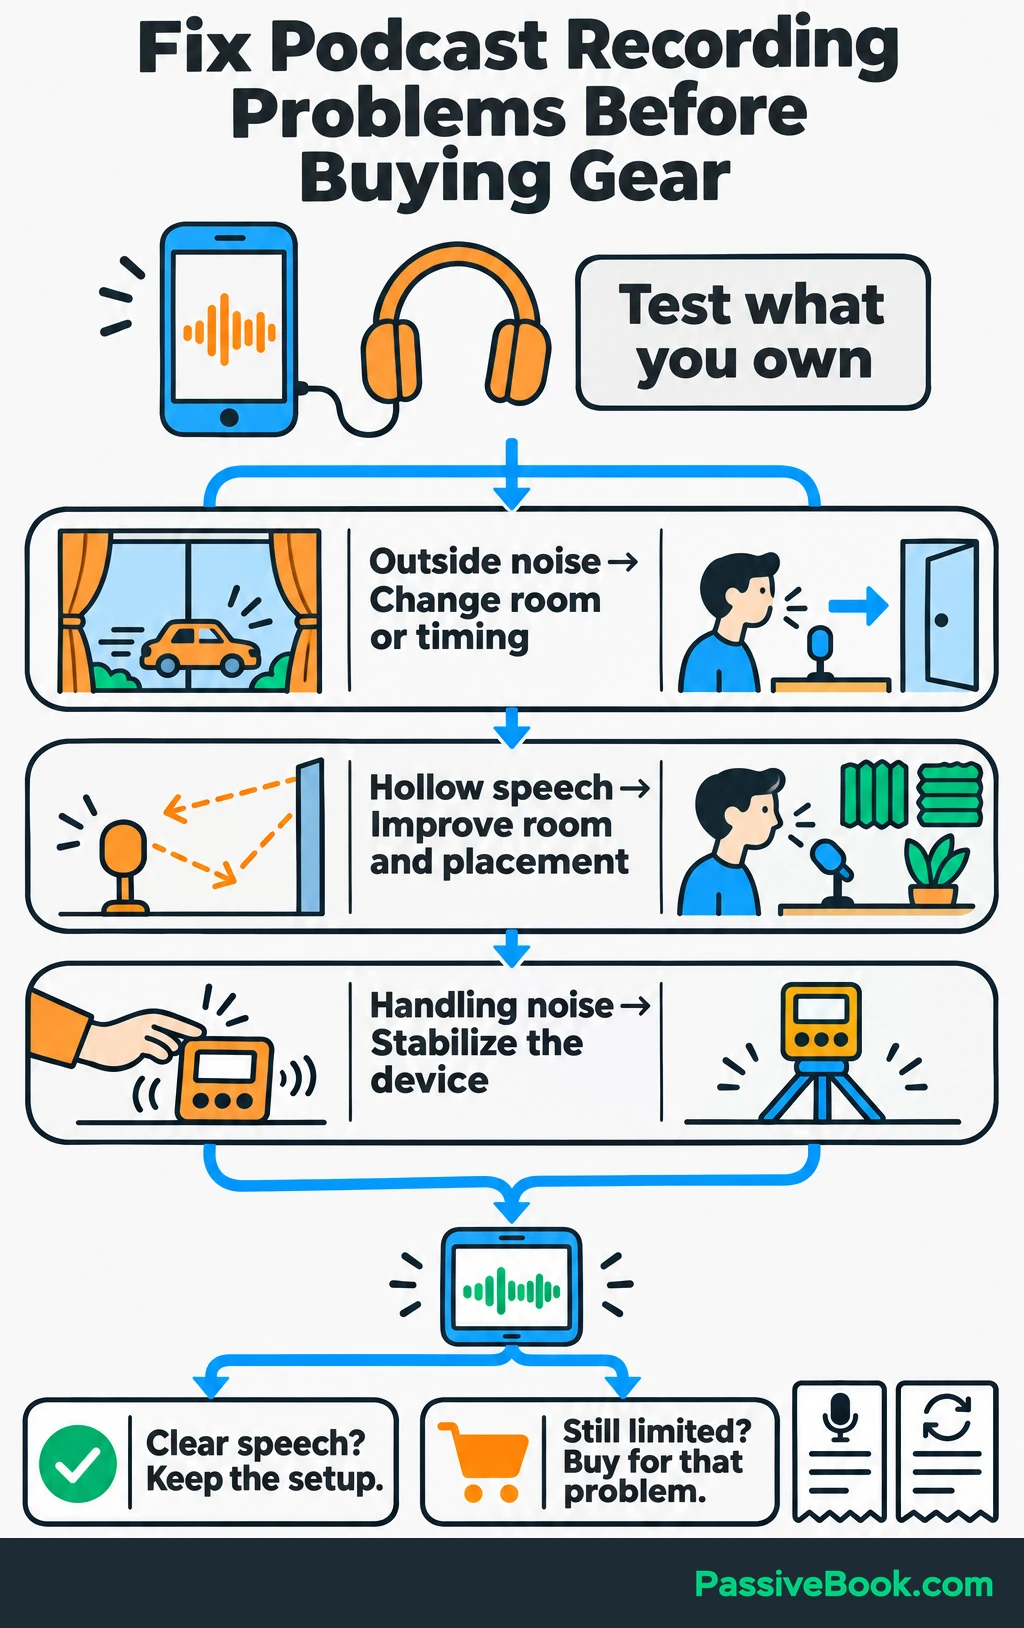
Then test what you already own. Listen for a specific problem before deciding which purchase would solve it.
| Item | Start With | Upgrade If |
|---|---|---|
| Recording device | Your phone or computer | Recordings fail, storage runs out, or your software cannot run |
| Microphone | Phone microphone or existing headset | Speech stays muffled or distant after improving placement and the room |
| Headphones | Wired earbuds | You cannot hear noise and edits clearly, or they hurt during editing |
| Stand | Stable phone support or included mic stand | Handling noise, desk bumps, or poor positioning interrupts recording |
| Recording software | Existing recorder or audio editor | You cannot select your microphone, save editable work, or export audio |
A new microphone won’t stop traffic outside your window. Solve the room and placement problems first.
Start With a Simple Solo Setup
Record a short passage using your phone, headset, or computer microphone. Play it through headphones and check whether every word is easy to understand.
Listen for echo, background hum, harsh popping on words beginning with “p,” and noises from touching the device.
If the result is usable, keep the equipment.
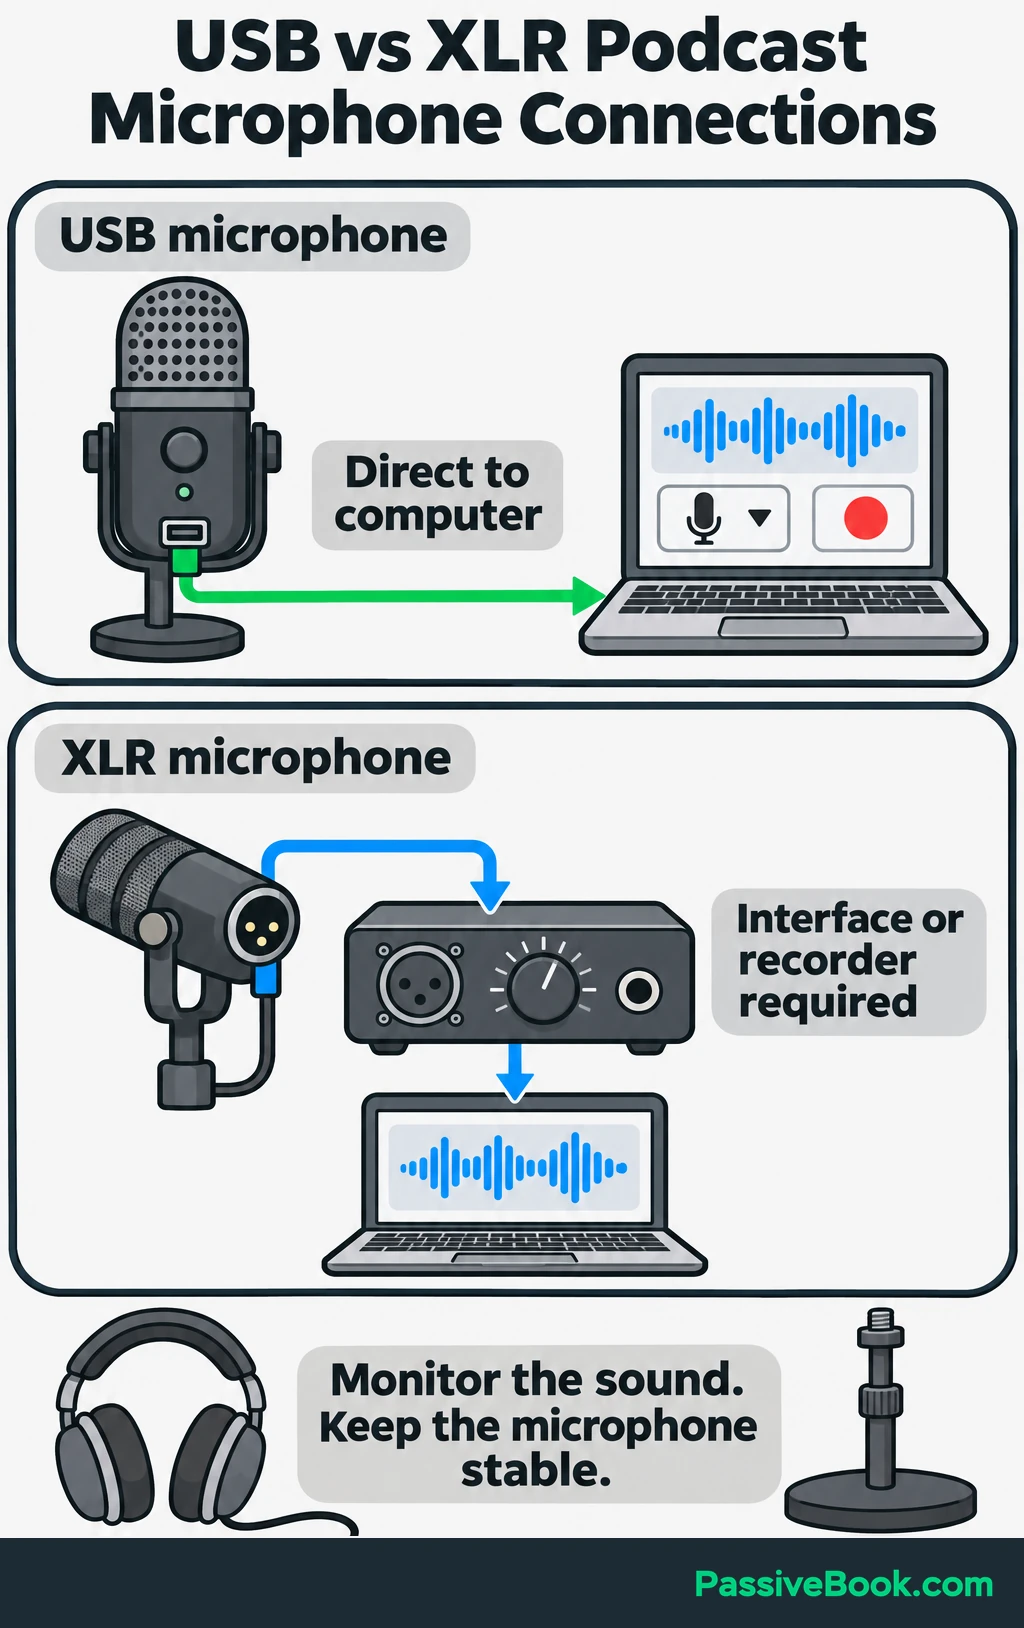
For a dedicated computer setup, I would choose one compatible USB microphone, wired headphones, and a stable stand. USB connects directly to the computer. An XLR microphone connection needs a suitable audio interface or recorder to turn its signal into a recording.
The Samson Q2U is one example with USB and XLR connections, a headphone socket for hearing yourself without delay, an included stand, and a foam windscreen to soften breath noise. Check compatibility and what comes in the package before comparing total costs.
For software, Audacity provides free recording and editing on Windows, macOS, and Linux. It would be my starting choice for a straightforward solo show.
Whatever you choose, select your microphone as the recording input, watch the recording levels, and save your test as an editable project. Exporting creates the separate audio file you’ll upload; the project file itself won’t play in listening apps. You don’t need to learn every effect before recording your first sentence.
Adapt the Setup for Guests
For remote interviews, ask each participant to use headphones and a microphone or usable headset. Arrange a short sound check before the conversation begins.
Choose recording software that can save each speaker on a separate track. That lets you adjust one person’s volume or remove their background noise without changing everyone else’s audio.
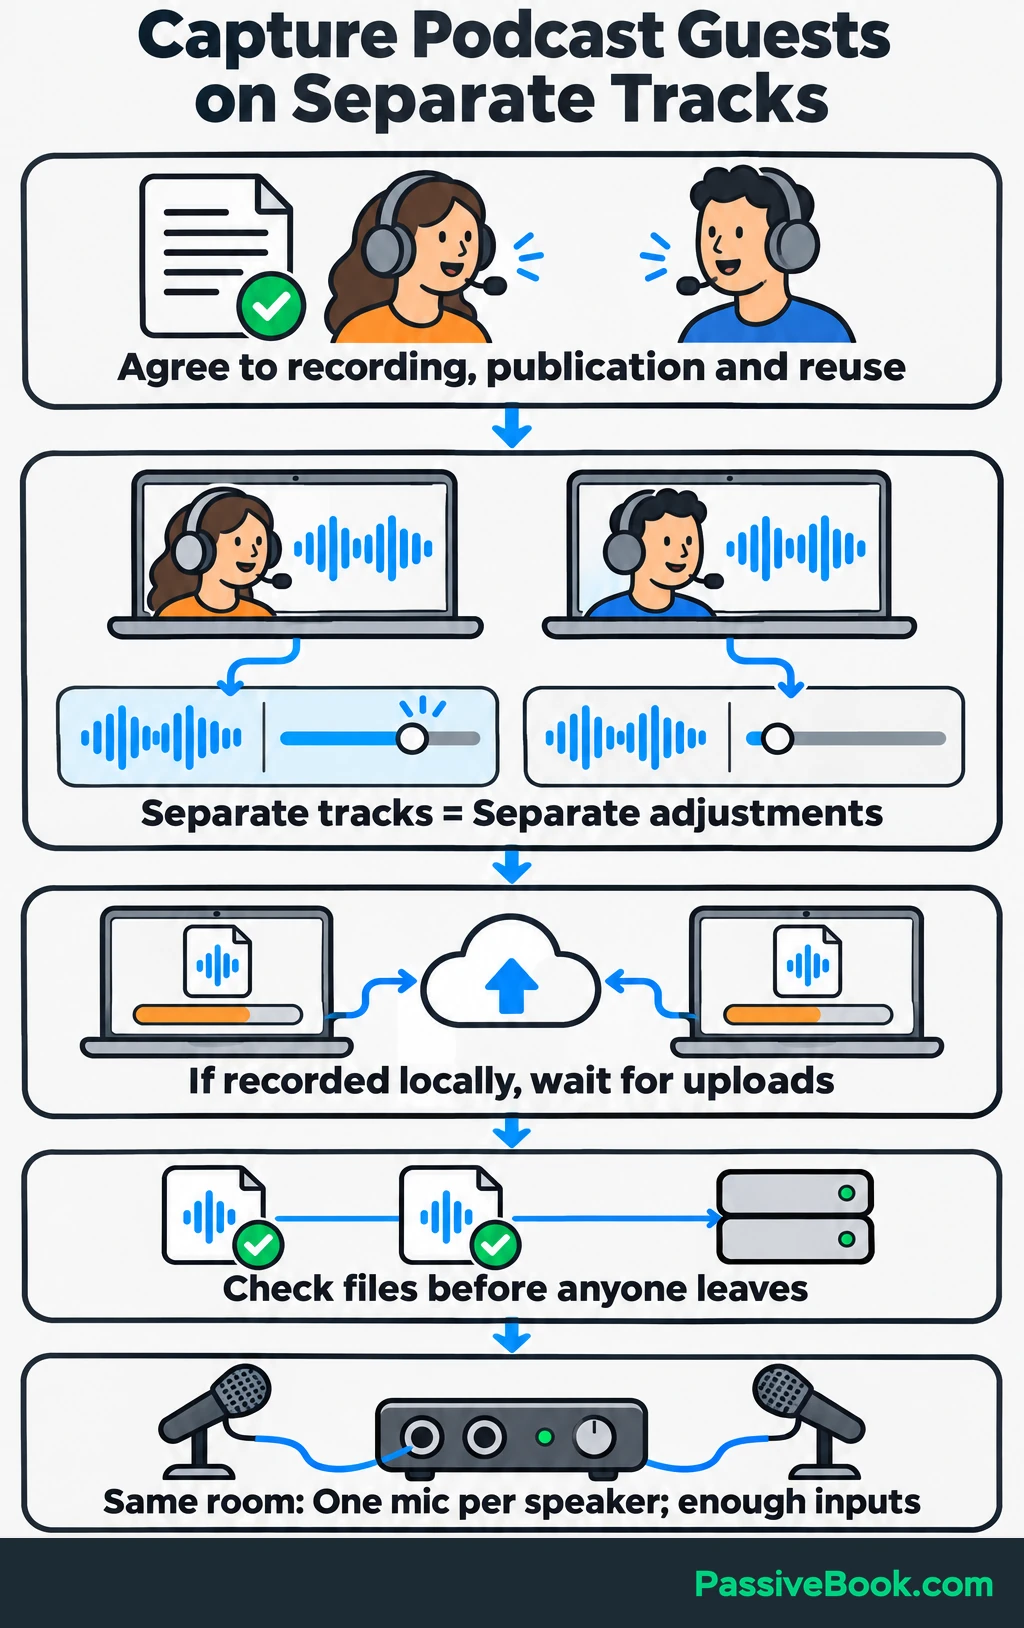
Some remote services record on each participant’s device before uploading the files. With that workflow, keep everyone connected until uploads finish. Agree on a backup recording beforehand, and make sure everyone knows when it is running.
For guests in the same room, use a microphone per speaker and an interface or recorder with enough simultaneous inputs. Test the whole arrangement together.
Get guests’ agreement to recording, publication, and planned reuse, including promotional clips, before recording. Check the rules that apply where participants are located; the Reporters Committee’s recording guide explains differences among U.S. state laws.
Plan Your First Episode
Choose one question and one practical result. “How to Prepare a Cat-Sitter Handover” works because listeners can finish with a document they know how to organize.
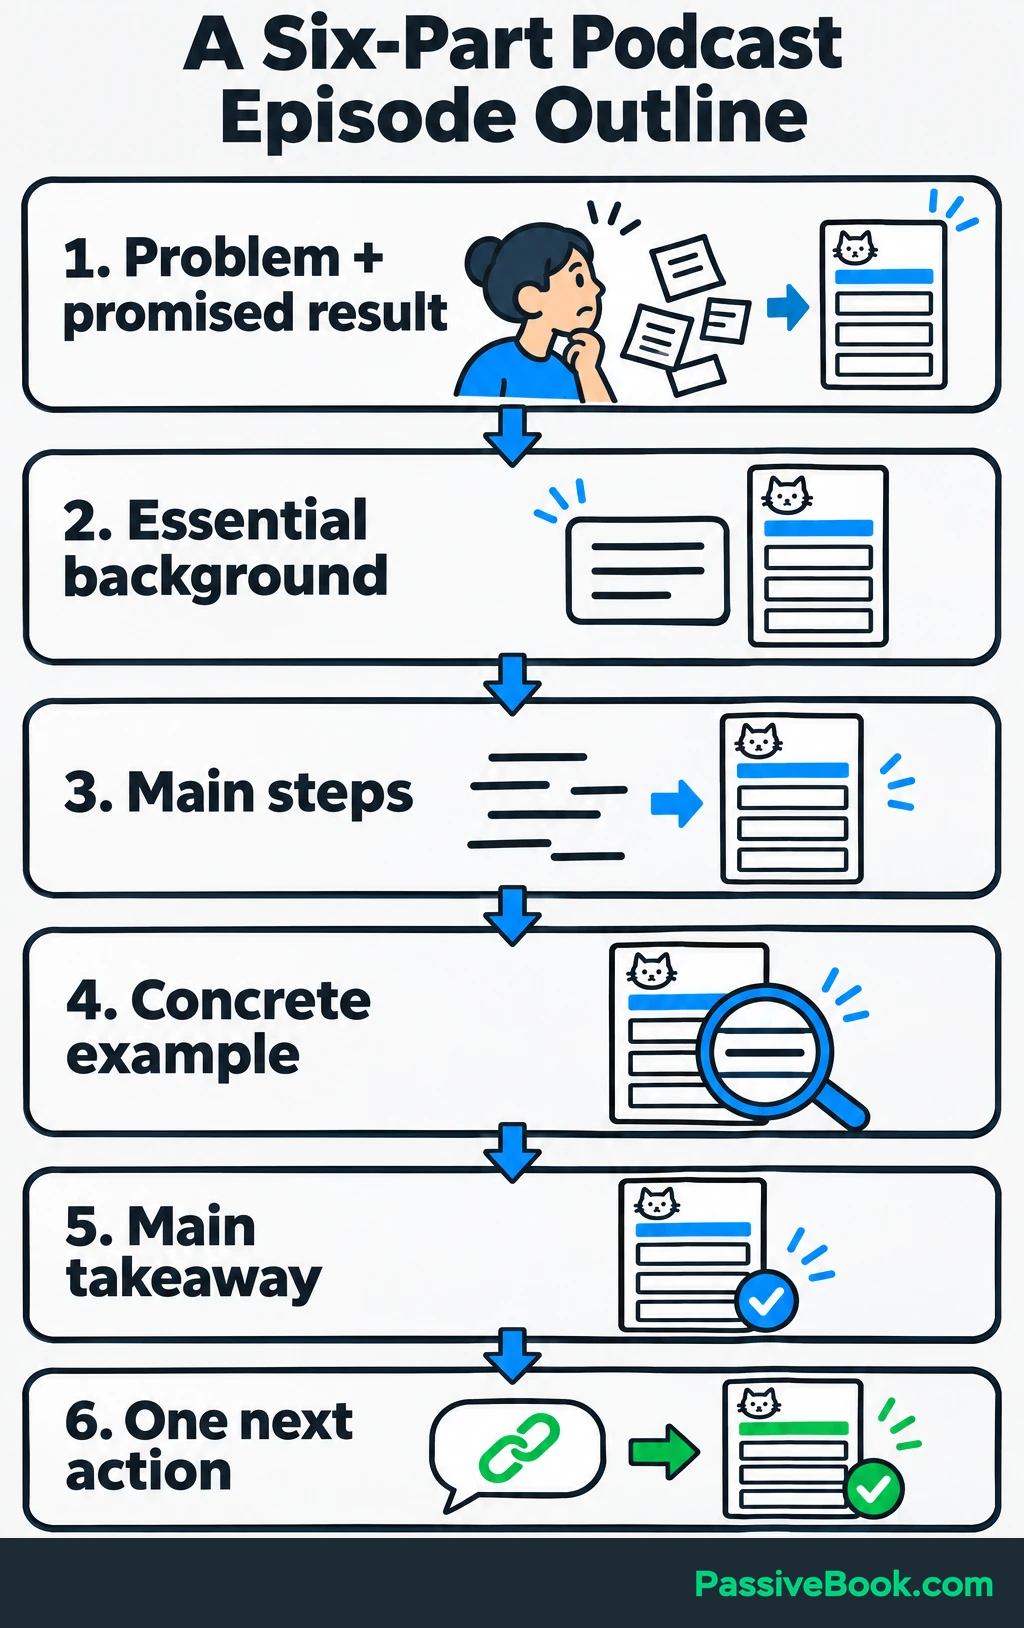
Build a reusable outline:
- State the problem and what the episode will help listeners do.
- Give only the background needed to understand the advice.
- Explain the main steps in a useful order.
- Walk through a short example.
- Recap the takeaway.
- Offer one next action.
Open with the listener’s situation, then introduce yourself briefly:
“Leaving your cat with a sitter? Here’s how to put the information they need in one place.”
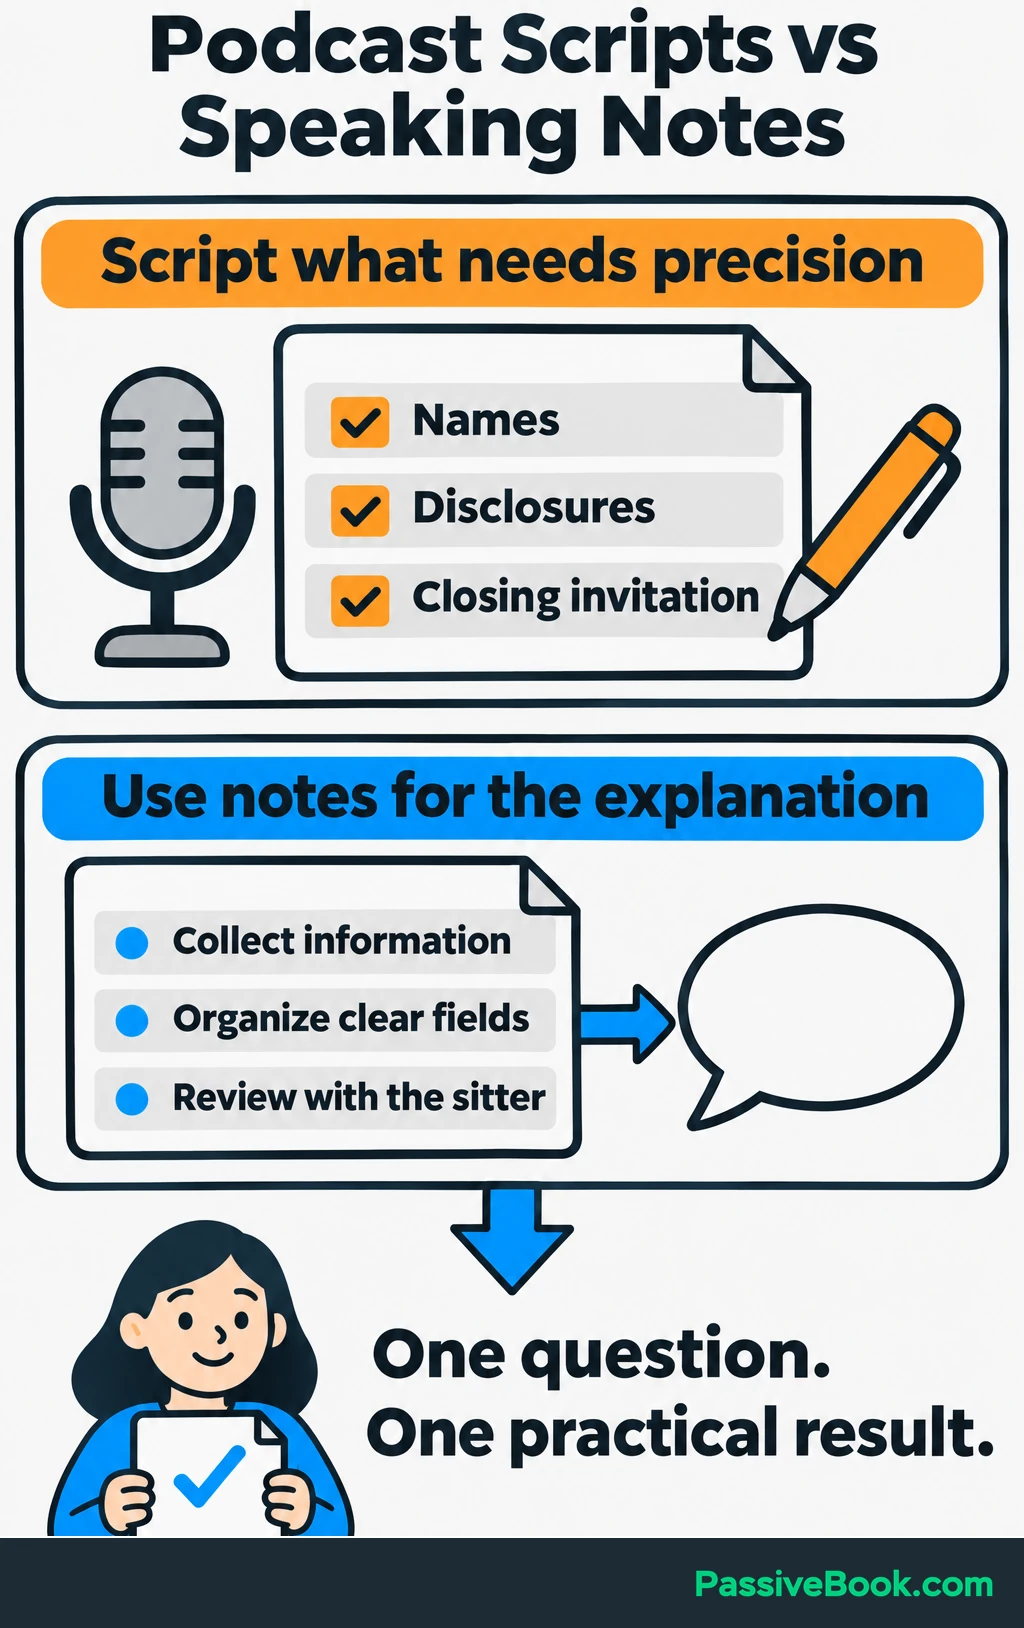
For this episode, first teach the process: collect the information, organize it into clear fields, and review it with the sitter. Then illustrate a field:
“Key collection — Friday, 6 p.m. — Alex will meet the sitter at the front door.”
That entry shows what “clear information” means. The listener doesn’t have to guess.
Keep private access details out of public examples. The episode can explain how to organize a handover without reading a real customer’s instructions aloud.
Script wording that needs precision, including names, disclosures, and your closing invitation. Use speaking notes elsewhere so the recording sounds like an explanation rather than a document being read.
If you know what you want to teach but not how to say it aloud, Podcast Copy Studio can turn your rough notes into a recording draft. Review the wording and examples before you switch on the microphone.
Free AI Podcast Studio


For interviews, share the topic and intended takeaway beforehand. Prepare questions that move toward that result instead of collecting unrelated stories.
Finish with one relevant call to action. For Cat-Sitter Notes, that could be a sample handover page. Give its short address aloud and repeat the link in the episode description, often called the show notes.
Keep this example focused on organization. If your show covers pet health, nutrition, or behavior, use reliable evidence and appropriately qualified contributors for those subjects.
Record Clear Audio
Choose a quiet, furnished space. Curtains, rugs, and soft furniture are worth trying before spending money on acoustic treatment. Silence notifications and move away from avoidable noise.
Keep the microphone stable and check where it is designed to receive your voice. Some microphones take sound from the end and others from the side.
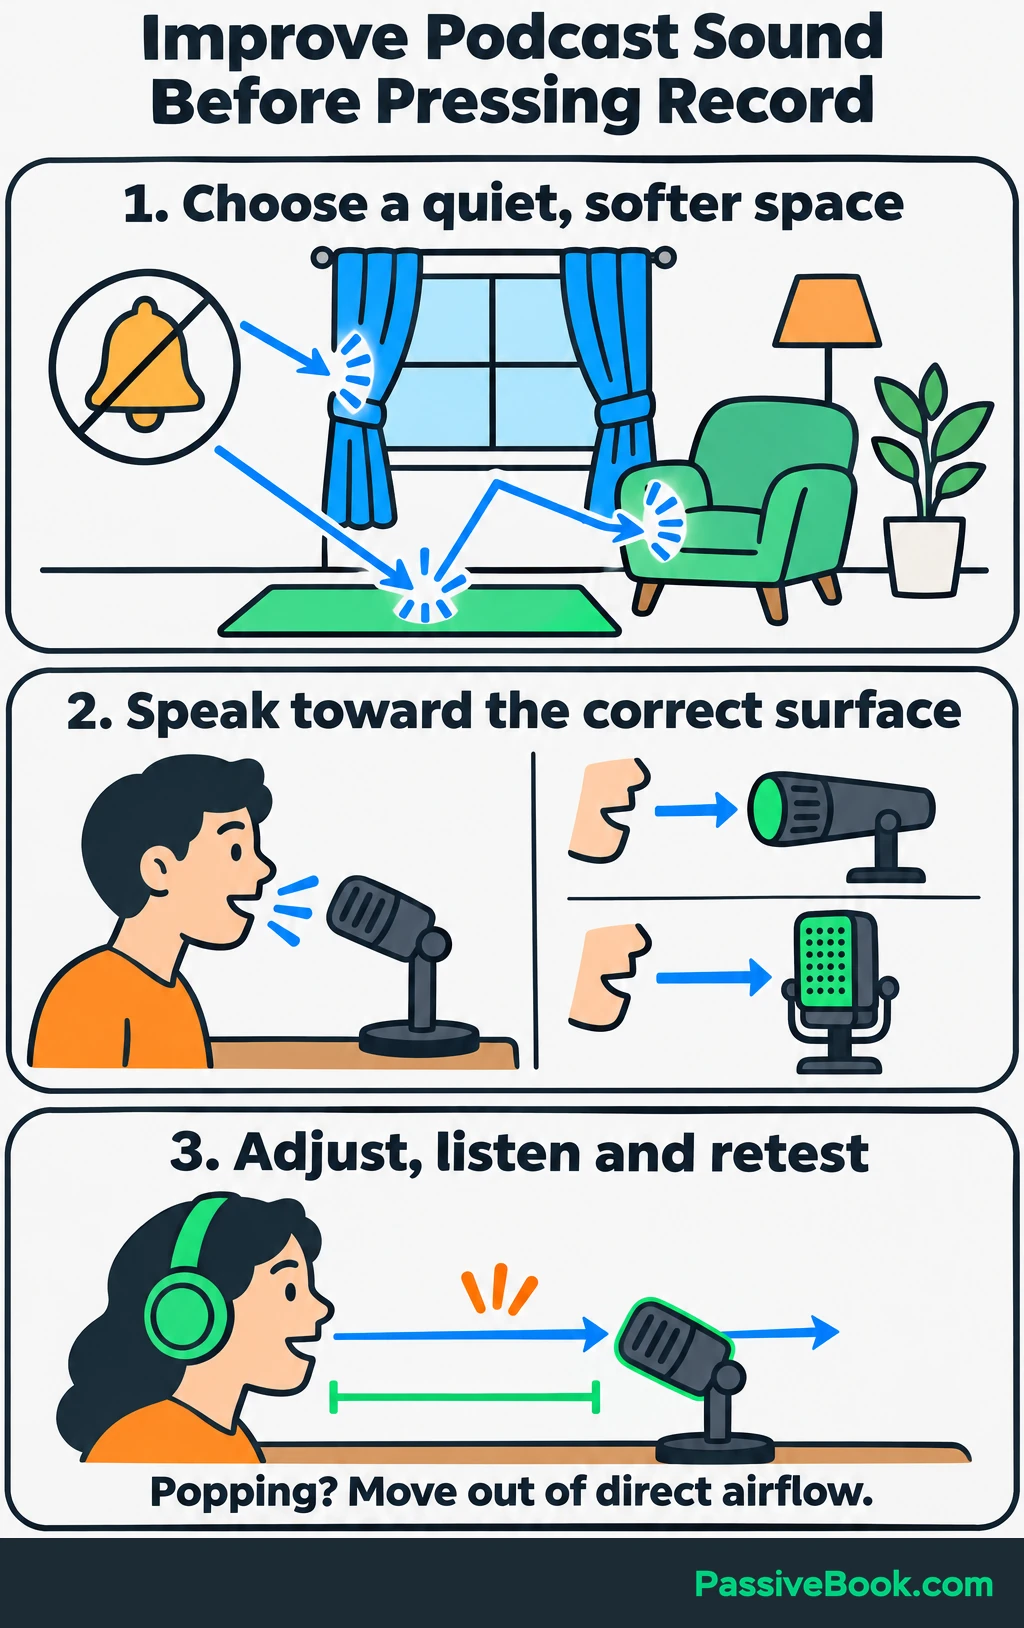
Before the full recording:
- Select your intended microphone in the recording software.
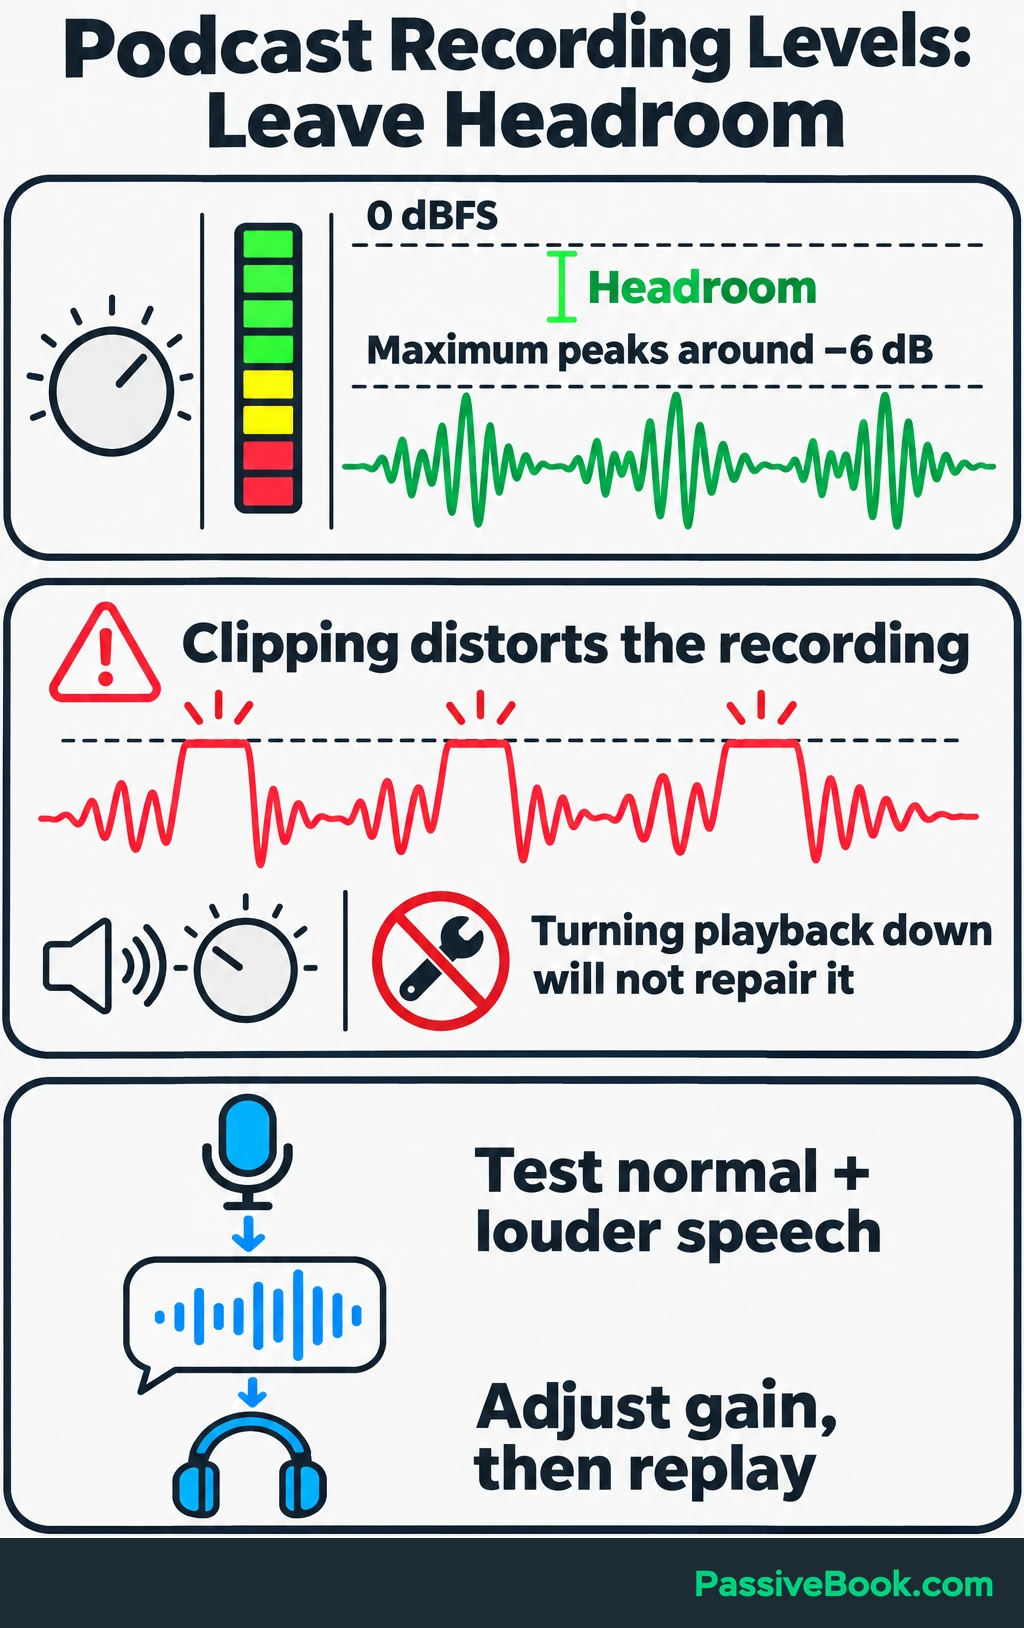
- Record normal speech and a louder sentence.
- Replay the sample through headphones.
- Adjust placement and input level, then test again.
If the recording sounds hollow, try a smaller, softer room and move closer to the microphone. If breath creates popping sounds, angle the microphone slightly away from the direct airflow. Keep a consistent distance as you speak.
The input level, often called gain, controls how strongly your voice is recorded. Audacity recommends maximum recording peaks around −6 dB, leaving space below the digital ceiling of 0 dBFS. Reaching that ceiling can cause clipping: harsh distortion that lowering playback volume won’t repair.
Record in manageable sections. When you make a mistake, pause and repeat the sentence. You can remove the unwanted take later, and you won’t need to restart the whole episode.
For a guest session, confirm that every intended recording has started. Before anyone leaves, check saved files and completed uploads.
Preserve the original recording and make a backup in a second location before editing.
Edit and Export a Listenable Episode
Editing should make the explanation easier to follow. You don’t need to remove every sign that a human being was involved.
Make the Essential Edits
Start with the changes listeners will notice most:
- Remove false starts and repeated takes.
- Cut tangents that delay the promised answer.
- Shorten distracting interruptions and long empty gaps.
- Balance the volume between speakers.
- Check that cuts preserve the speaker’s meaning.
In Audacity, select the unwanted section of the waveform—the picture of your recorded sound—and delete it. Play across the cut to check that it sounds natural.
Keep natural pauses. A conversation with every breath removed can sound surprisingly exhausting.
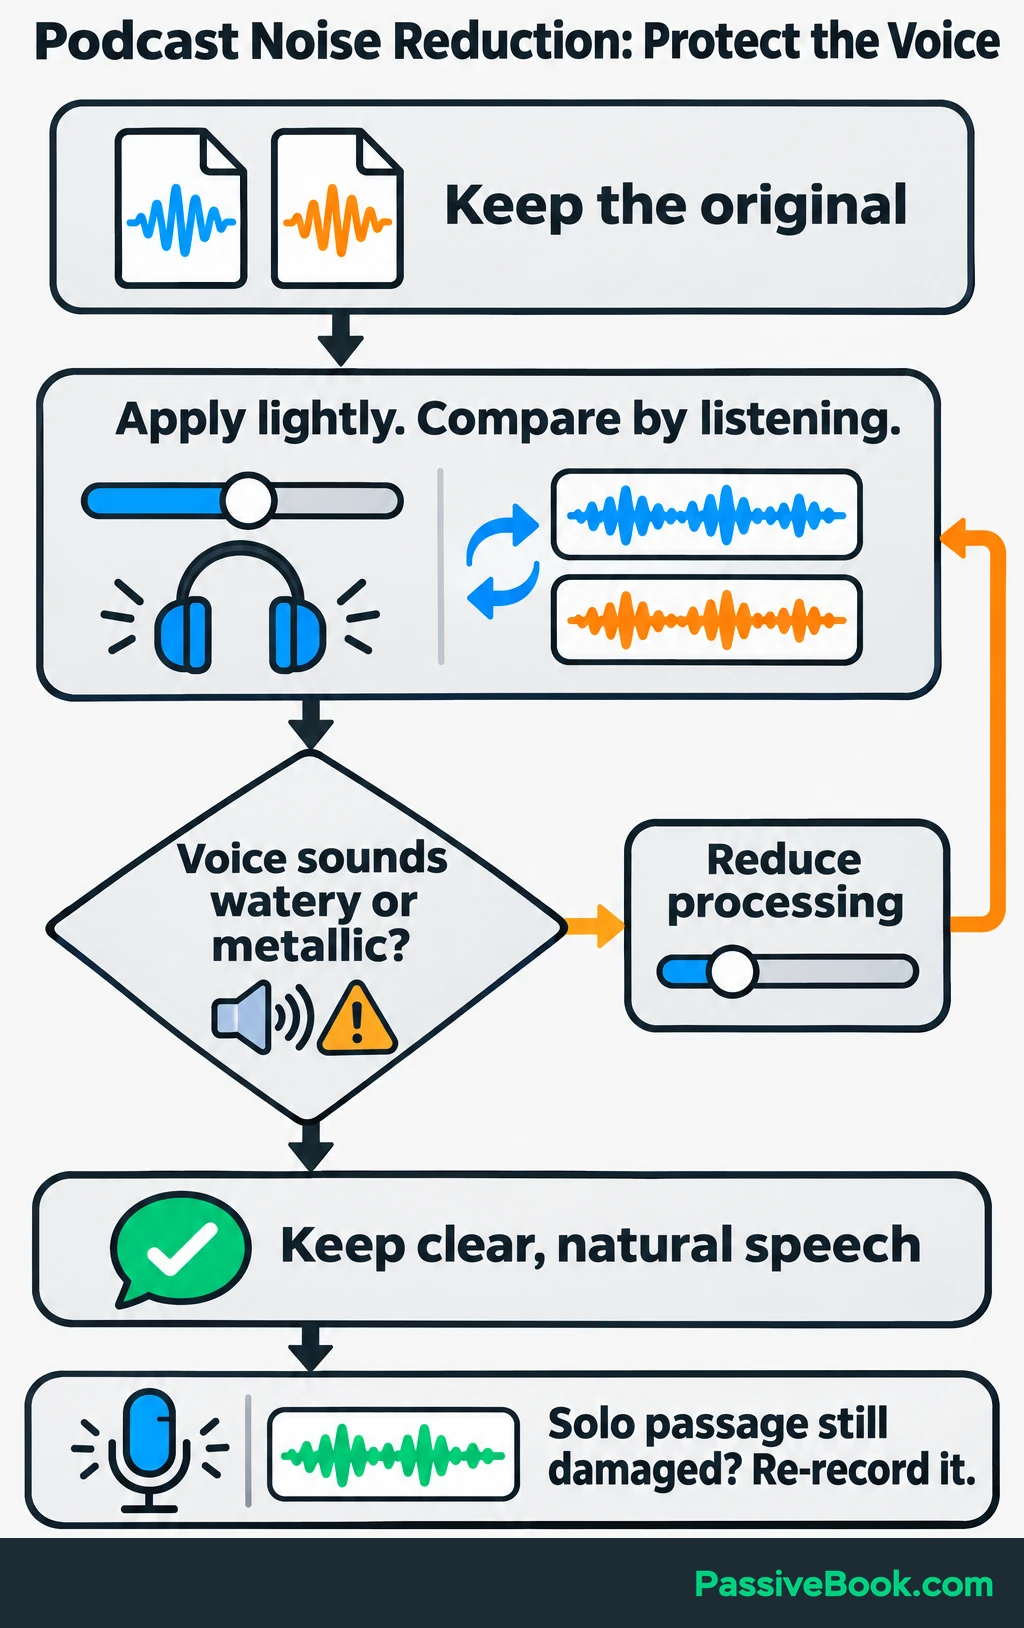
Use noise reduction lightly and compare the result with the original. If the voice becomes watery or metallic, reduce the processing. For a solo episode, recording a damaged passage again may take less time than trying to repair it.
Intro music is optional. I would launch without it unless it serves a clear purpose.
If you use copyrighted music or clips, get permission or a license covering your intended podcast use unless a legal exception applies. Keep a copy of any permission or license. Buying a song or crediting its creator does not supply those rights, as Spotify’s copyright guidance explains.
Export and Check the Finished File
Keep the editable project and an uncompressed master, such as a WAV file. Export a separate delivery file for your podcast host.
For a speech-only show, export an MP3 if your host supports it. In the export settings, choose mono (one audio channel), a sample rate of 44.1 kHz, and a bit rate of 128 kbps. Use stereo when the content needs separate left and right sound.
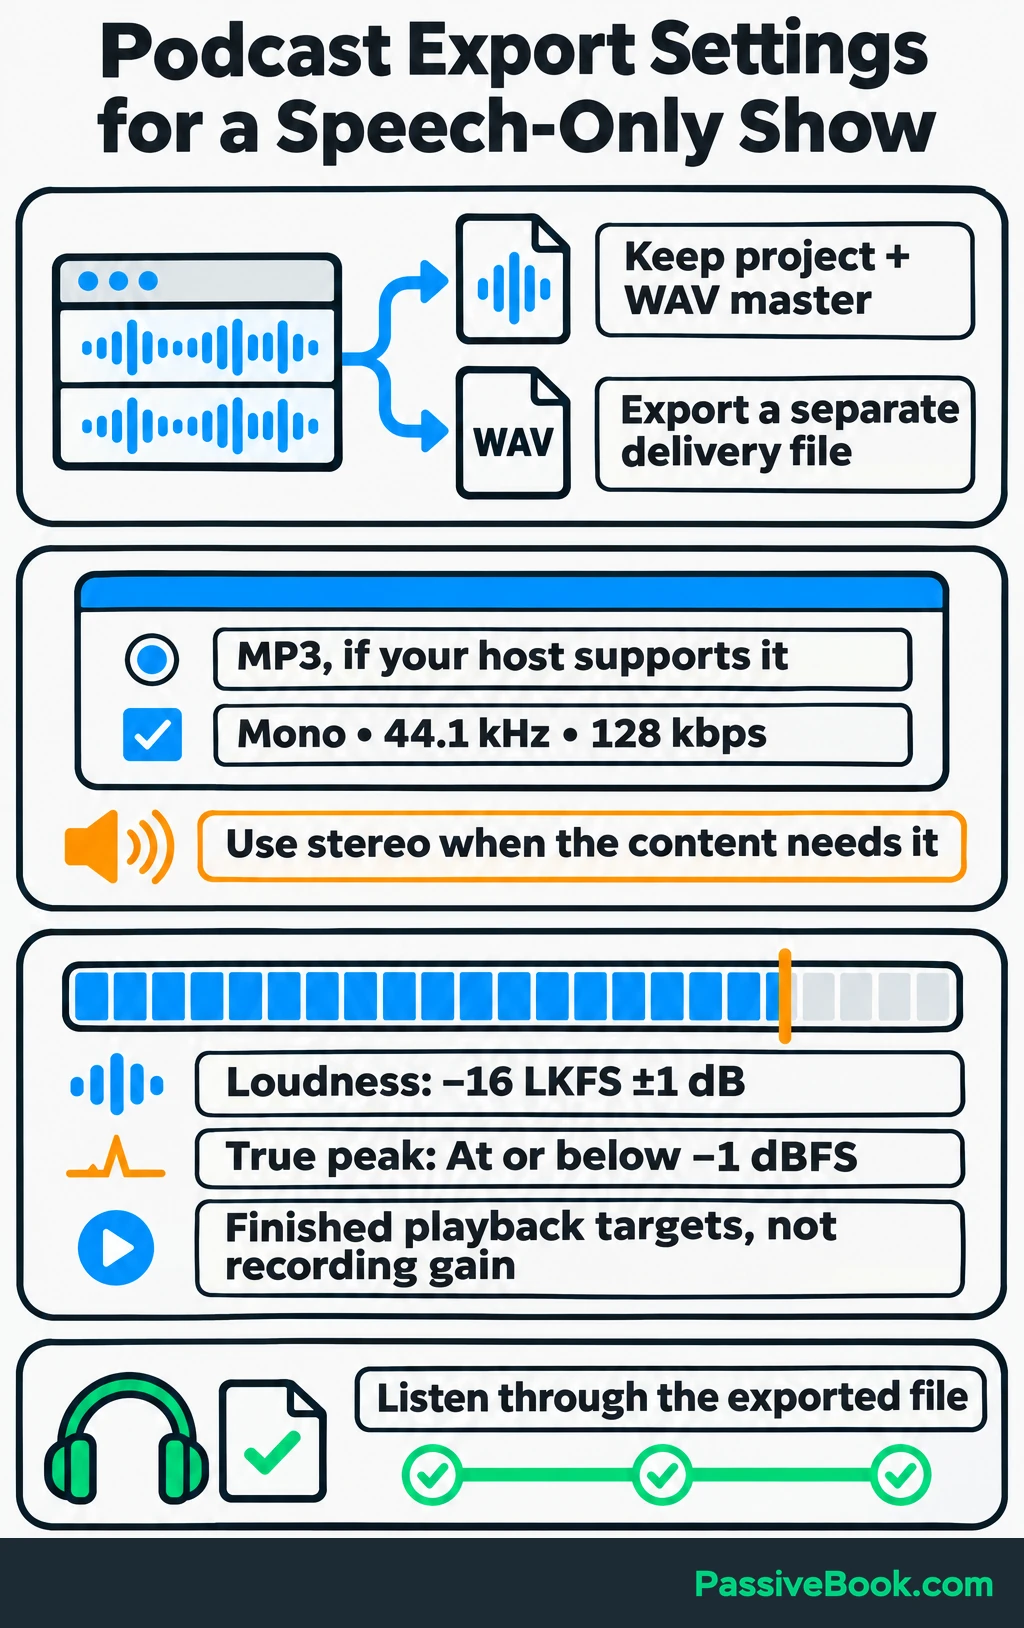
Those settings fall within Apple’s RSS audio specifications. Apple also recommends finished loudness around −16 LKFS, within ±1 dB, and a true-peak ceiling of −1 dBFS. Loudness describes the overall listening level, while true peak checks brief peaks.
Use a loudness meter or mastering preset that supports those targets. They concern finished playback volume and are separate from the recording-gain setting in the previous section.
Listen through the exported file. Check the opening, ending, edits, speaker balance, names, and spoken links. A clean editing project doesn’t guarantee you exported the right version.
Set up Your Podcast Hosting
Choose a host after testing the recording workflow so you know what you need to upload.
Choose a Host That Fits Your Workflow
Compare hosts against your planned releases:
- Capacity: Does the upload allowance cover your episodes, and will older episodes remain available?
- Cost: What is the total recurring commitment, including annual billing or necessary extras?
- Distribution: Can you access your public RSS feed and connect listening apps?
- Portability: Can you export files and redirect the feed if you move?
- Support: Can you get useful help when a release fails?
- Reporting: Can you see understandable episode download data?
Spotify for Creators offers free podcast hosting. I would consider it for a small-budget audio launch if its workflow suits you.
Pay for another host when its support, reporting, or publishing tools solve a specific problem. A subscription is easy to start and remarkably good at surviving an abandoned project.
Keep independent copies of audio, artwork, and descriptions. Your hosting account should not be your only archive.
Prepare Your Show Listing
Write a description that starts with the listener’s benefit, then explains the format and your relevant background.
For the example:
“Prepare for cat-sitting visits with clearer notes and fewer last-minute arrangements. Cat-Sitter Notes covers handover information, supply organization, and visit updates through short, practical episodes from a cat-sitting business.”
Add your show name, presenter’s name, language, explicit-content designation, and contact details.
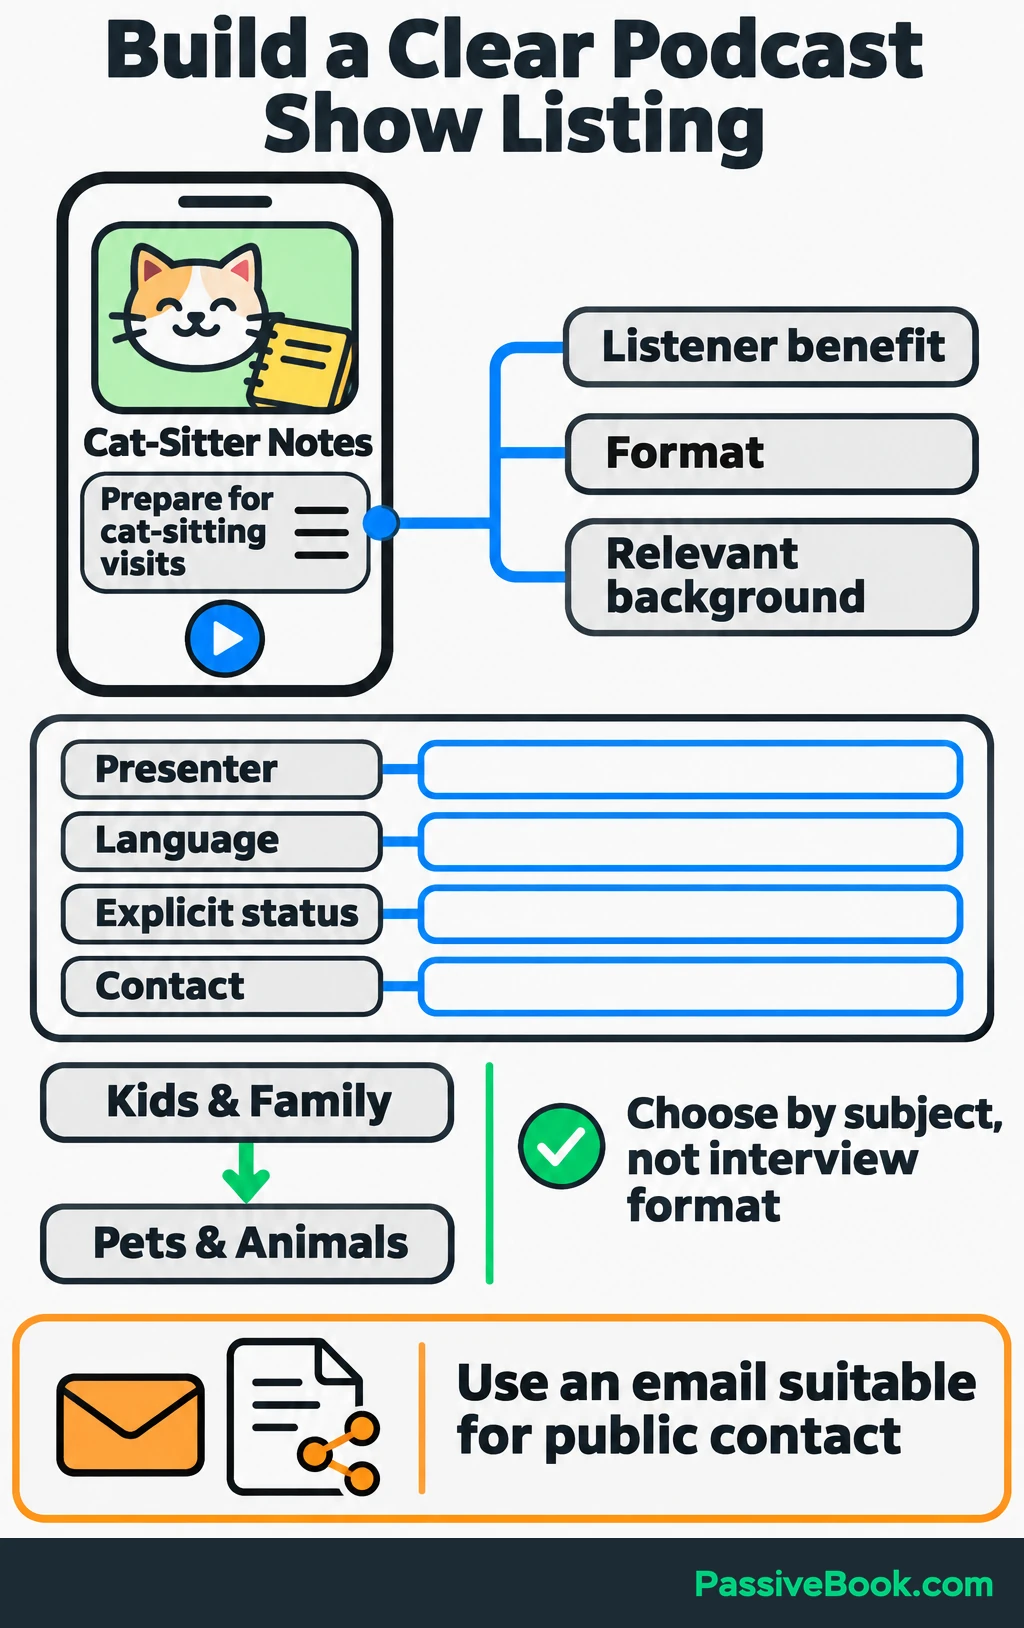
Choose categories by subject. An interview is a format, not a topic. For Cat-Sitter Notes, Apple’s Pets & Animals subcategory sits under Kids & Family.
Make the artwork readable at a small size. Canva is enough for a clear title, simple background, and limited detail.
Export a 3000 × 3000-pixel JPG or PNG with a solid background and no transparency. That follows Apple’s show-cover specifications.
Use a dedicated contact email that you monitor and are comfortable making public. Feed contact details may be visible and can also be used to verify ownership.
Publish and Distribute Your First Episode
Publishing makes the episode available through your host. Distribution connects the show to the apps where people listen.
Upload the Episode to Your Host
Upload the checked audio and add:
- A title that states the episode’s value.
- A short description explaining what listeners will learn.
- Links to resources mentioned.
- The promised next action.
- Any relevant credits or commercial disclosures.
Review episode numbering, content settings, publication time, and time zone. Preview playback before publishing.
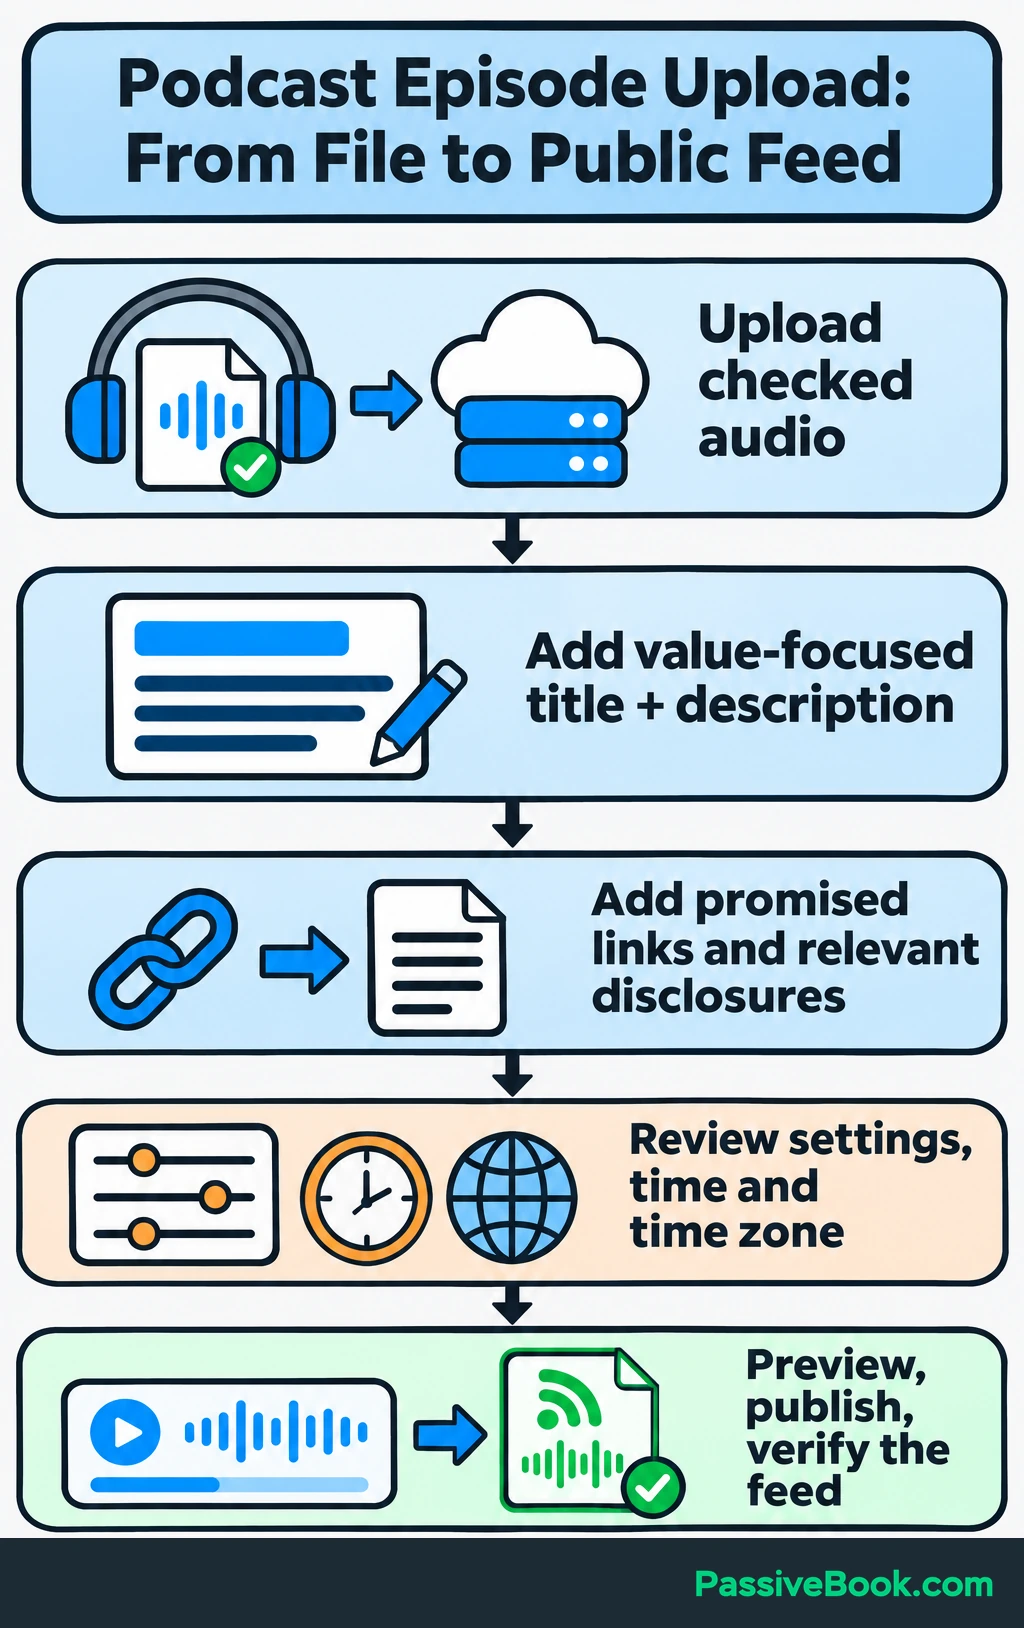
Once released, confirm that the episode appears in the public feed. Your host may provide a feed preview.
Have artwork, the required show information, and at least one published episode ready before submitting to Apple Podcasts. A trailer can introduce the show, but your first full episode should deliver the promised help.
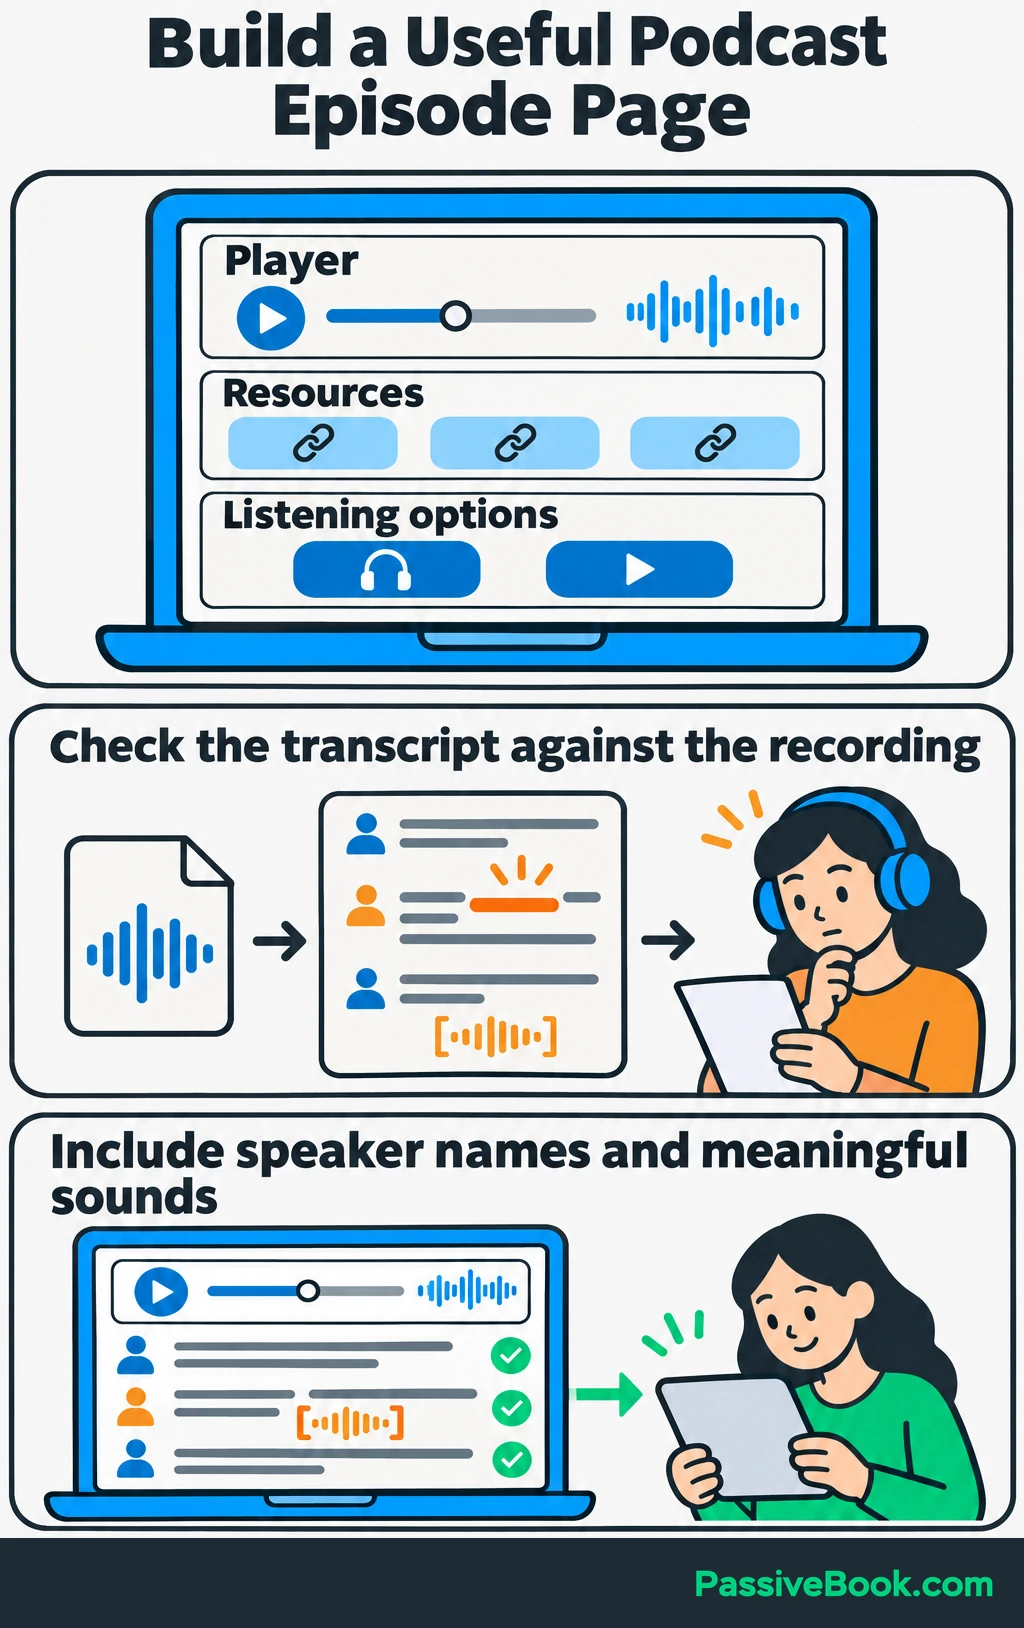
Use your host’s episode page or an existing website to collect the player, resources, and listening links in one place. You don’t need a separate website launch.
Add a corrected transcript with speaker names and meaningful sounds. An automated draft can help, but check it against the recording. Providing equivalent text follows W3C’s guidance for prerecorded audio and gives people access without listening.
Connect Your Listening Apps
For Apple Podcasts, submit your public RSS feed through Apple Podcasts Connect or a participating host. Review the imported details, confirm rights and availability, resolve any validation errors, and submit for review.
Your host should help with feed errors. You generally don’t need to write or edit the feed yourself.
For a Spotify-hosted show, publication on Spotify is automatic. Enable the public RSS feed and submit it to other listening services separately. Spotify does not automatically make those submissions, and enabling its public feed exposes the listed email address.
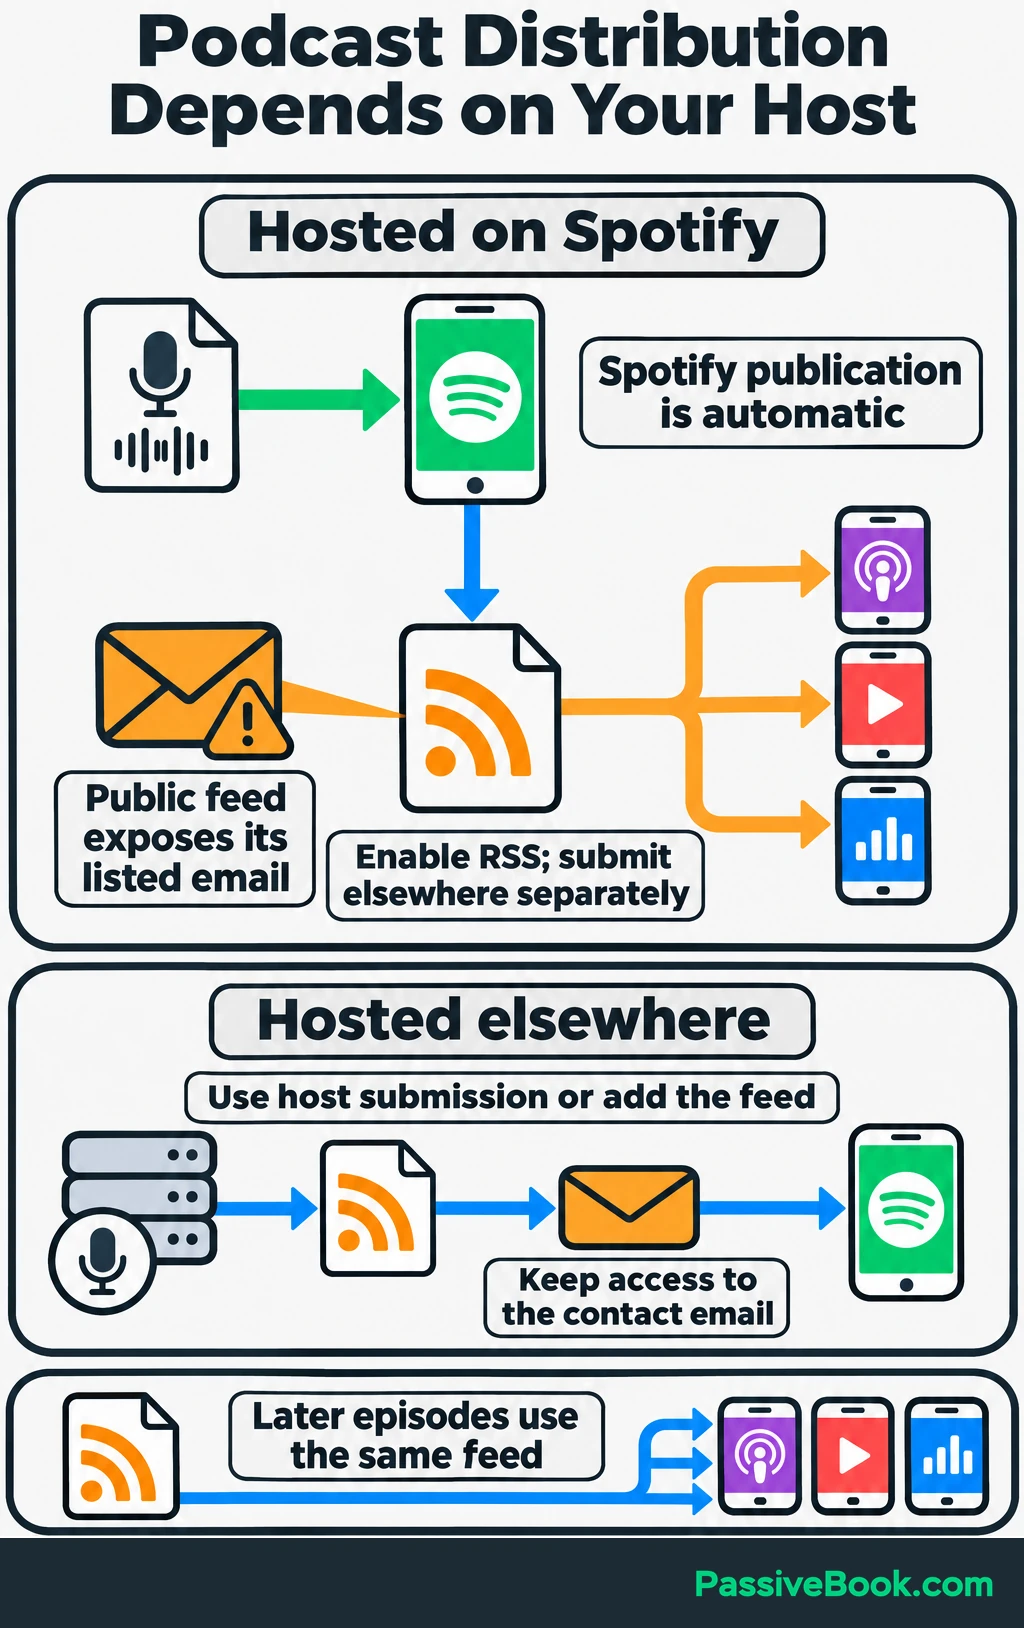
If you host elsewhere, use your host’s Spotify submission process or add the existing feed through Spotify for Creators. Keep access to the feed’s contact email for ownership verification.
Search for an existing listing before creating another one.
Once the show is available, test public playback, artwork, descriptions, and links. Later episodes go through the same host and feed. Apps may display updates at different times, so check the host and feed before uploading a duplicate.
Attract Your First Listeners
Start with a title that makes the episode worth considering. “How to Prepare a Cat-Sitter Handover” tells a listener more than “Episode 3.”
Then share it where that question already comes up.
For Cat-Sitter Notes, you could include the handover episode in a booking-preparation email and beside related advice on your website. In a community, answer the question usefully and add the episode only when recommendations are permitted and the recording adds something.
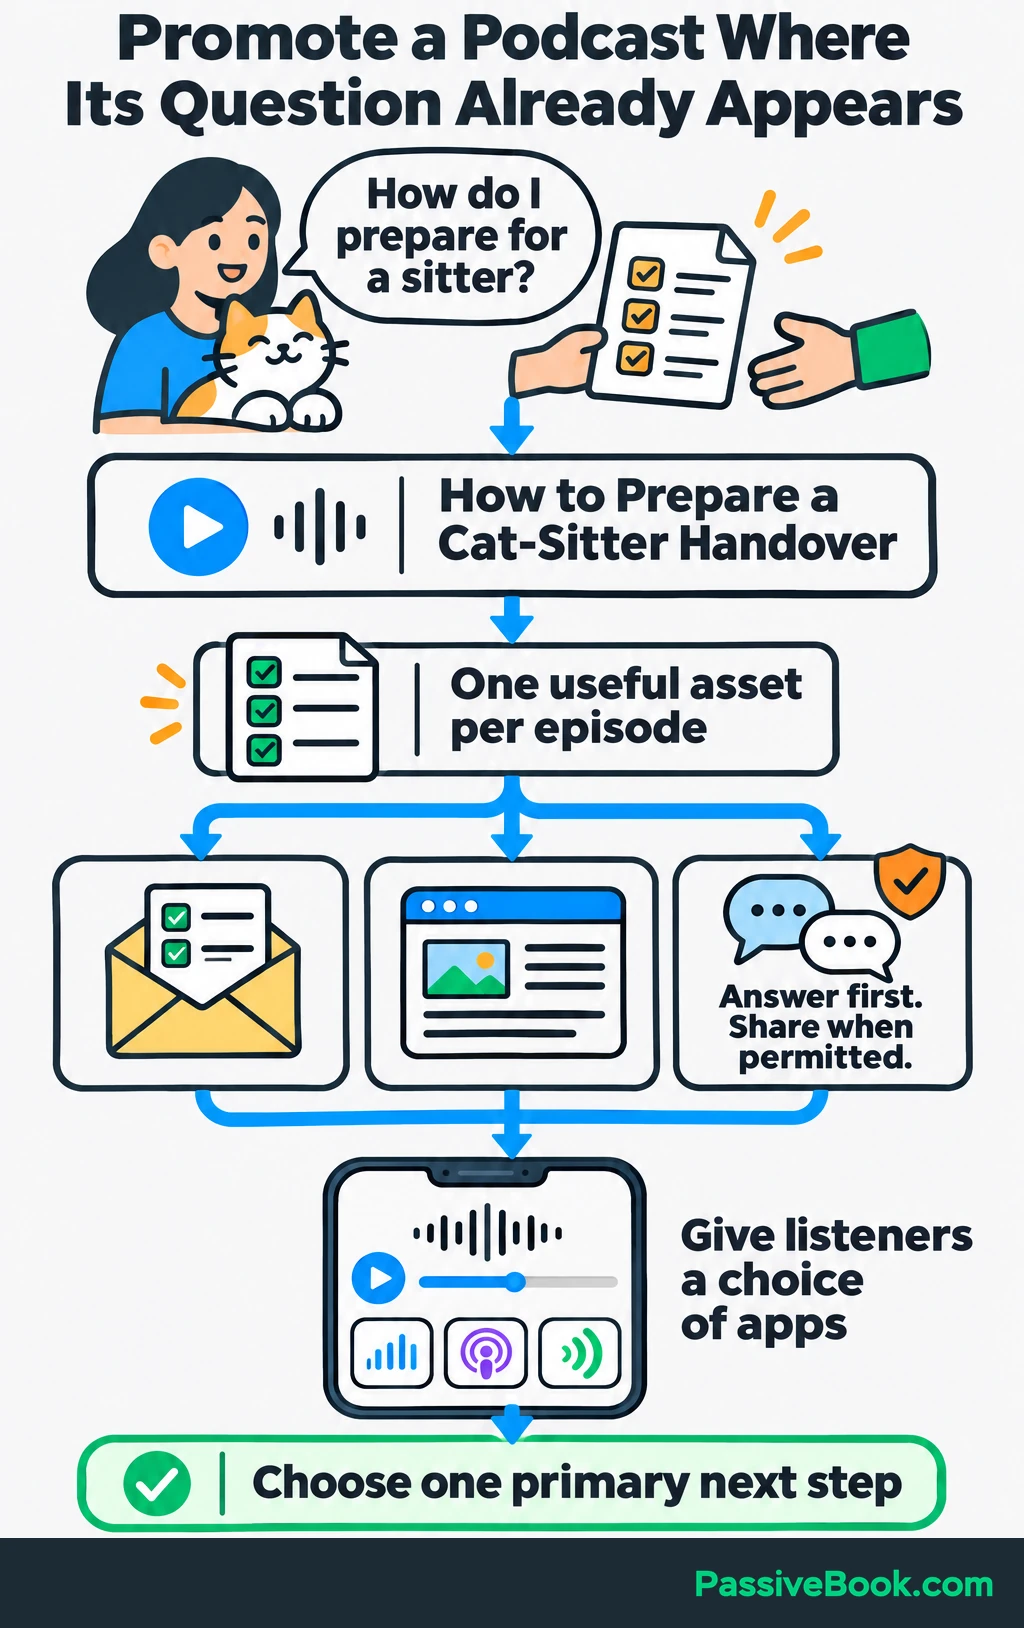
Without an existing audience, begin with relevant conversations. Ask a few people facing the problem to listen and tell you where the explanation helped or became unclear.
Make one useful promotional asset per episode: a short audio excerpt, checklist, or written answer. Link to an episode page with listening options. You don’t need five social accounts to promote one recording.
Seek collaborations with complementary businesses or shows. Pitch a specific topic and explain what their audience can do after hearing it. That gives the other person something concrete to assess.
Choose one primary next action per episode. You might ask listeners to follow, share, send a question, or download a resource.
For the handover episode, I would offer the sample page through an email signup. Explain what emails people will receive, deliver the page, and make the paid pack available as an optional next step.
That creates a route from useful advice to an offer without making every episode a sales presentation.
Build a Production Routine You Can Maintain
Track the pilot’s complete workload: preparation, recording, editing, publishing, and promotion.
Then set your release schedule from the total. A short recording can still create a long evening of work.
I spent six months building a membership site alongside corporate work, and the ongoing content demands became unsustainable. Finishing one piece meant the next piece was already due. I abandoned it because I couldn’t keep that commitment going.
That experience shapes my advice here: test the recurring workload before promising a recurring release.
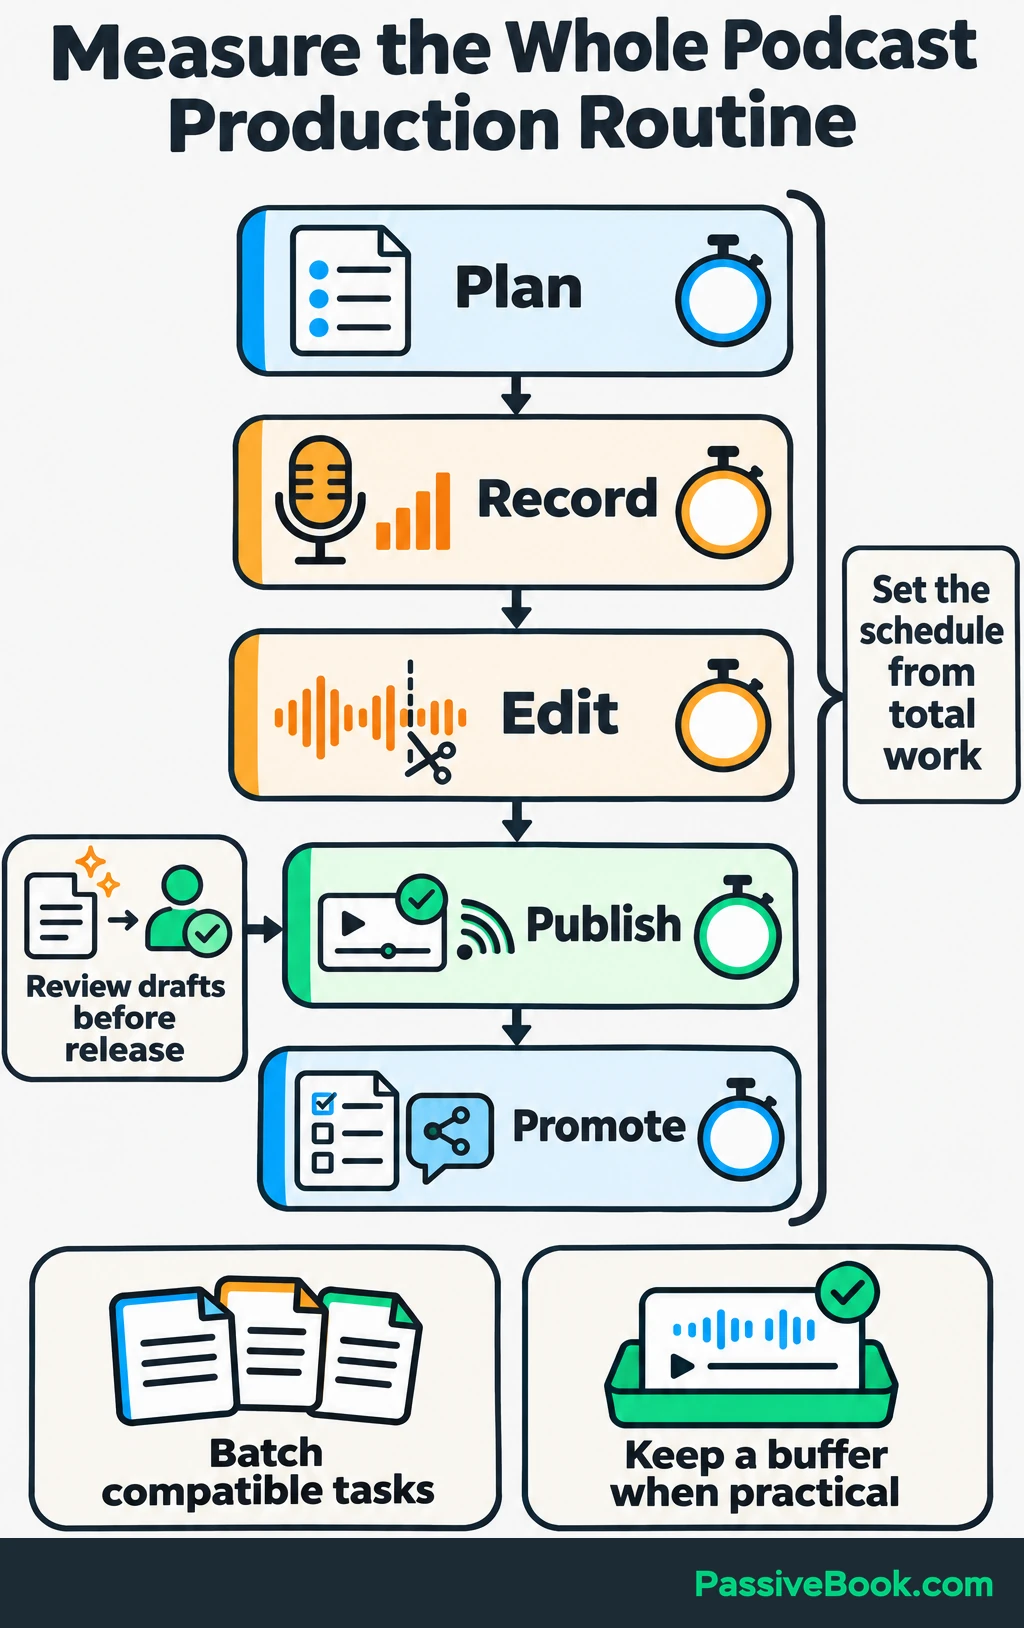
Keep the routine simple:
- Planning: Store listener questions and upcoming outlines in one place, such as Notion.
- Recording: Reuse a checklist for the room, microphone, levels, and backups.
- Editing: Start from a saved project with your usual settings.
- Publishing: Reuse a show-note structure and final review checklist.
- Promotion: Choose one useful asset and a few relevant places to share it.
Batch compatible tasks, such as outlining several episodes together. Keep a finished episode in reserve when practical, or use defined seasons.
Automate after the workflow works. Tools that connect apps, such as Make or n8n, can handle reminders and move files. AI can draft descriptions or promotional summaries from a transcript.
Check those drafts against the recording, especially names, facts, links, and promises. I would keep a human review before publication. Automatically publishing an inaccurate summary merely saves time on creating a different problem.
Use Listener Response to Improve the Show
Once episodes have been live for at least seven days, compare their first seven days using the same reporting source.
Keep three kinds of evidence separate:
- Reach: Downloads and the promotion used to attract them.
- Listening: Available engagement or completion data.
- Business response: Resource requests, email signups, enquiries, and purchases.
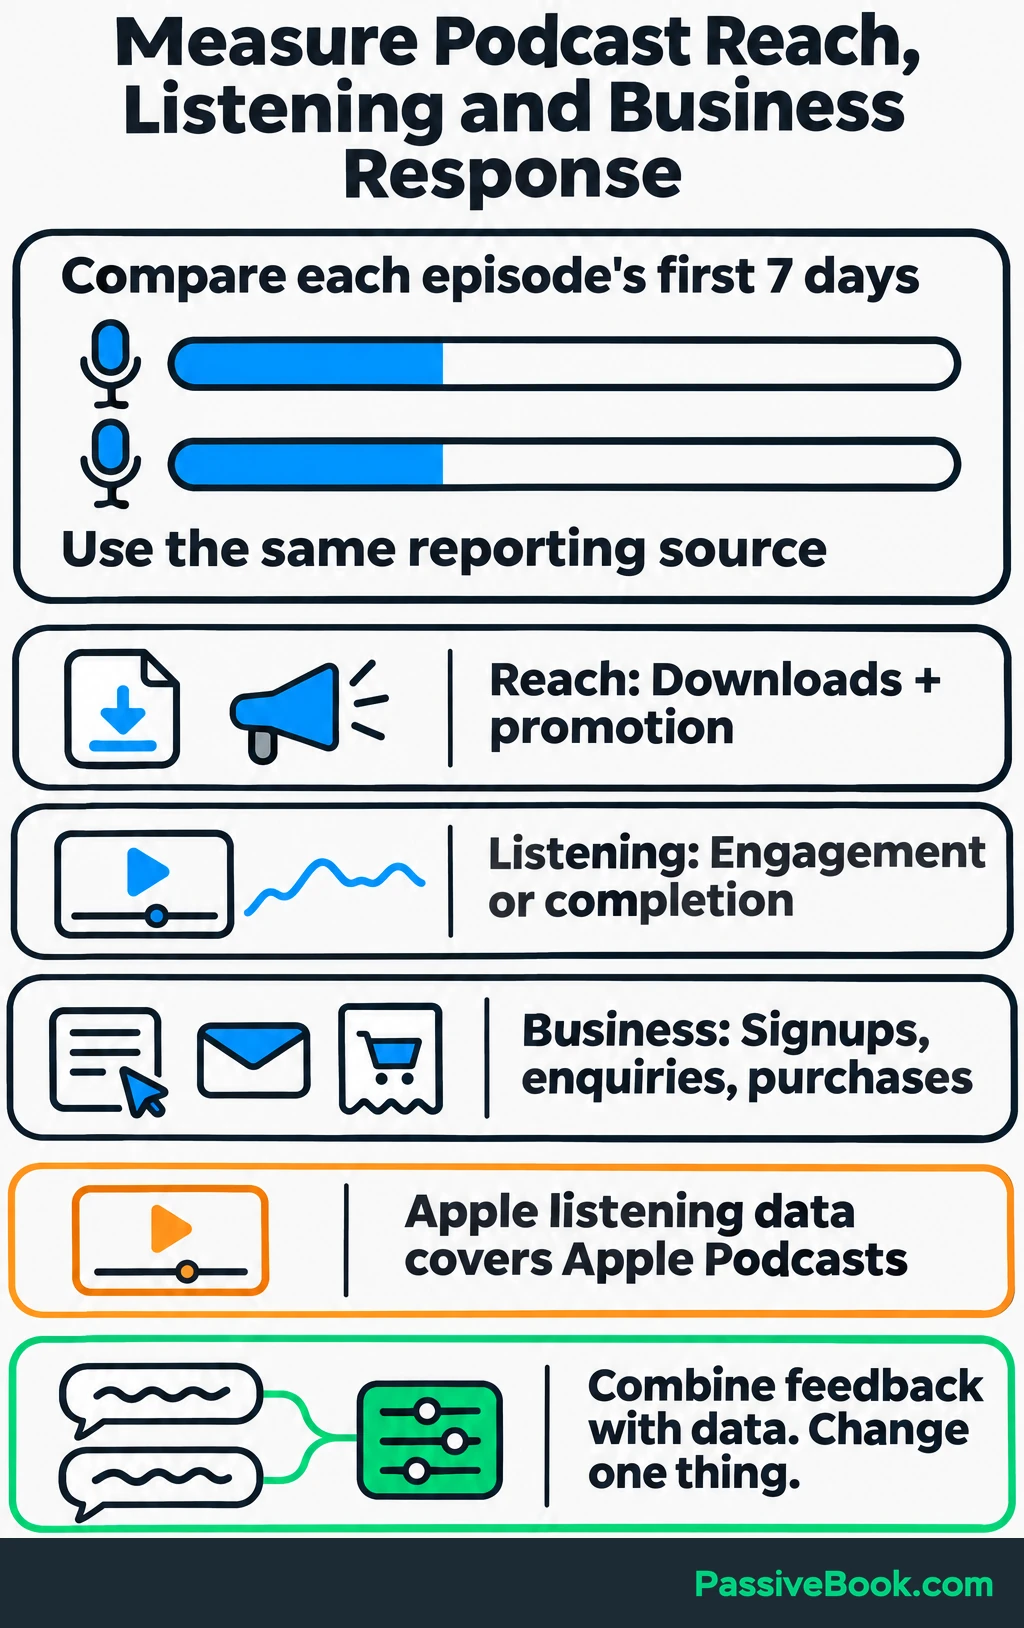
A download doesn’t establish that someone finished the episode or bought anything. Apple’s listening analytics describe engagement within Apple Podcasts, so don’t treat them as a report on every app.
Record listener questions alongside the numbers. Repeated confusion about a handover field may suggest a clearer explanation or a follow-up episode.
Choose one improvement at a time: a more specific title, shorter opening, cleaner recording, or more useful topic. With very little data, direct feedback is more actionable than declaring one episode a winning formula.
Choose a Realistic Way to Monetize Your Podcast
Choose a revenue model that fits the listener’s problem and the work you can deliver. Budget for zero revenue until actual purchases, support payments, or paid placements arrive.
| Model | Payer | Prerequisites | Ongoing Work | Costs |
|---|---|---|---|---|
| Your service | A listener who books | A relevant service and capacity to deliver | Enquiries, bookings, and service delivery | Delivery time, travel where relevant, payment fees |
| Digital product | A listener who buys | A useful product and a working checkout | Support, corrections, and occasional updates | Creation time, selling fees, refunds |
| Affiliate referrals | A merchant or network | Program acceptance and relevant recommendations | Maintain recommendations and links | Research time and any tools you genuinely use |
| Sponsorship | An advertiser | An audience the advertiser wants and agreed deliverables | Outreach, recordings, approvals, and reporting | Sales time and possible network fees |
| Listener support | A contributing listener | A clear reason to contribute | Thank supporters and deliver any promised benefits | Platform and payment fees, benefit production |
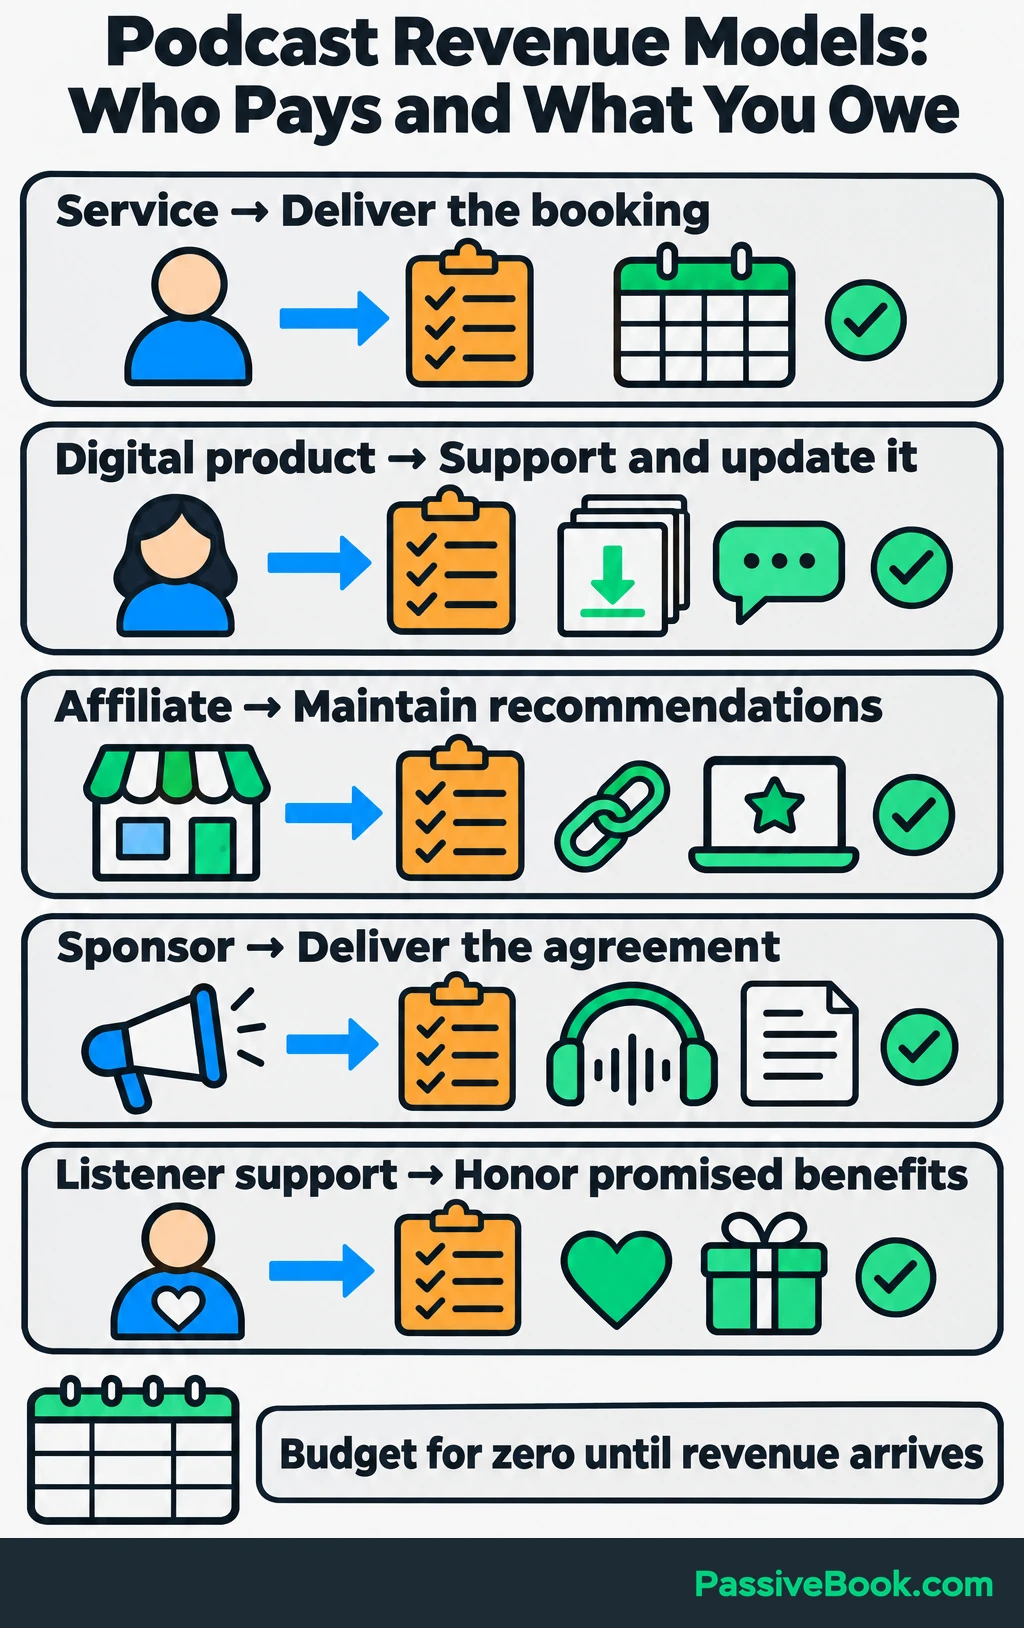
Listener count alone doesn’t determine earnings. The relevance of the audience, offer, and commercial agreement matters.
Connect Episodes to Your Own Offers
I would begin with a relevant offer you can already deliver.
For Cat-Sitter Notes, the handover episode can lead to a free sample page, and that page can introduce the complete printable pack. The sample should be useful on its own, while the paid product provides the fuller set.
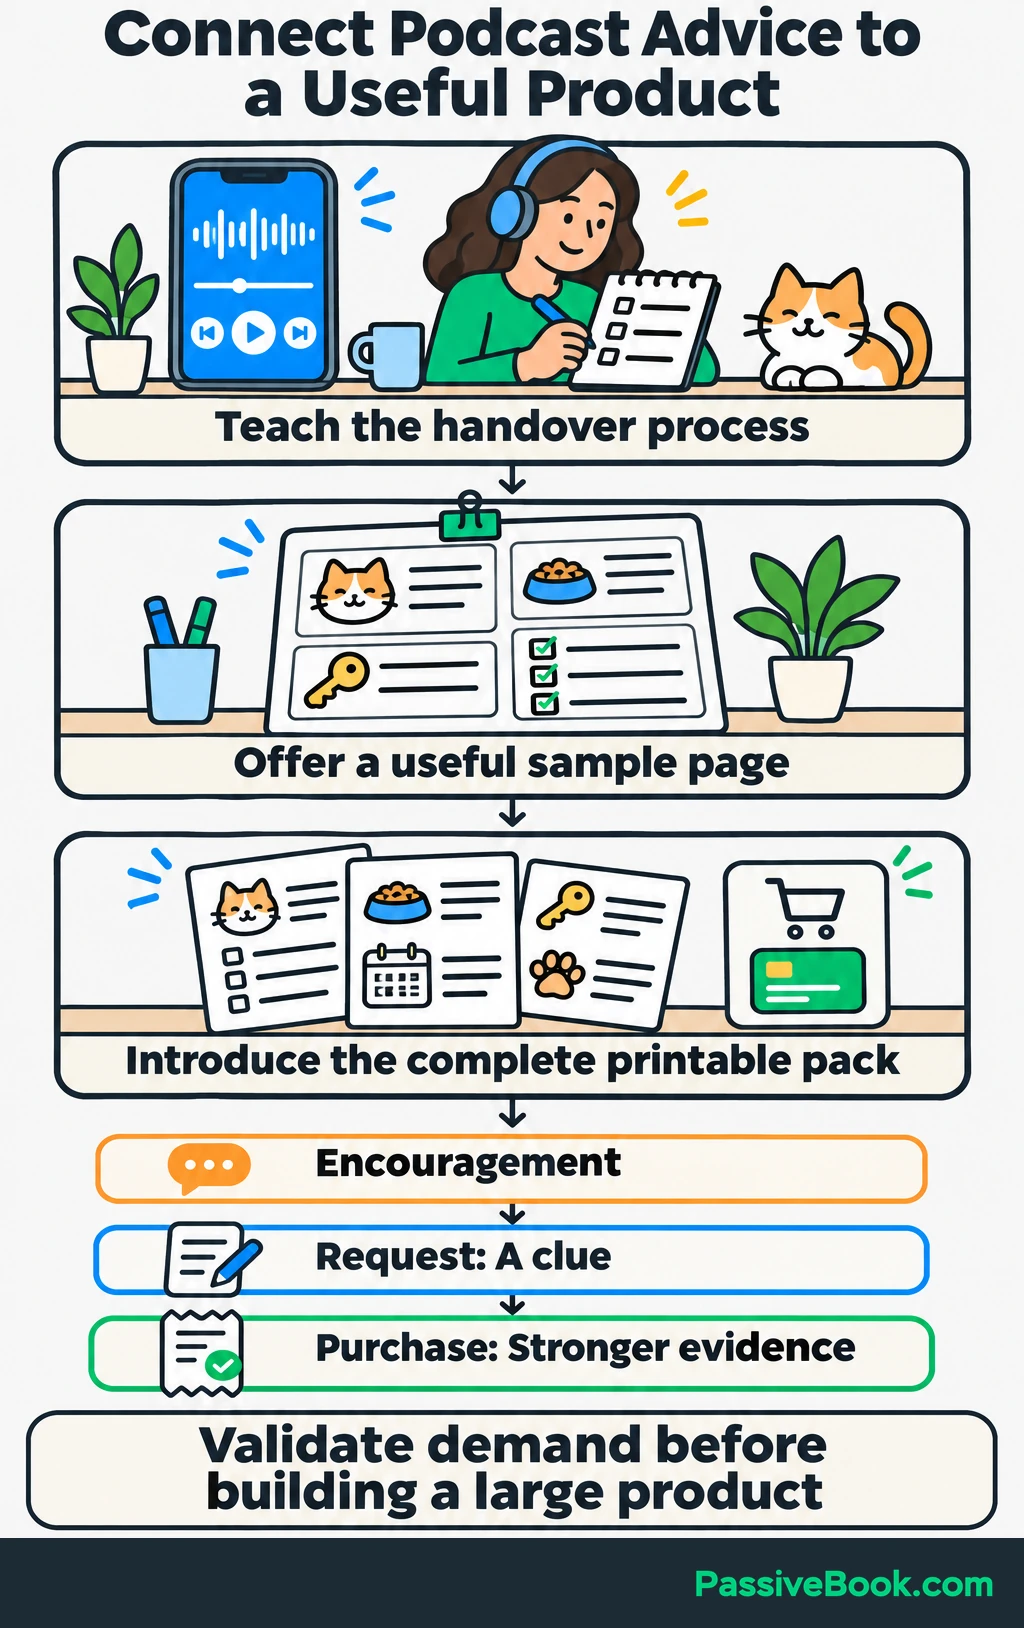
Validate demand before building a large product. Notice which questions repeat, whether people request the sample, and whether anyone pays for the pack.
I once rushed a course without validating demand. It made few sales, received a bad review, and I took it down. Completing the product had felt like progress, but it hadn’t answered whether people wanted it.
For your podcast, a request is a clue and a purchase is stronger evidence. Don’t turn a few encouraging comments into six months of product development.
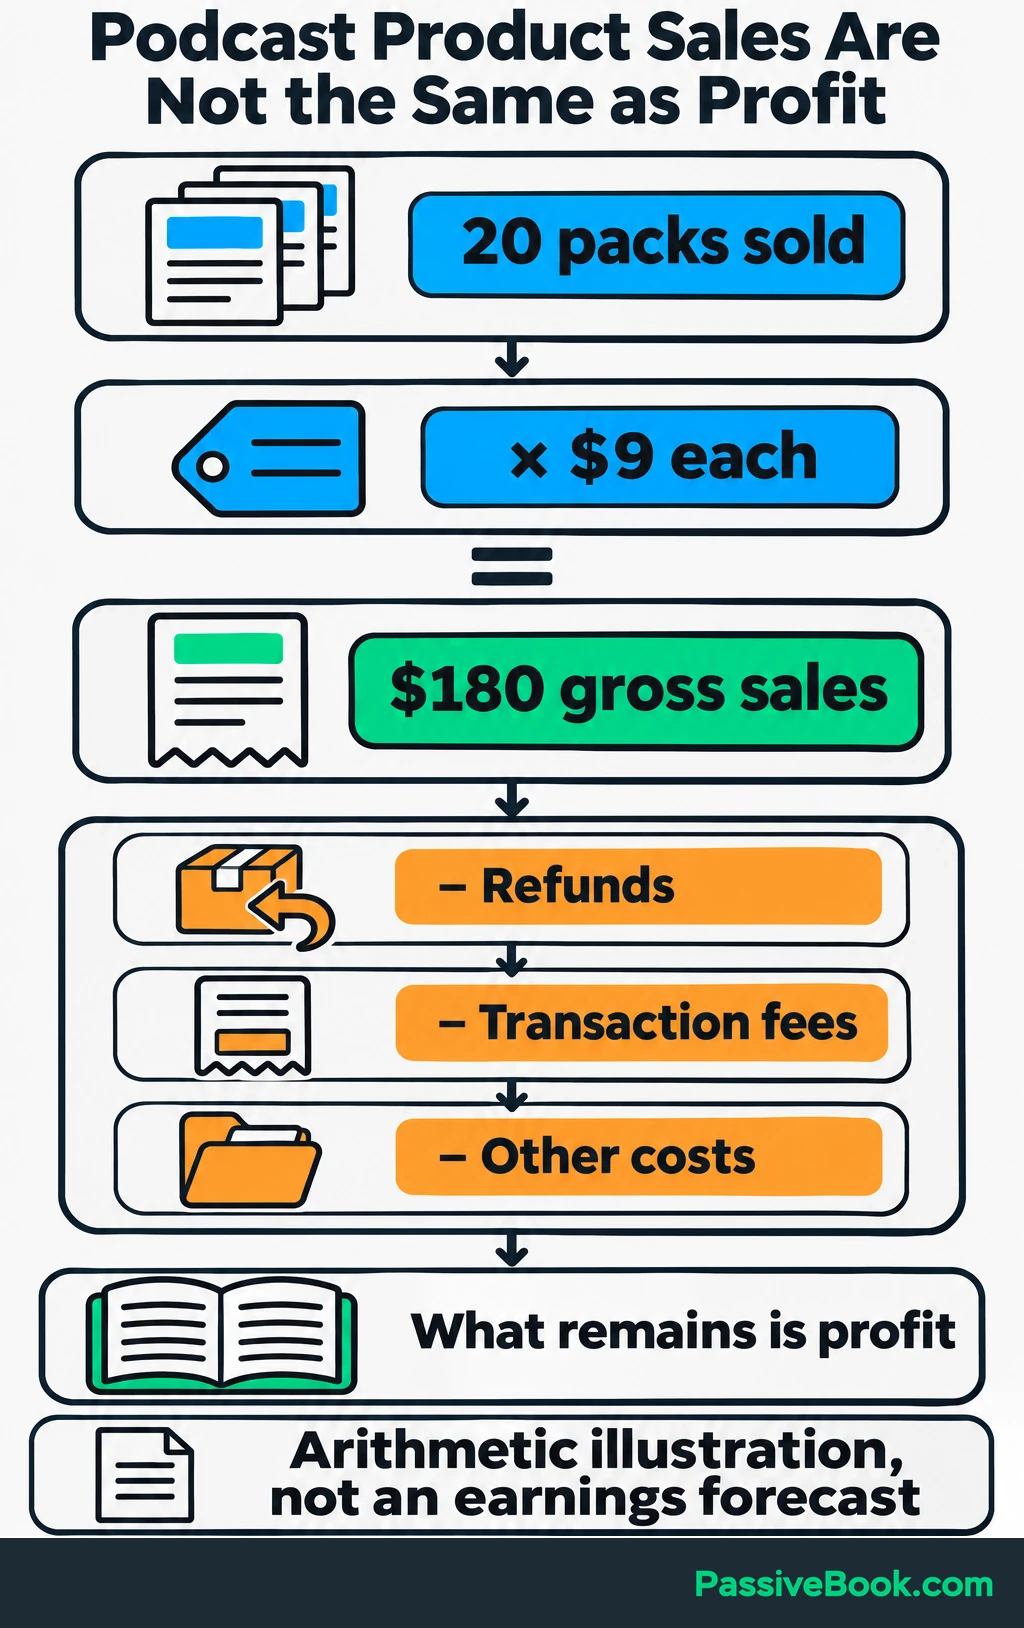
To calculate gross sales, count the packs sold and multiply by the selling price. In this illustration:
20 packs × $9 = $180 gross sales.
Subtract refunds, transaction fees, and other costs to assess profit. That figure is an arithmetic example, not a prediction of what launching the show will earn.
Evaluate Affiliates, Sponsors, and Listener Support
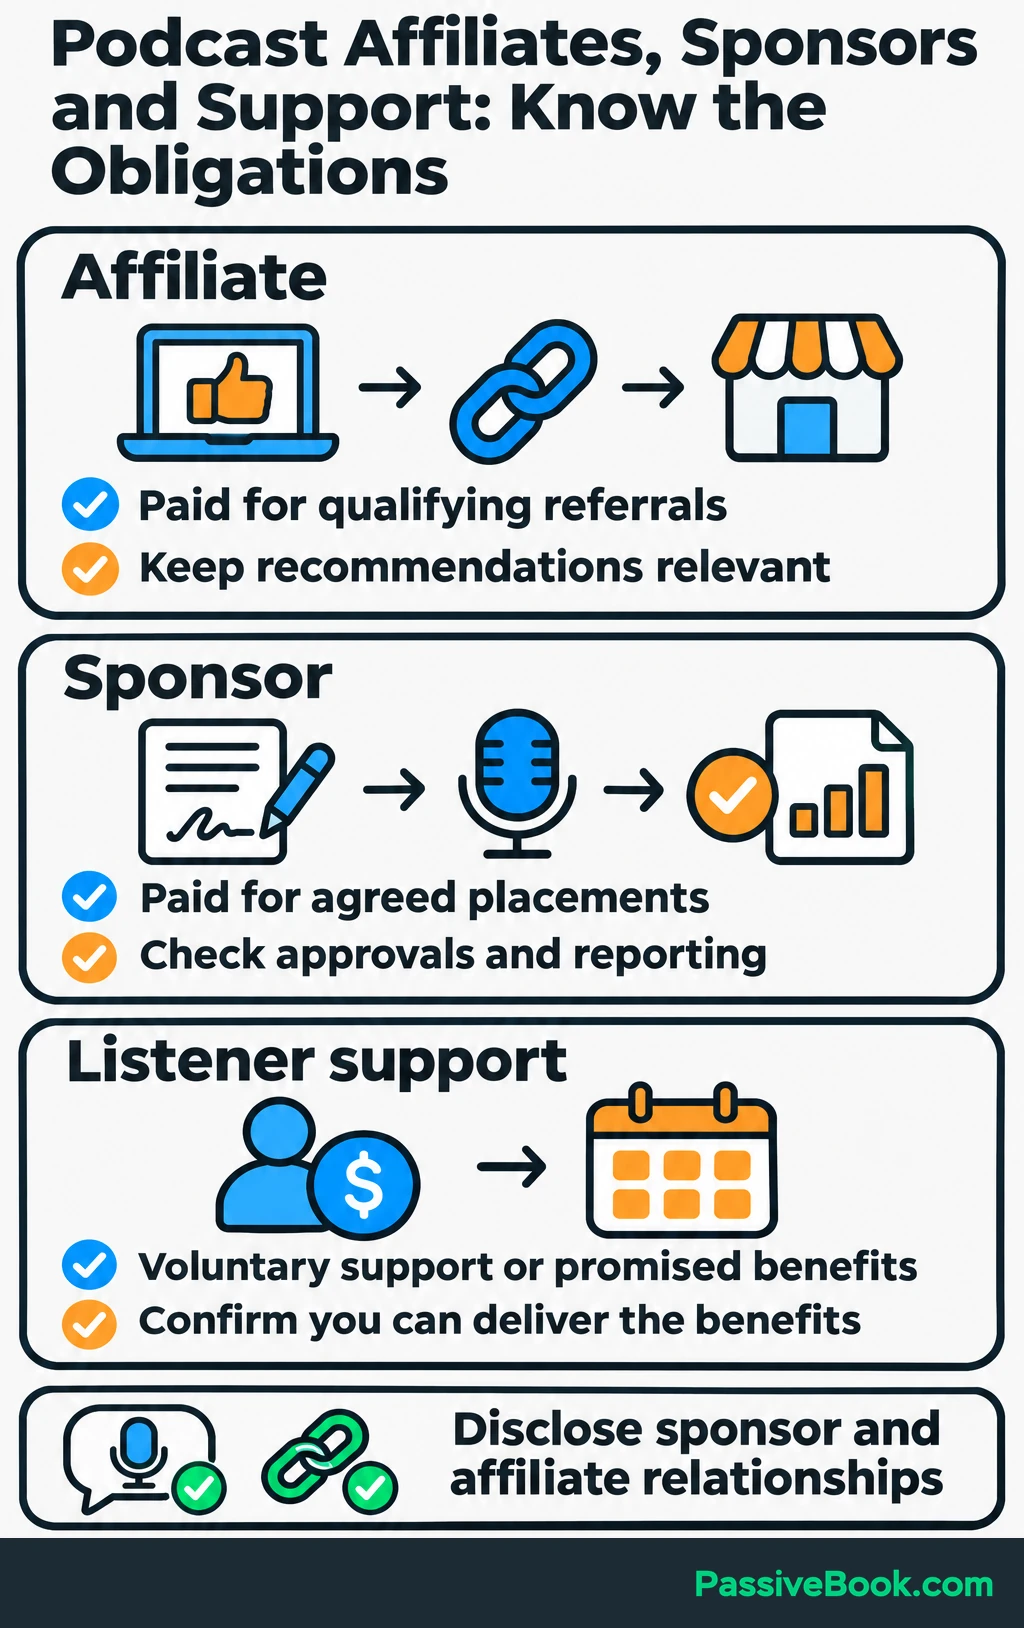
Affiliate programs pay for qualifying referrals. Sponsors pay for agreed placements. Listeners contribute voluntarily or pay for promised benefits.
Assess each option by its obligations. An affiliate link needs a relevant recommendation. A sponsor may require approvals and reporting. Paid bonus episodes create another publishing commitment.
Check eligibility before relying on built-in monetization. Spotify’s options depend on location, hosting, and audience requirements.
For sponsorship, understand exactly what the advertiser is buying. Some deals use a flat fee. Others use CPM, meaning payment per thousand qualifying downloads or impressions.
Count only downloads eligible for the advertising slot within the agreement’s measurement period. If an episode had 5,000 qualifying downloads, an assumed $25 CPM, and one filled advertising slot:
5,000 ÷ 1,000 × $25 × 1 = $125 gross advertising revenue.
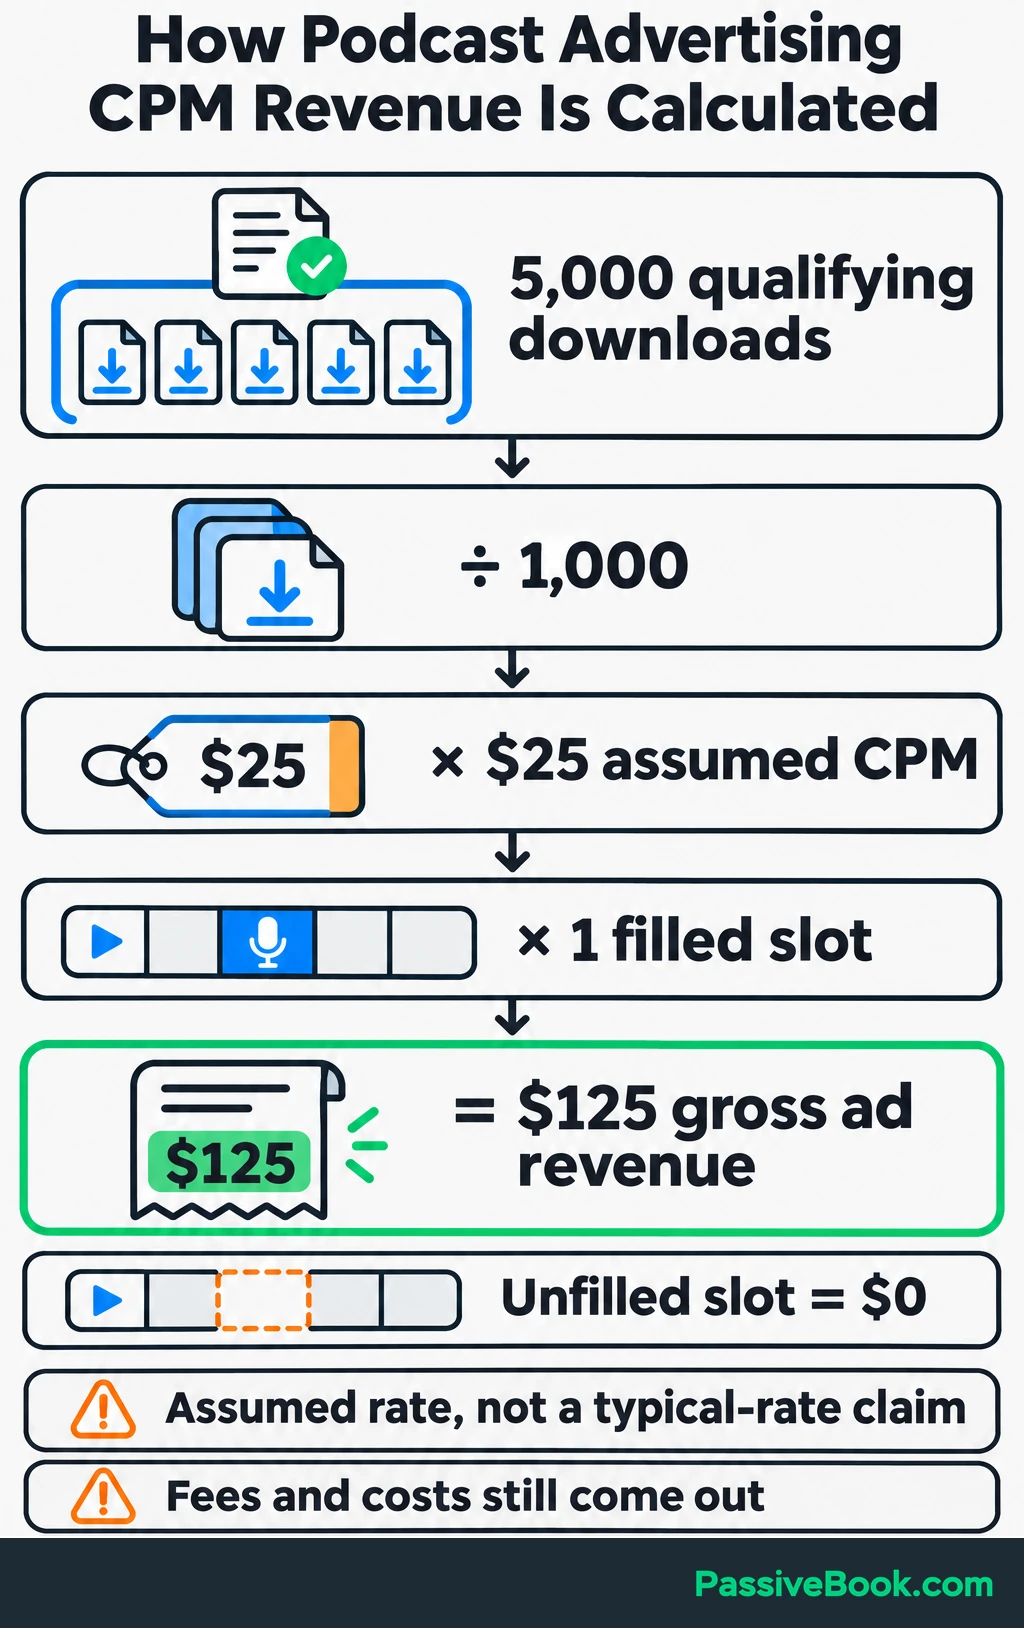
The CPM is an arithmetic assumption, not a typical rate or earnings forecast. Fees and costs still come out, and an unfilled slot earns nothing.
Disclose sponsorships and affiliate relationships in the spoken endorsement and beside relevant links. The FTC’s endorsement guidance explains U.S. expectations; follow the rules governing your activity.
I would skip paid bonus content until listeners ask for it and you know you can deliver it. A second content treadmill is still a treadmill.
What Next?
Record a one-minute opening for your first episode using equipment you already own. Play it back and identify the single biggest obstacle to understanding your voice. That gives your next decision a concrete basis.
Use the social buttons to share this guide with your launch group so you can work from the same recording and publishing checklist.
Which part of producing a first episode feels hardest to fit around your existing work? Tell me in the comments, and bring any other podcasting questions too.
Share this post with your friends & followers: