You want a short video that explains something useful, but filming yourself and learning a complicated editor can turn a small task into a weekend project.
An AI preview may look promising until an object starts floating or the product details turn unreadable. Now you’ve spent time and generation credits on footage you can’t publish. To help you avoid that wasted effort, this guide follows a 20-second product video from an idea or image to a finished download, covering text prompts, image animation, editing, tool costs, and commercial-use checks.
Plan a Short Sequence of Shots
Start with one message and one action you want viewers to take. “Show how this planner helps organize a project, then invite viewers to download it” gives you something concrete to build.
Choose where the video will appear before creating footage. Use a vertical canvas for a vertical post and a horizontal canvas for a horizontal video. Cropping later may cut off the detail you wanted people to see.
You have two ways to generate scenes:
- Text-to-video creates footage from a written description. Choose it when you need to invent a scene.
- Image-to-video animates a starting image. Choose it when you already have a visual whose appearance matters.
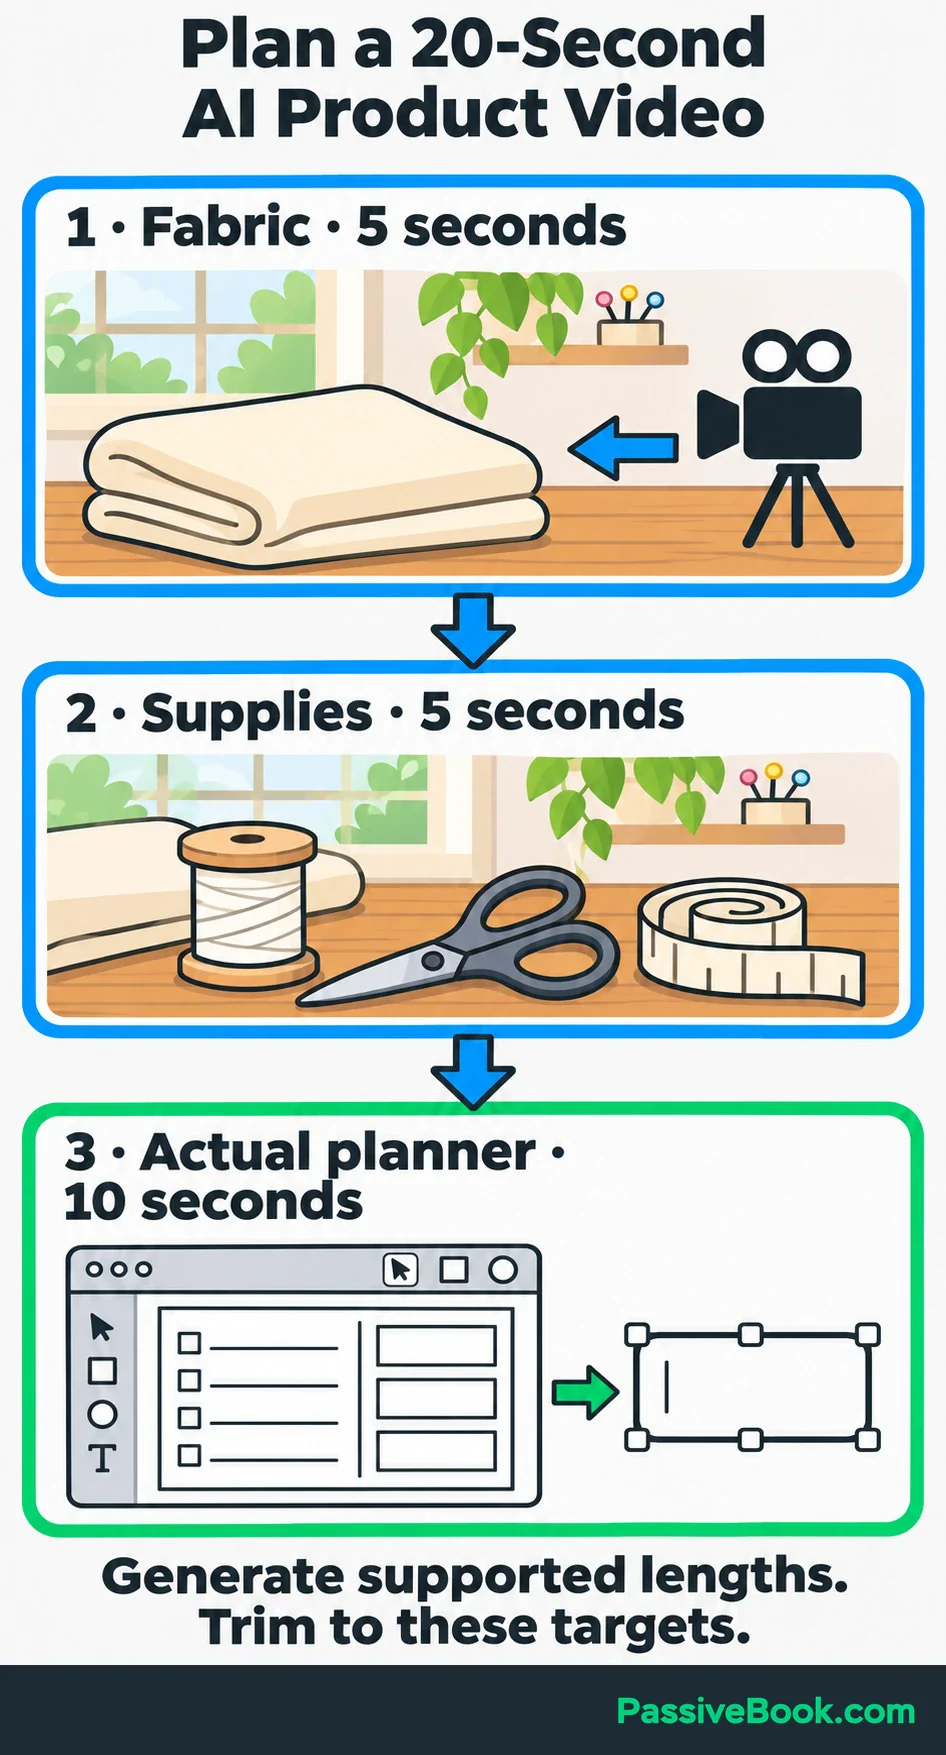
You can combine both in one project. These methods differ from script-to-video tools that assemble stock footage, narration, and subtitles. Here, you’ll generate individual scenes and assemble them yourself.
For the worked example, imagine you sell a printable sewing-project planner. You want a 20-second video showing the supplies, the planning problem, and the actual download.
Write the script before generating anything:
Starting another sewing project? Keep your fabric, supplies, and next steps in one place. Download the printable sewing-project planner.
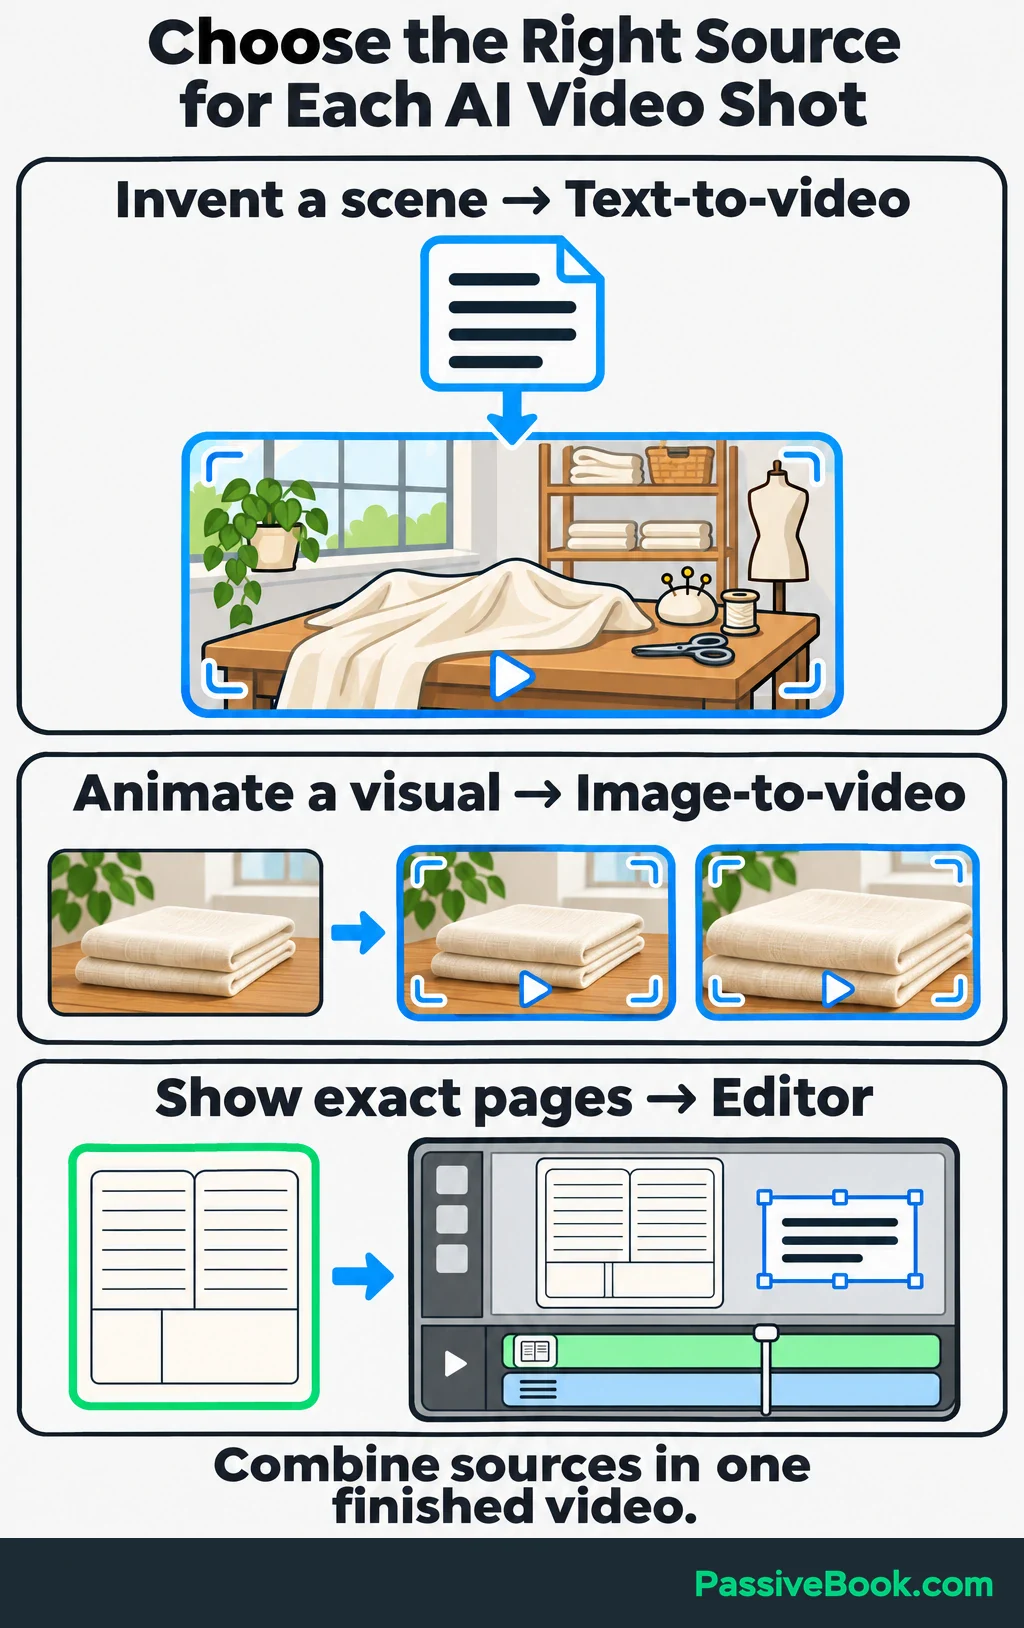
Then divide it into shots. Each shot needs one visual purpose and one main action.
| Shot | Approximate Duration | Visual | Narration or Caption | Source |
|---|---|---|---|---|
| 1 | 5 seconds | Cream linen on a wooden sewing table; camera moves slowly closer | “Starting another sewing project?” | Text generation or image animation |
| 2 | 5 seconds | Thread, scissors, and a measuring tape arranged on the table | “Keep your fabric, supplies, and next steps in one place.” | Text generation |
| 3 | 10 seconds | Actual planner pages, followed by a clear download invitation | “Download the printable sewing-project planner.” | Existing product images and editable text |
Keep a short list of recurring details: cream linen, a wooden table, a bright craft room, and soft daylight. Reuse those descriptions so the shots feel related.
The durations are editing targets. Generate a supported clip length and trim it to fit. Keep exact wording, logos, and product pages for the editor, where you can control them.
If you have an idea but no script yet, the AI Video Copy Studio can draft the words and scene prompts around your own offer. It keeps the narration, generated scenes, and editable text working toward the same message.
Free AI Video Studio


Choose an AI Video Generator You Can Test
I would start with one generator and one editor. A collection of subscriptions is an expensive substitute for a finished video.
Before choosing, check whether the generator accepts your input and supports the orientation, clip length, and downloadable resolution you need. A service may offer several versions of its generator, called models, with different settings and credit costs. Credits are the allowance you spend to generate footage.
These two generators provide a practical starting point:
| Generator | Supported Inputs | Free Access | Entry Paid Plan | Important Output Restrictions |
|---|---|---|---|---|
| Adobe Firefly | Text-to-video and image-to-video | Limited daily generations on Firefly Video and selected partner models | Standard: US$9.99/month; 2,000 monthly credits shared across features | Available settings depend on the model. |
| Runway | Text and image inputs through Gen-4.5; other models vary | 125 one-time credits; model selection varies | Standard: US$15/month, or US$12/month billed annually; 625 monthly credits | Free videos have watermarks. Standard includes all models and watermark-free generation. |
Check Runway’s free-plan details for model availability and watermarks, and the linked product pages for current prices and allowances.
I would test Firefly’s free access first. Generate your hardest planned shot, download it, and inspect the file before paying.
Allow room for rejected attempts. Suppose you need two five-second clips and generate three versions of each. You have generated 30 seconds of footage to select ten seconds for the finished video.
That is the useful budget: attempts needed to produce an accepted shot. Credit totals alone are hard to compare because models charge differently.
Check commercial permission before generating business footage:
- Adobe allows commercial use of Firefly output, including beta output unless the product explicitly says otherwise. See its commercial-use guidance.
- Runway permits commercial use of your outputs subject to compliance with its terms of use.
Those permissions cover the generator’s output terms. You still need permission for the images, music, and other material you supply.
Create Video Clips From Text Prompts
Describe One Clear Shot
When learning how to create videos with AI, the most useful prompt habit is to describe one shot at a time.
Include the subject, setting, action, framing, camera movement, and lighting. You don’t need a paragraph of film jargon. You need instructions that describe something visible.
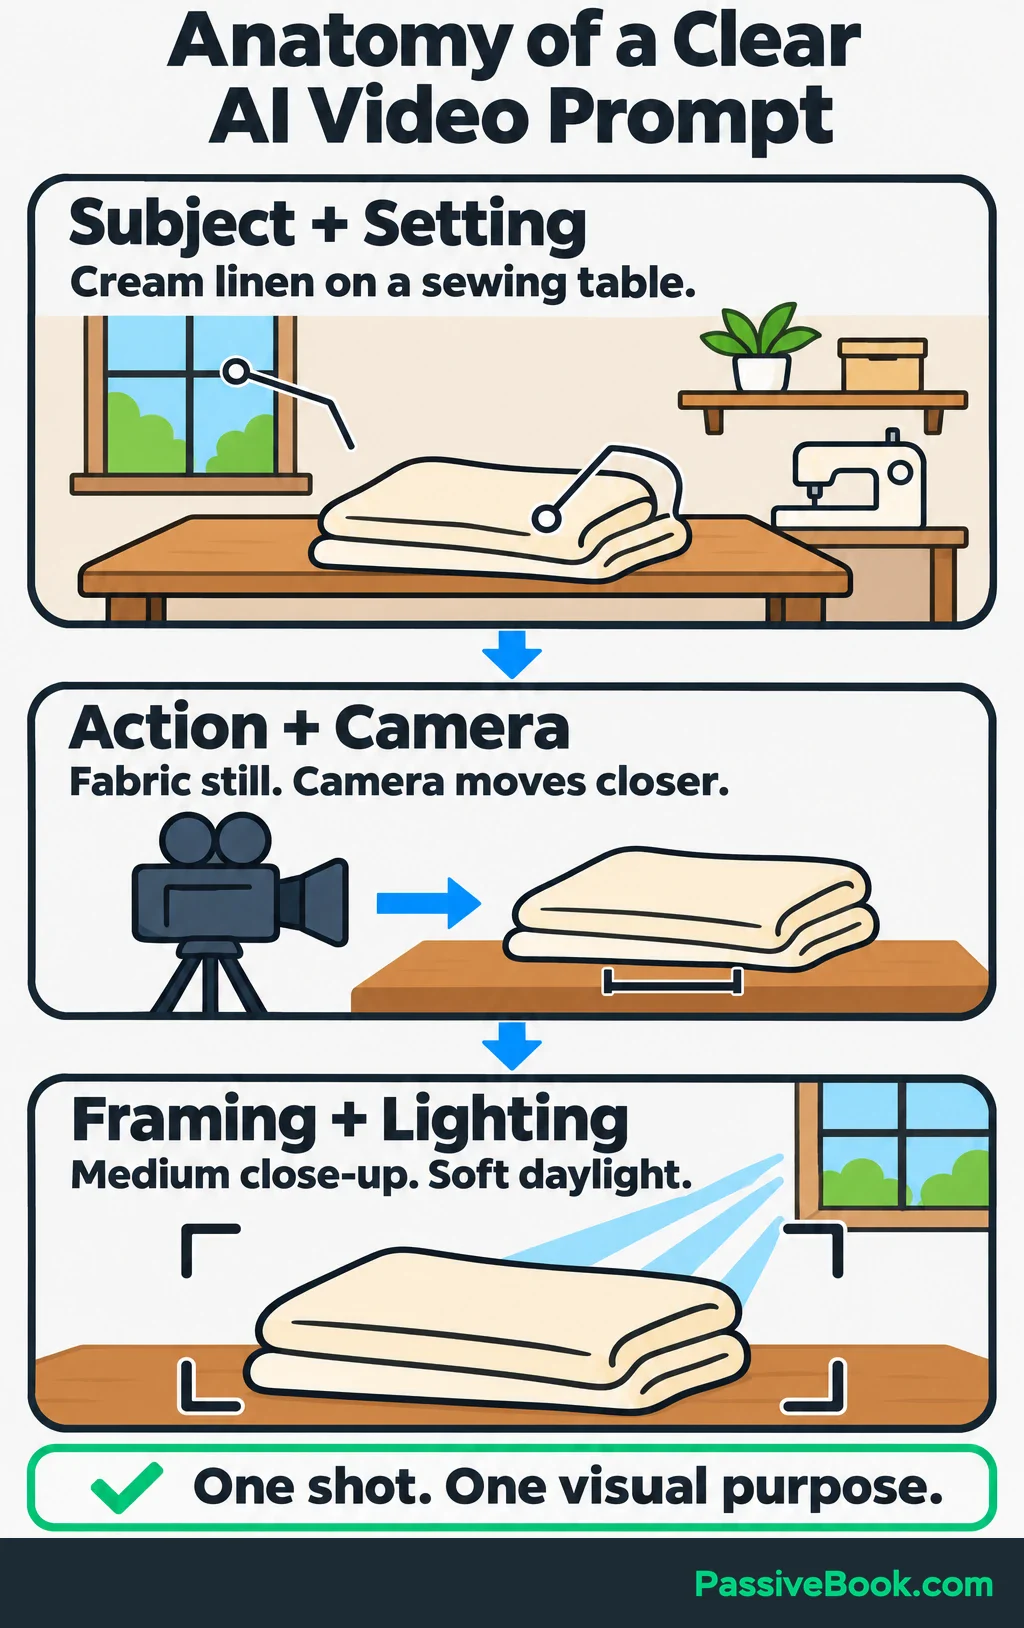
Use this starting structure:
[Subject] performs [one action] in [setting]. [Framing and camera movement]. [Lighting and visual style].
An object can stay still while the camera moves. For the opening shot, try:
A folded length of cream linen rests on a wooden sewing table in a bright craft room. Medium close-up. The camera slowly moves closer to the fabric. Soft daylight, natural live-action appearance.
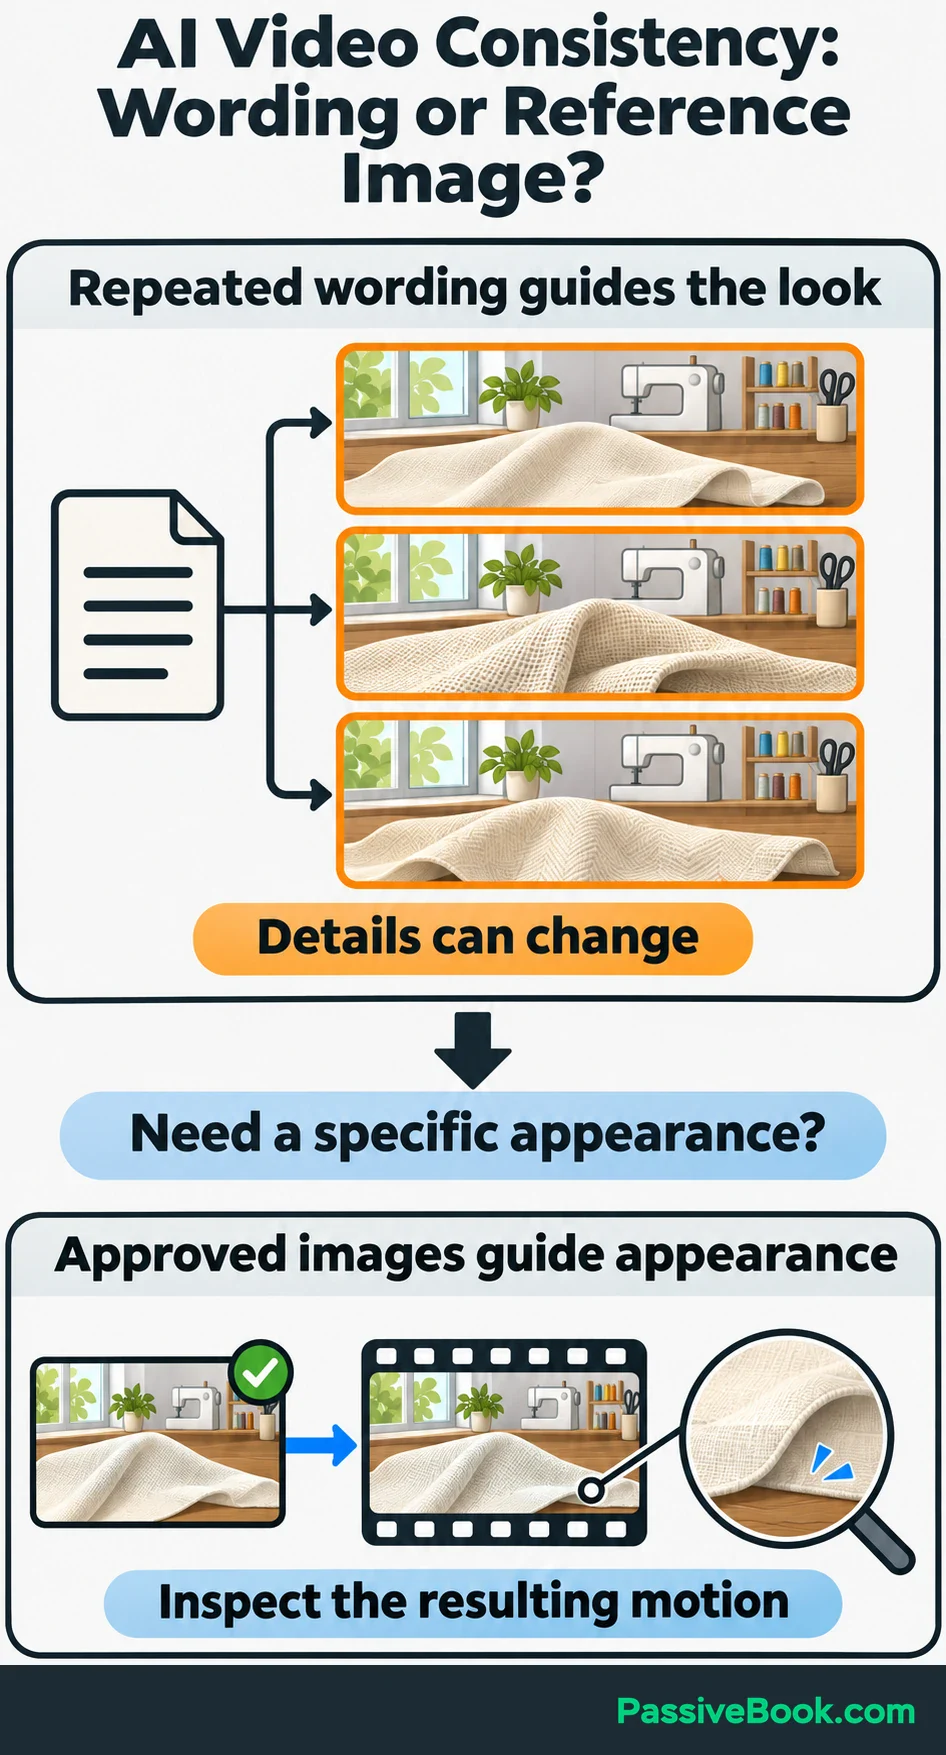
This gives the shot one job: introduce the sewing project. It doesn’t also ask someone to enter, unfold the fabric, pick up scissors, and start sewing.
Reuse the setting and style descriptions in related prompts. But treat repeated wording as a guide, not a guarantee of identical objects. If a particular fabric, animal, or character must match, start from an approved image instead.
For dog-focused footage, apply the same structure: one dog, one simple movement, and a clear setting. Save a complicated interaction with a person or toy for a project where you have time to inspect and replace it.
Generate a Test and Fix the Specific Failure
Choose text-to-video, select a model, and set the supported duration and orientation. Review the displayed credit charge before generating one version.
Watch the whole clip. Don’t approve it because the first frame looks good.
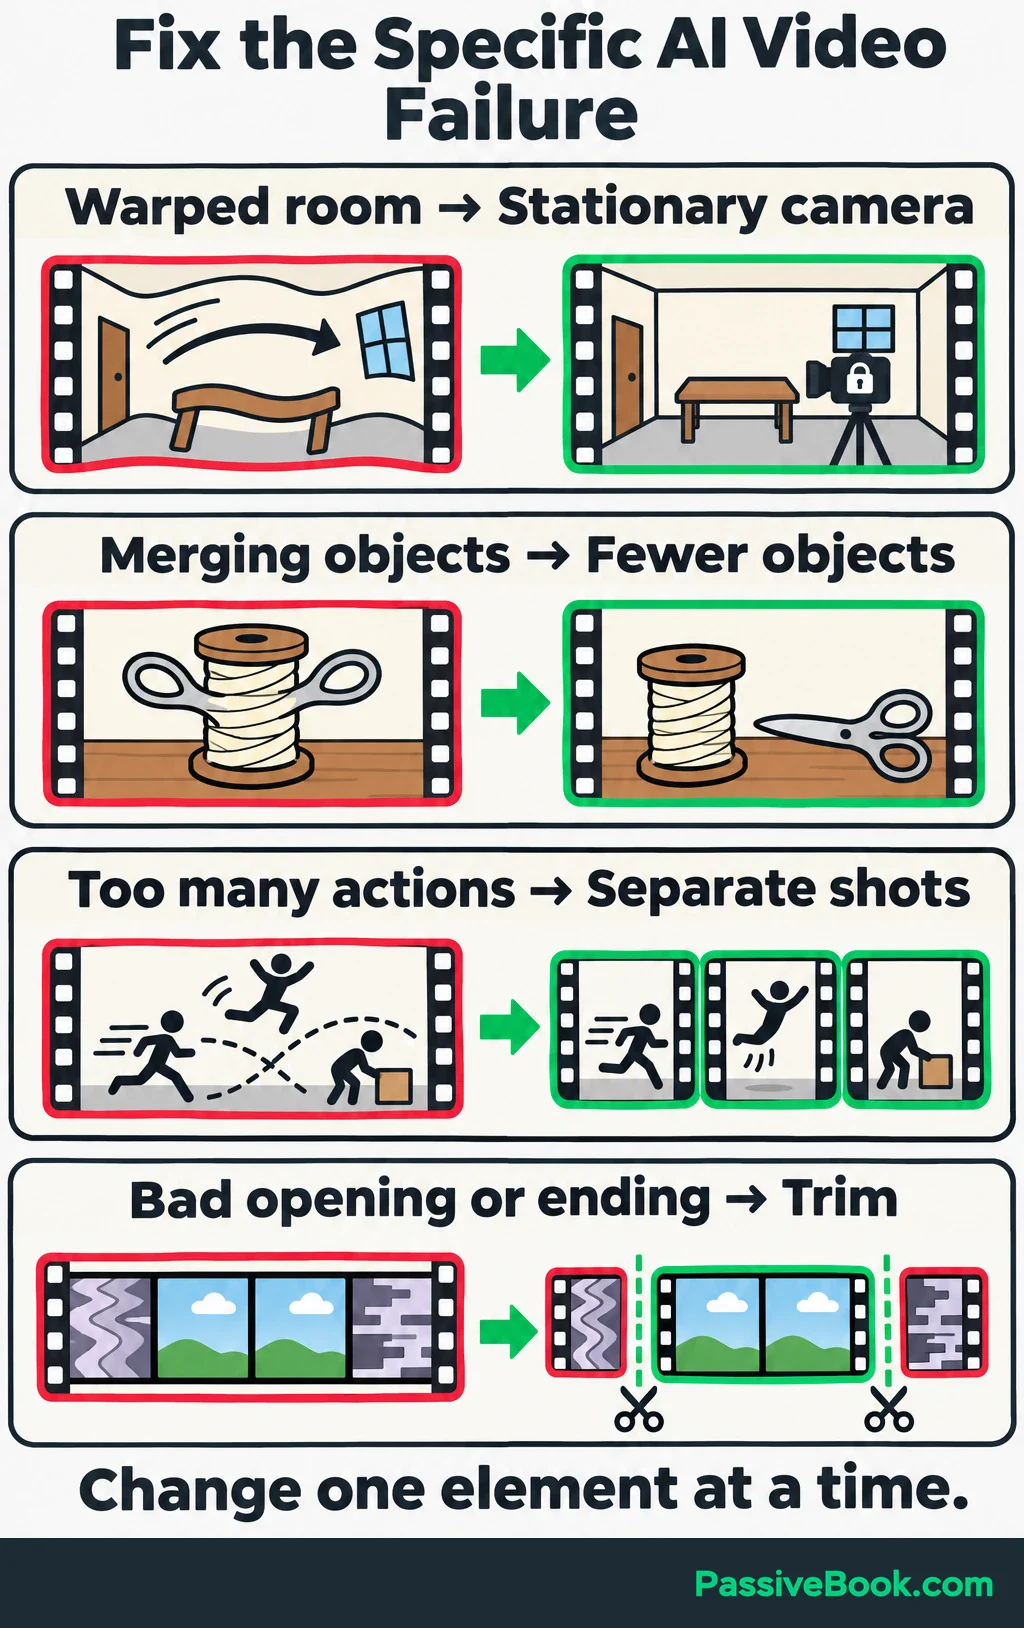
For the fabric shot, check whether the cloth stays on the table, the table keeps its shape, and the camera moves as requested. For an animal shot, also inspect paws, legs, markings, and contact with the floor.
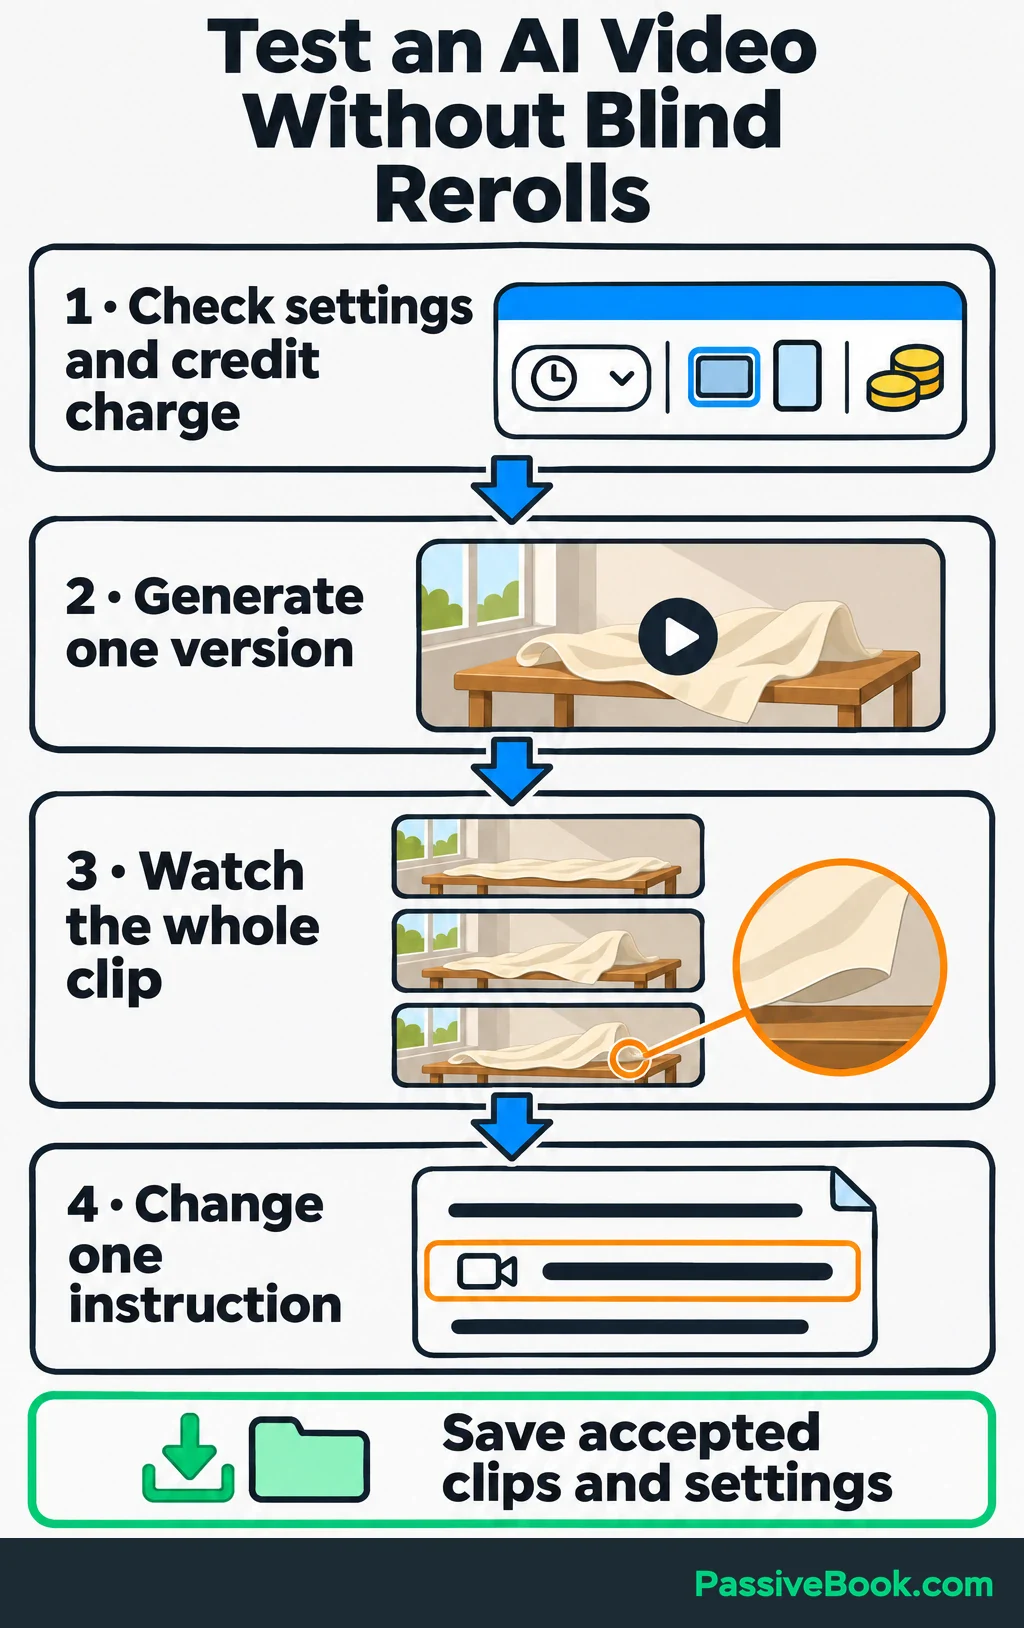
When something fails, revise the instruction connected to that failure:
| What Went Wrong | What I Would Change |
|---|---|
| The camera swings around and reveals a distorted room | Request a stationary camera |
| Objects slide or merge | Reduce the number of objects or simplify the composition |
| Several actions happen at once | Keep one action and generate the others separately |
| Only the opening or ending is unusable | Trim that portion if enough clean footage remains |
Change one element at a time so you can tell whether the revision helped. Rewriting everything makes the next result harder to judge.
Create the supplies shot separately:
A spool of cream thread, closed sewing scissors, and a loosely coiled measuring tape rest on a wooden table in a bright craft room. Close-up, slow camera push-in. Soft daylight, natural live-action appearance.
If a shot keeps failing, simplify it or use a still image. The audience came for the message, not proof that you won an argument with a generator.
Download accepted clips and save their prompts, model names, and settings.
Create Video Clips From Images
Prepare a Clean Starting Frame
Choose image-to-video when you have a useful starting visual and want to add movement.
Use a sharp image with a clear subject and enough space for the intended motion. Crop it to your planned orientation before uploading, and fix visible defects first. Runway’s image-to-video guidance warns that flaws in a starting image can become more pronounced during animation.
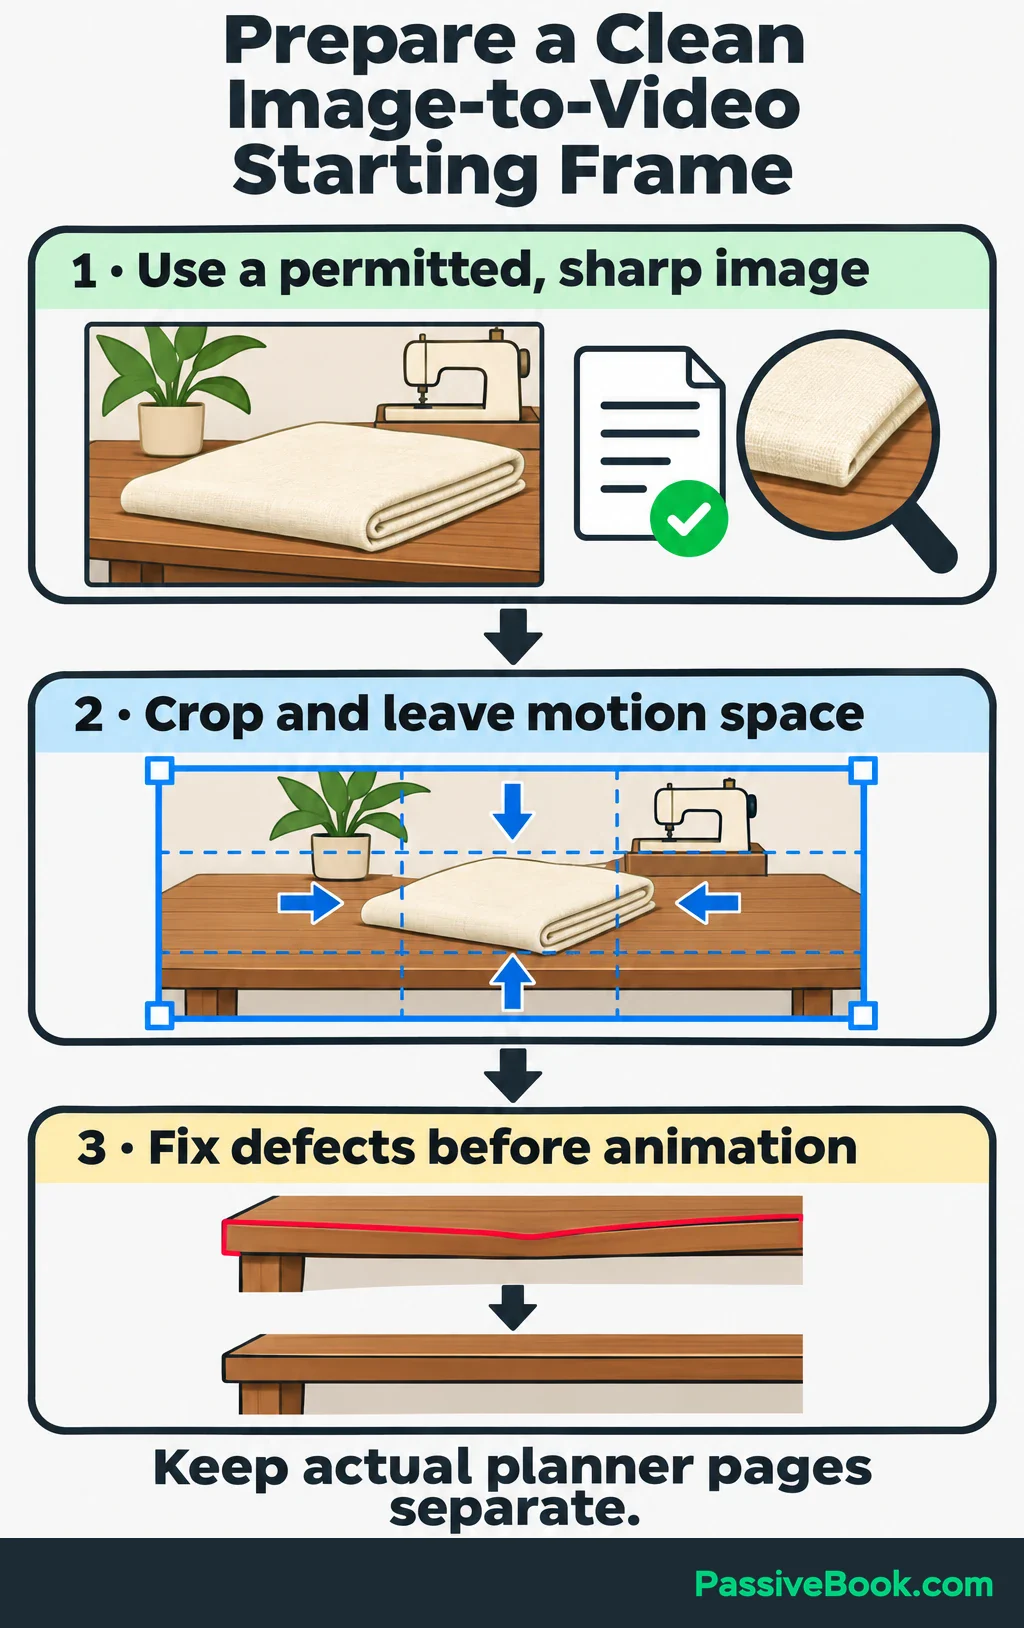
For the sewing video, prepare a still of the cream linen on the wooden table. You could use your own photograph or an image you have permission to use. This replaces the text-generated opening shot; it doesn’t add another scene to the plan.
Keep the real planner pages separate.
Only upload images you own or have permission to upload and adapt, and obtain any necessary permissions for identifiable people. Adobe’s generative AI guidelines prohibit inputs and outputs that violate third-party rights. A generator’s commercial-use permission doesn’t turn an image found online into an asset you can freely animate.
Prompt the Movement
Upload the still as the starting frame, choose supported settings, and describe what should move. The image already supplies the appearance and composition, so you don’t need to describe every visible object again.
For the linen still, start with:
The camera slowly moves closer to the fabric. The fabric and table remain still.
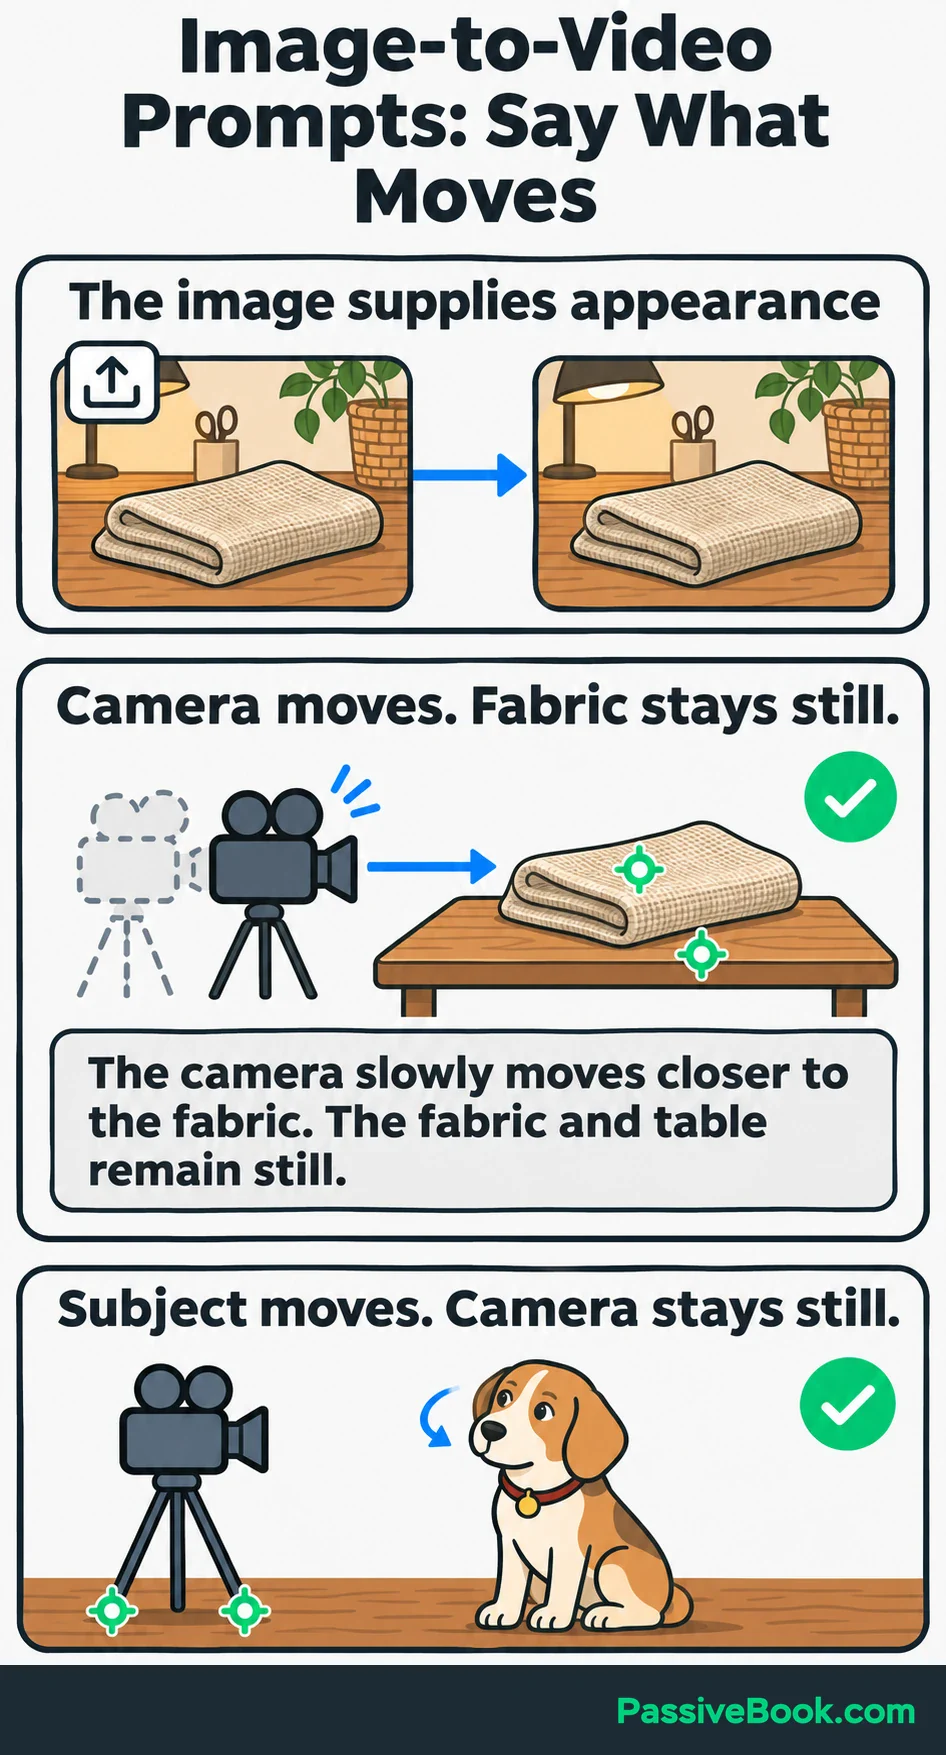
For a dog photo, the same approach might be:
The dog turns its head slightly toward the camera. The camera remains stationary.
Compare the beginning, middle, and end. Look for changing textures, moving furniture, warped edges, or new objects. With animals, check markings and anatomy throughout the movement.
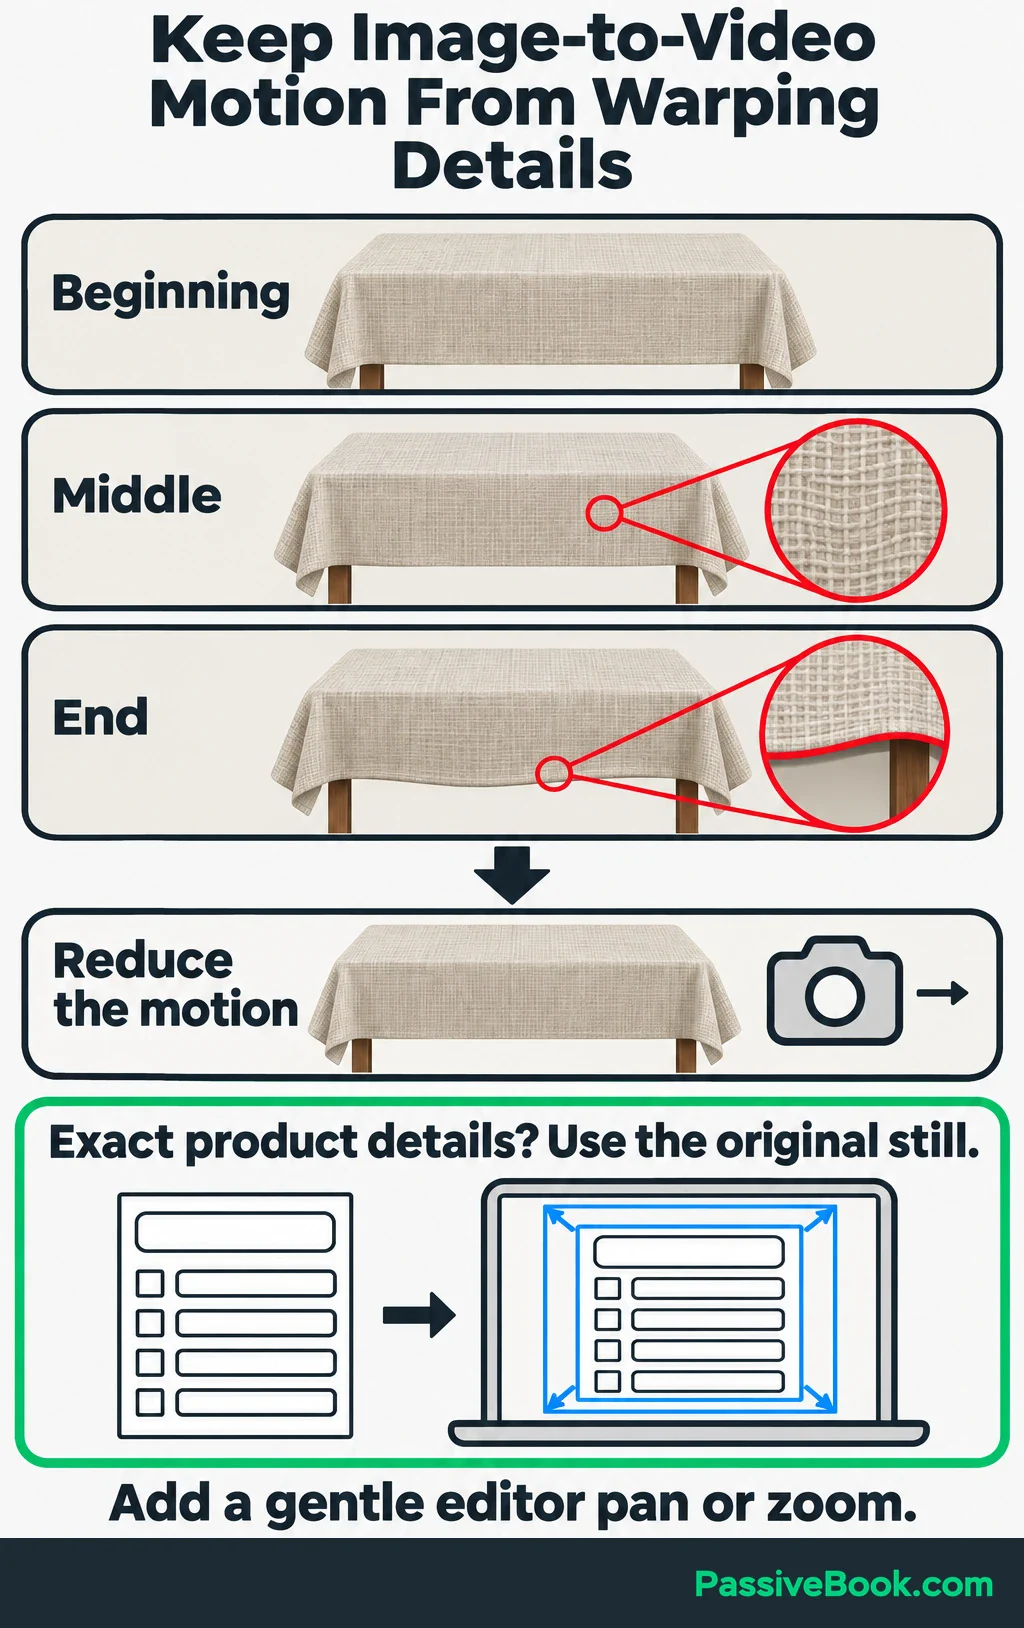
If the image starts to change shape, reduce the motion. If accuracy matters more than movement, keep the original still and add a gentle pan or zoom in the editor.
That is the approach I would choose for the planner pages. Buyers need to see the actual download, and a slow editor zoom can do that without asking a model to redraw it.
Edit the Clips Into a Finished Video
Assemble the Sequence
Create a video project in your chosen orientation and upload your accepted clips. Arrange them in the planned order, then trim weak frames and adjust the cuts around the message.
Canva is a useful browser editor for this stage. It supports video assembly, editable text, and captions. Its video editor allows exports without an added Canva watermark on a free account when you use free assets; paid elements have separate restrictions.
For a free first project, combine Firefly’s free generations with Canva Free, your own product images, and free design elements. Check the generated downloads and the finished export for watermarks.
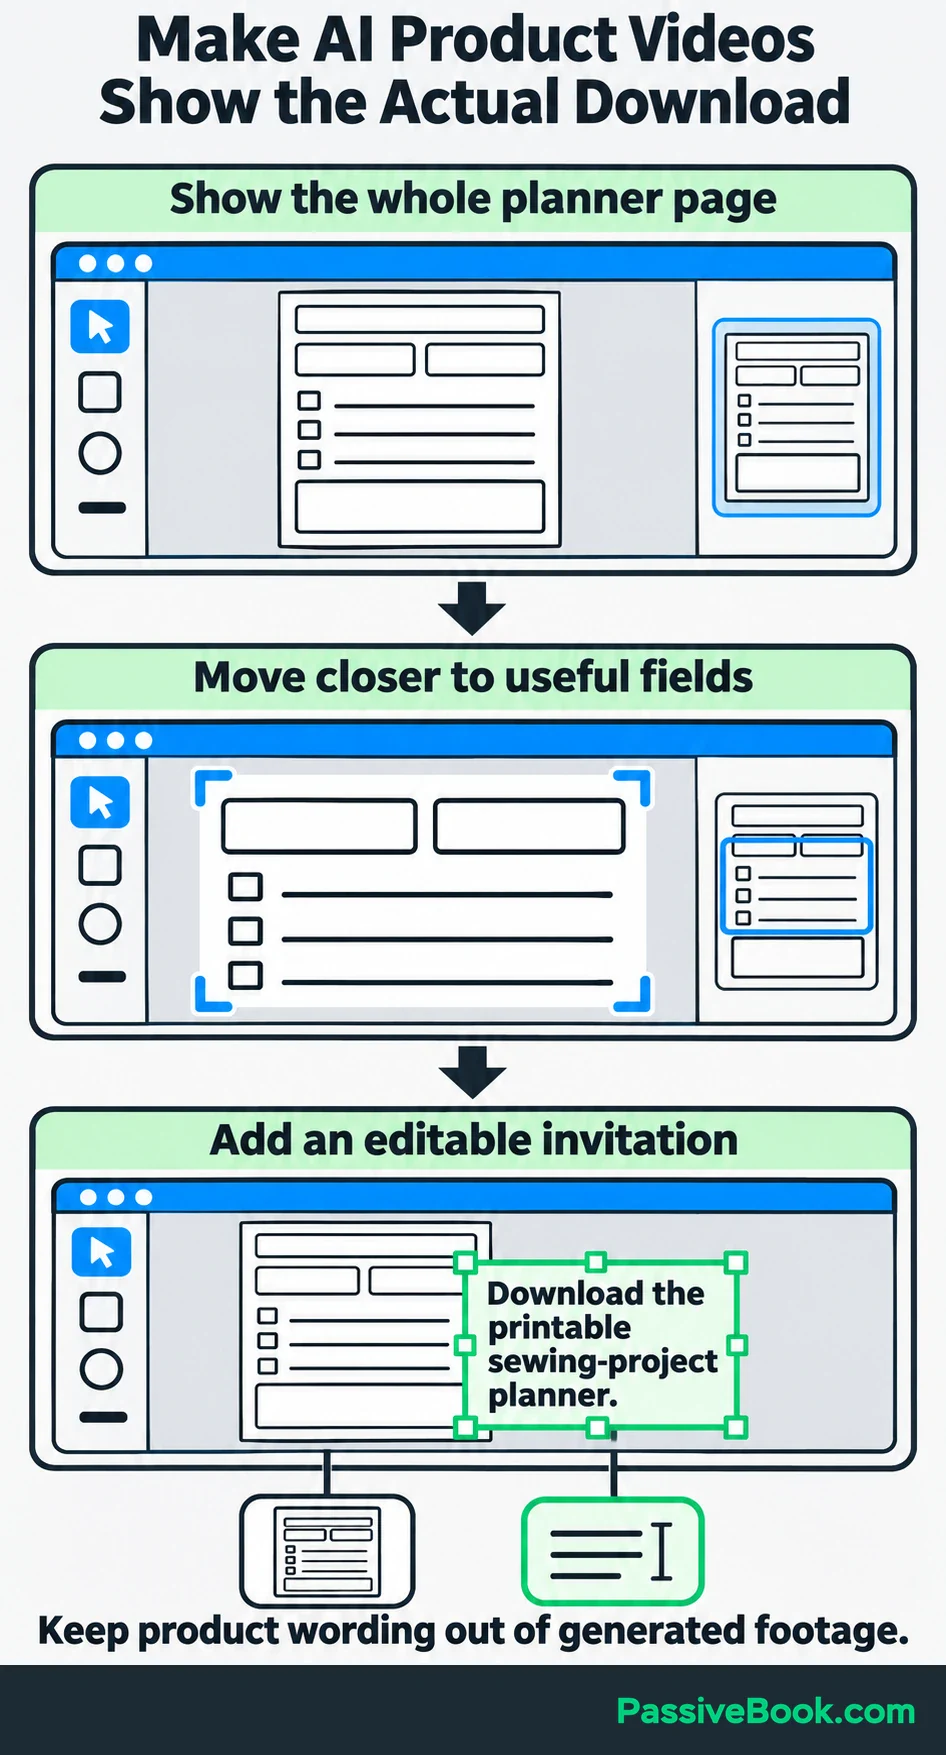
Build the example like this:
- Place the fabric clip first and trim it to about five seconds.
- Add the supplies clip and trim it to about five seconds.
- Show the actual planner pages for the remaining ten seconds.
- Add the script as timed text or narration.
- Put the download invitation over the final product preview.
Match the clips for color and brightness. If one looks warm and natural while the next looks like a glossy animation, replace or adjust the odd one.
On one of my digital-product listings, I had a polished cover and very little of the download on show. I added actual page previews because the cover couldn’t explain what buyers would work with. I apply the same judgment here: give the useful pages enough screen space to understand.
For your video, show a whole planner page briefly, then use a closer view of the relevant fields. Keep the final invitation readable:
Download the printable sewing-project planner.
Add that wording as editable text. It should stay sharp, and you should be able to change it without regenerating footage.
Add Narration, Captions, and Sound
You can record narration, use a synthetic voice licensed for your intended use, or make a text-led video.
I would start with text alone if recording or choosing a voice is delaying the project. The example’s short script works as three timed text blocks, and the product preview gives viewers something concrete to inspect.
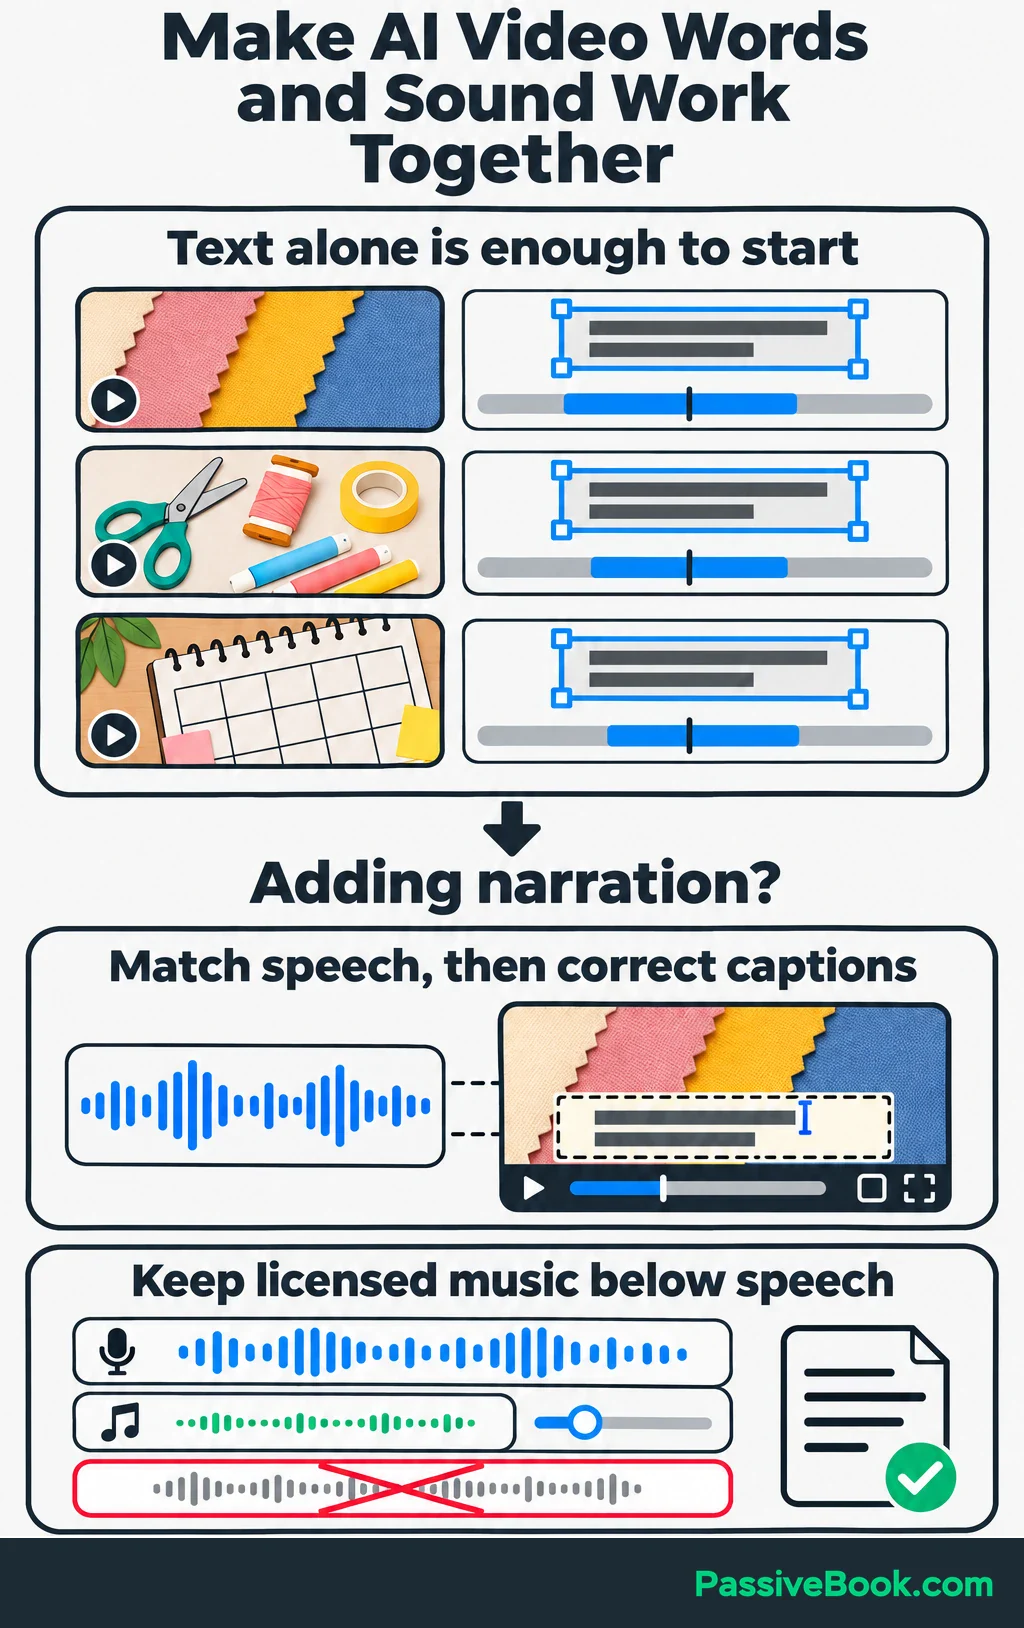
If you add narration, match each line to the corresponding shot. Listen for missing words, odd pronunciation, and pauses that separate words which belong together.
Generate captions from the finished narration, then correct their wording and timing. Automatic captions are a starting draft. Use readable text against a plain or shaded background, and keep important lines away from the screen edges where platform controls may cover them.
Lower music beneath speech and keep the volume steady between cuts. Remove unwanted generated audio rather than leaving it under a separate soundtrack.
Choose music licensed for your intended platform and commercial use. The YouTube Audio Library guidance explains which tracks require attribution. Check the individual license before reusing a track elsewhere.
For the first version, I would skip music if finding a suitable license becomes a separate project. Clear words and a useful product view can carry this video.
Review and Publish the Finished Video
Export an MP4 in the intended orientation and at a resolution suited to the source footage. Choosing a larger export size won’t repair a blurry clip.
Watch the exported file once with sound and once muted. The muted pass shows whether the visual sequence and text can explain the offer on their own.
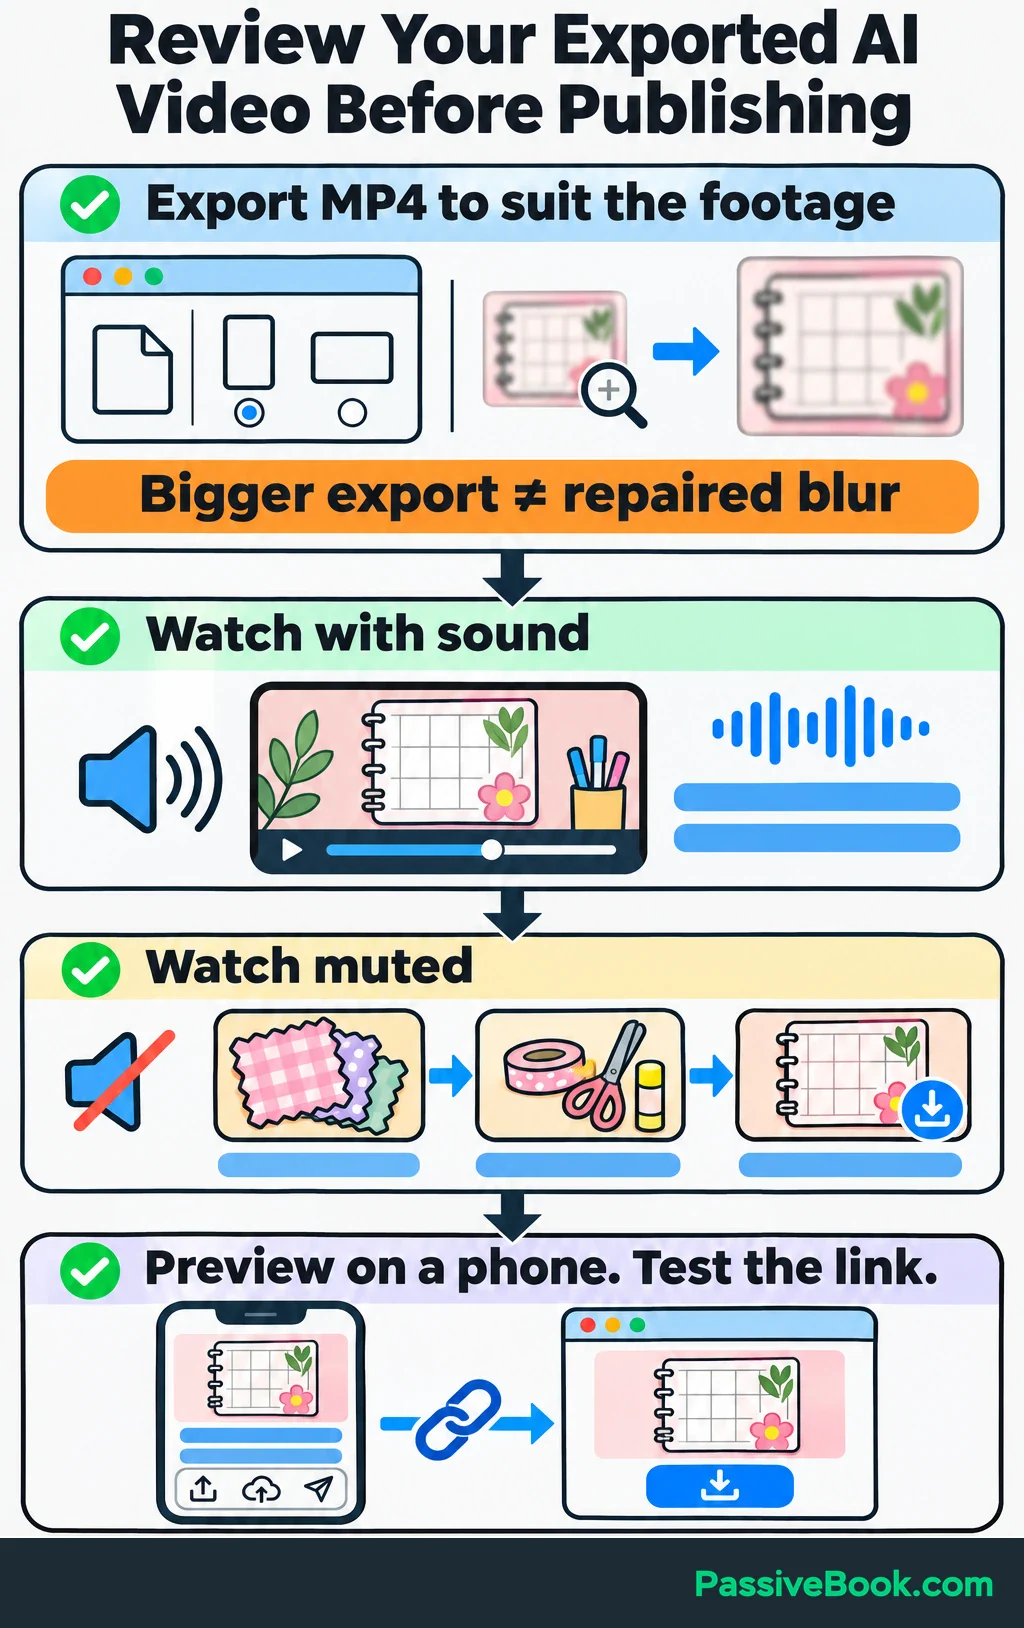
Use this final review:
- Check spelling, caption timing, narration, and the download invitation.
- Inspect objects for changing shapes, floating edges, and broken contact with surfaces.
- For animals, watch the full movement for extra limbs, changing markings, or unnatural handling.
- Compare the product preview with the actual download.
- Preview the upload on a phone for cropping and text readability.
- Test the destination link and confirm that it leads to the promised item.
For pet-care instruction, add one further decision: does the viewer need an accurate physical demonstration? If you are teaching handling, equipment fitting, or another action they may copy, I would use reviewed real footage for that step. A plausible-looking generated movement is too weak a basis for instruction.
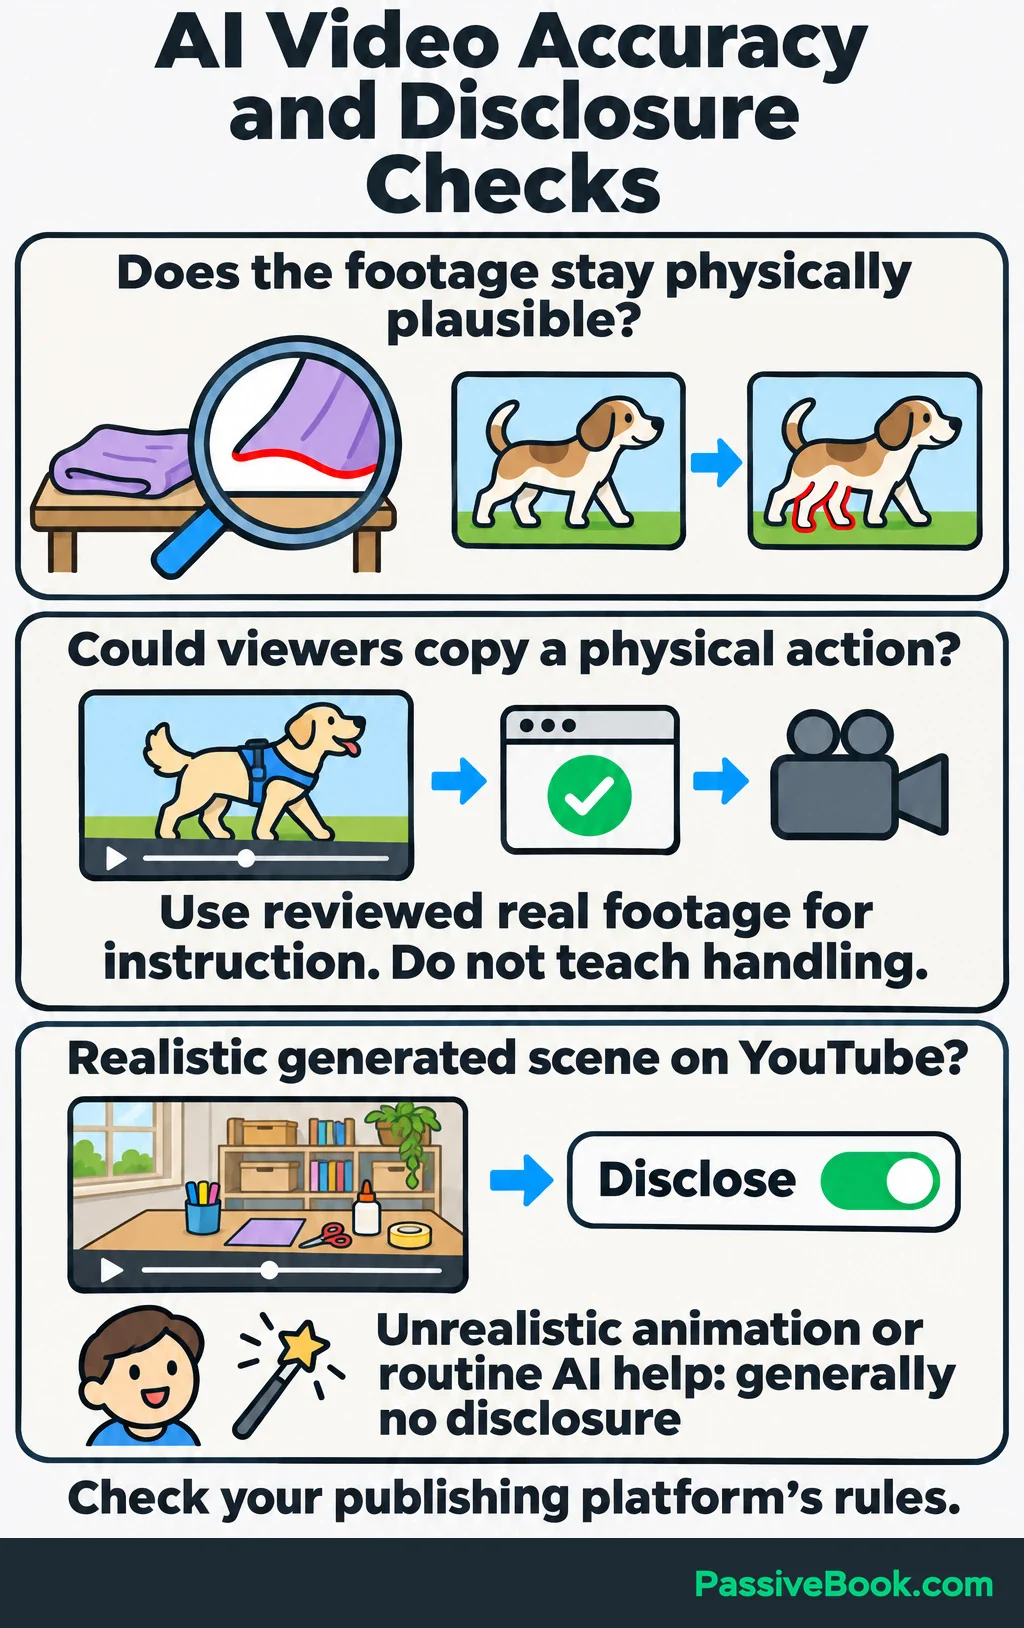
Follow the publishing platform’s disclosure rules. YouTube requires disclosure for realistic generated scenes that did not occur. Clearly unrealistic animation and routine AI production help generally don’t require disclosure. The realistic generated craft-room scenes in this example fall within the kind of footage that should be disclosed.
Finally, save the storyboard, prompts, reference images, accepted clips, license records, and editing project together. Duplicate that project for the next video and update the message and assets.
That gives you a repeatable production process, with a human review before each upload.
What Next?
Write a three-shot plan for one short video and test the shot you’re least sure the generator can handle. Download it before spending time on the rest.
Use the social buttons to share this guide if it would help make the next video project smaller, cheaper, and easier to finish.
Which part of your first video needs the most control: the subject’s appearance, the movement, or the product preview? Tell me in the comments, and bring any other questions there too.
Share this post with your friends & followers: